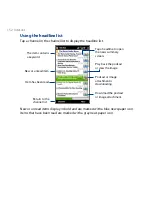


158 Bluetooth
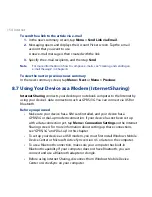
To turn off Bluetooth visibility after a certain period of time
You can automatically turn off Bluetooth visibility after a specified period of time.
1.
Tap Start > Settings, and then tap Menu > Bluetooth Devices > Timeout tab.
2.
In Turn off Visible mode, select the time before your device’s Bluetooth
visibility turns off, and then tap OK.
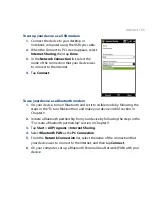
9.2 Bluetooth Partnerships
Create a Bluetooth partnership between your device and another Bluetooth-
enabled device in order to exchange information in a secured manner. Creating
a Bluetooth partnership between two devices is a one-time process. Once a
partnership is created, the devices can recognize the partnership and exchange
information without entering a passcode again.
To create a Bluetooth partnership
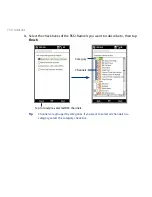
1.
Tap Start > Settings, and then tap Menu > Bluetooth Devices > Devices tab.
2.
Tap Add new device. Your device displays the names of other Bluetooth
devices within range.
3.
Tap the device name in the box, and then tap Next.
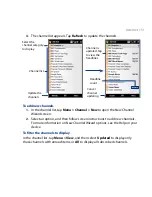
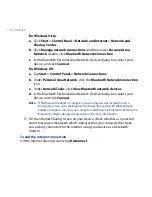
4.
Specify a passcode to establish a secure connection. The passcode can be 1
up to 16 characters.
5.
Tap Next.
6.
Wait for the paired device to accept the partnership. The receiving party
needs to enter the same passcode that you specified.
7.
After the receiving party enters the passcode, a message box appears on your
device confirming the partnership.
8.
Tap Done.
Summary of Contents for 99HEH104-00 - Touch Smartphone - GSM
Page 1: ...www htc com User Manual ...
Page 102: ...102 Synchronizing Information ...
Page 122: ...122 Exchanging Messages ...
Page 162: ...162 Bluetooth ...
Page 190: ...190 Experiencing Multimedia ...
Page 226: ......


