background image

104  Organizing Contacts, Appointments, Tasks, and Other Information

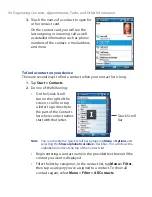
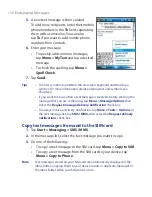
To record a voice note

You can create a stand-alone recording (voice note) or you can add a 

recording to a note.

1. 

Tap 

Start > Programs > Notes

.

2. 

If you do not see the Recording toolbar, tap 

Menu > View Recording 

Toolbar

.

3. 

Do one of the following:

• 

To create a stand-alone recording, record from the note list.

• 

To add a recording to a note, create or open a note.

4. 

Tap the 

Record

 icon ( 

 ) to begin recording your voice. Tap the 

Stop

 icon ( 

 ) when finished recording.

To change recording formats

1. 

Tap 

Start > Settings >


Personal

 tab 

> Input

.

2. 

Tap the 

Options

 tab, and select the desired format you want in the 

Voice recording format

 list.

3. 

Tap 

OK

.

Note


You can also change recording formats from within Notes. In the note list, tap 

Menu > Options > Global Input Options

 link (at the bottom of the page), 

then tap the 

Options

 tab.

Summary of Contents for POLA200

Page 1: ...www htc com Xda orbit 2 User Guide...

Page 2: ...Touch Touch Cruise TouchFLO and HTC Care are trademarks and or service marks of High Tech Computer Corp Microsoft MS DOS Windows Windows NT Windows Server Windows Mobile Windows XP Windows Vista Acti...

Page 3: ...ny product and service names mentioned herein are trademarks registered trademarks or service marks of their respective owners HTC shall not be liable for technical or editorial errors or omissions co...

Page 4: ...or course of performance Without limiting the foregoing it is further understood that HTC and its Providers are not responsible for Your use or misuse of the Weather Information Data and or Documenta...

Page 5: ...nstructions Observe all warnings in the operating instructions on the product To reduce the risk of bodily injury electric shock fire and damage to the equipment observe the following precautions ELEC...

Page 6: ...ontacts or circuits dispose of in fire or water or expose a battery pack to temperatures higher than 60 C 140 F WARNING Danger of explosion if battery is incorrectly replaced To reduce risk of fire or...

Page 7: ...ONS FOR DIRECT SUNLIGHT Keep this product away from excessive moisture and extreme temperatures Do not leave the product or its battery inside a vehicle or in places where the temperature may exceed 6...

Page 8: ...n death EXPLOSIVE ATMOSPHERES When in any area with a potentially explosive atmosphere or where flammable materials exist the product should be turned off and the user should obey all signs and instru...

Page 9: ...RF energy Your physician may be able to assist you in obtaining this information Turn the phone OFF in health care facilities when any regulations posted in these areas instruct you to do so Hospitals...

Page 10: ...erformance and ensure human exposure to RF energy is within the guidelines set forth in the relevant standards always use your device only in its normal use position Do not touch or hold the antenna a...

Page 11: ...been spilled or an object has fallen into the product The product has been exposed to rain or water The product has been dropped or damaged There are noticeable signs of overheating The product does n...

Page 12: ...n unstable table cart stand tripod or bracket Any mounting of the product should follow the manufacturer s instructions and should use a mounting accessory recommended by the manufacturer Avoid unstab...

Page 13: ...ttings 44 Chapter 2 Entering Text and Searching for Information 49 2 1 Entering Information 50 2 2 Using the On screen Keyboard 51 2 3 Using the Touch Keyboard 51 2 4 Using the Touch Keypad 54 2 5 Usi...

Page 14: ...bile Device Center on Windows Vista 85 5 3 Setting Up ActiveSync on Windows XP 87 5 4 Synchronizing With Your Computer 88 5 5 Synchronizing via Bluetooth 89 5 6 Synchronizing Music and Video 90 Chapte...

Page 15: ...and Managing Files 140 9 4 ZIP 141 9 5 Backing Up Data 142 Chapter 10 Getting Connected 145 10 1 Comm Manager 146 10 2 O2 Connection Settings 147 10 3 Ways of Connecting to the Internet 148 10 4 Wi F...

Page 16: ...udio Booster 205 12 8 Using FM Radio 207 Chapter 13 Managing Your Device 213 13 1 Adding and Removing Programs 214 13 2 Resetting Your Device 214 13 3 Managing Memory 216 13 4 Windows Update 217 13 5...

Page 17: ...Know Your PDA Phone and Accessories 1 2 Installing the USIM SIM Card and Battery 1 3 Installing a Storage Card 1 4 Starting Up 1 5 The Today Screen 1 6 The Start Menu 1 7 Quick Menu 1 8 TouchFLO 1 9...

Page 18: ...arting Up in this chapter Left panel Right panel VOICE COMMAND Press to activate or cancel voice recognition See Chapter 14 for details Press and hold to record a voice note Volume Control During a ca...

Page 19: ...ick List where you can select an action to perform In the Quick List touch Settings to set the behaviour when pressing and holding the END key Second Camera Use this video camera for video call conver...

Page 20: ...GPS antenna with model number GA S120 Self portrait Mirror Bottom Panel Sync Connector Earphone Jack Connect the supplied USB cable to synchronize information or plug in the AC adapter to recharge th...

Page 21: ...or put a call on hold press and hold the button to end the call 4 AC adapter Recharges the battery 5 USB sync cable Connects your device to a PC and synchronizes data 6 Extra stylus Use to tap items o...

Page 22: ...vice the features and or settings you select and use items attached to connecting ports and your voice data and other program usage patterns Battery life estimates approximations Standby time Up to 40...

Page 23: ...position 3 Slide the back cover off to remove it To install the USIM SIM card 1 Make sure your device is turned off 2 Push the SIM card holder to the right to unlock it and then flip the card holder...

Page 24: ...ery compartment Insert the contact s side of the battery rst then gently push the battery into place Make sure that you leave the black strip extended to make it easy for you to remove the battery Bat...

Page 25: ...our device To have additional storage for your images videos music and files you can purchase a microSDTM card and insert it into the slot To insert a microSD card 1 Prise open the storage card slot c...

Page 26: ...ter After the Quick Start Wizard finishes the device installs customisation settings and then the device will restart Note After the device restarts you may be prompted to set up an e mail account Ref...

Page 27: ...orm best after several full charge discharge cycles You can charge the battery in two ways Charging the device s battery by connecting the power adapter Connecting your device to a PC using the provid...

Page 28: ...orientation tap Start Settings System tab Screen and select the orientation you want To smooth the edges of screen fonts for many programs on the ClearType tab select the Enable ClearType check box To...

Page 29: ...ry power Tap Start Settings System tab Power When the low battery warning appears immediately save your data by synchronising with your PC or save your data on a storage card and then turn off your de...

Page 30: ...tion status Displays the current Profile being used Tap to change or edit the current Profile Tap to lock the device The icon changes to Tap Unlock on the Today screen to unlock again Tap to view the...

Page 31: ...gram Open a program The items displayed in the Start menu can be customized by tapping Start Settings Personal tab Menus Switch to the Today screen 1 7 Quick Menu The O2 Custom Quick Menu located at t...

Page 32: ...nd more You can also add your favourite contacts play music and access your pictures and videos Note Touch Cube is displayed in portrait view only To be able to open Touch Cube make sure your display...

Page 33: ...ne favourite contacts If you make calls to certain people frequently you can add them as favourite contacts for quicker access Note You must already have contacts with phone numbers stored on your dev...

Page 34: ...Phone program See Chapter 3 for details Delete favorite contacts Open Contacts See Chapter 6 for details When you add a favourite contact and there is no photo associated to that contact the contact s...

Page 35: ...your device Touch this icon to open Audio Manager and play back music files For more information about using Audio Manager see Chapter 12 Touch these buttons to control music playback From left to ri...

Page 36: ...ur finger downward to scroll up the screen Slide your finger upward to scroll down the screen When finger scrolling up and down slide anywhere within this area To scroll towards the left slide your fi...

Page 37: ...he left touch and hold on the touch screen then drag your finger to the right You can also pan diagonally Note Scrollbars shown on the screen indicate that there are more content that cannot be fit on...

Page 38: ...e previous message slide your finger from left to right on the screen To go to the next or previous messaging account While on a messaging account screen you can slide your finger across the screen to...

Page 39: ...a wireless network Synchronising via Wi Fi Connection is active Connection is not active Synchronisation in progress Icons that appear in this area There are more notifications Tap the icon to view a...

Page 40: ...ing GPRS in use EDGE connecting EDGE in use HSDPA connecting HSDPA in use UMTS connecting UMTS in use Maximum signal strength No signal Phone is turned off No phone service Searching for phone service...

Page 41: ...Word documents Calendar Keep track of your appointments and create meeting requests Contacts Keep track of your friends and colleagues Internet Explorer Mobile Browse Web and WAP sites as well as dow...

Page 42: ...amera Comm Manager Manage your device s connections including Wi Fi GPRS Bluetooth and ActiveSync turn the phone on or off switch to ringer vibration mode and enable or disable the Direct Push functio...

Page 43: ...o create backups of your data STK SIM Tool Kit Service Access information and other services offered by your wireless service provider Streaming Media Stream live or on demand video Tasks Keep track o...

Page 44: ...e large Start menu Lock Set a password for your device Menus Set what programs will appear in the Start menu Owner Information Enter your personal information on your device Phone Customise phone sett...

Page 45: ...e Information See information about the firmware version hardware identity and the duration of calls made on your device Encryption Allow files on your storage card to be encrypted Encrypted files wil...

Page 46: ...nd change the screen text size TouchFLO You can enable or mute the finger scrolling and panning sound See Enable or disable sound in this chapter for details Windows Update Link to Microsoft s Web sit...

Page 47: ...for your device to attain the high connection speed of HSDPA your wireless service provider must support this feature and you must be within the coverage area of your service provider s HSDPA network...

Page 48: ...48 Getting Started...

Page 49: ...ion 2 1 Entering Information 2 2 Using the On screen Keyboard 2 3 Using the Touch Keyboard 2 4 Using the Touch Keypad 2 5 Using the Symbol Pad 2 6 Using Letter Recognizer 2 7 Using Block Recognizer 2...

Page 50: ...ct a text input method and customize input options After selecting a text input method the corresponding Input Panel is displayed which you can use to enter text To switch the Input Panel display on a...

Page 51: ...eyboard 3 Tap Large keys 2 3 Using the Touch Keyboard The Touch Keyboard is another type of on screen keyboard which features 20 keys With its large touch friendly keys and enhanced features such as X...

Page 52: ...d To enter text using XT9 mode 1 Start entering the first few letters of a word As you enter each letter predicted words will appear above the keyboard 2 Tap the desired word to immediately insert it...

Page 53: ...ically inserts an apostrophe when you type common contracted words e g dont automatically becomes don t Word Completion Lets you select from a list of possible words based on the keys that you tapped...

Page 54: ...p to open the Symbol pad Tap to create a new line Tap to delete the previous character Displays the word candidate list in XT9 mode Tap to insert a word to your text Tap the symbol to add a word To en...

Page 55: ...Indicates the current page and the total number of symbol pages Tap to go to the next page of symbols To open the Symbol Pad and select a symbol While using the Touch Keyboard or Touch Keypad tap the...

Page 56: ...esired character in the 123 right area of the box Tip For help with writing characters tap the question mark near the writing area 2 7 Using Block Recognizer With Block Recognizer you use a single str...

Page 57: ...d that provides an easy way to add punctuation or a special symbol to existing text To use this on screen keyboard tap on the Transcriber toolbar The keyboard remains visible until you tap the button...

Page 58: ...item 1 Tap Start Programs Search 2 In the Search for field you can Enter the le name word or other information you want to search for Tap the down arrow icon and from the list select an item that you...

Page 59: ...atures 3 1 Using the Phone 3 2 Making a Call 3 3 Receiving a Call 3 4 Making a Video Call 3 5 Receiving a Video Call 3 6 Smart Dialing 3 7 Additional Dialing Information 3 8 Setting Up Bluetooth SIM A...

Page 60: ...re preset with a PIN personal identification number that is provided by your wireless service provider 1 Enter the preset PIN assigned by your wireless service provider 2 Tap Enter Note If your PIN is...

Page 61: ...e 1 Tap the Speaker icon in the title bar 2 Under Volume do the following Adjust the phone volume or device volume by moving the slider to the desired volume level Tap On Vibrate or Off to change both...

Page 62: ...a call from Contacts Tap Contacts on the Today screen or tap Start Contacts then do one of the following Select a contact and press TALK Tap the desired contact in the contacts list and tap the phone...

Page 63: ...the contact whom you want to call Tip Touch and hold the contact to open the contact s summary Note When you have different numbers assigned to the same contact an icon is displayed to show the numbe...

Page 64: ...Menu New 3 Tap a contact Select the phone number that you want assigned to a speed dial key 4 In the Location box select an available key to use as the speed dial key 5 Tap OK Note If you want to plac...

Page 65: ...receive a phone call a message will appear giving you the option to either answer or ignore the incoming call To answer or reject an incoming call To answer the call tap Answer or press TALK on the d...

Page 66: ...Conference Note Not all service providers support conference calling Contact your service provider for details To turn on and off the Speakerphone The built in Speakerphone on your device allows you t...

Page 67: ...ry tap and hold the desired phone number or contact and tap Video Call Note The other party s image will appear on the screen about 3 to 5 seconds after a connection is established depending on the si...

Page 68: ...ll options for details 4 Audio Mute Unmute Tap to mute unmute audio 5 Main Second camera Tap to switch between the Main back and Second front camera 6 Swap Image Tap continuously to cycle through the...

Page 69: ...EL anti clockwise to increase brightness Press NAVIGATION left or rotate the NAVIGATION WHEEL clockwise to decrease brightness Brightness bar Tips You can also press NAVIGATION up or down to adjust th...

Page 70: ...from the Video screen preference list or tap the Swap Image button on the Video Call screen Camera options Flip the 2nd camera video Select this check box if you are going to show a text document to...

Page 71: ...rd in Contacts and the phone numbers in Call History including incoming outgoing and missed calls You can then select the desired number or contact from the filtered list to dial Smart Dialing panel T...

Page 72: ...reen 2 Begin entering the first few numbers or characters When you start entering a number or letter the Smart Dialing panel will display matches found 3 In the Smart Dialing panel browse the list by...

Page 73: ...and phone number 3 8 Setting Up Bluetooth SIM Access for Car Kit Phones Bluetooth car kits that support the SIM Access Profile SAP can connect to your device and access its SIM card via Bluetooth Once...

Page 74: ...pop up message should appear on your device saying that a connection has been established between your device and car kit phone Tap OK 7 On the Bluetooth screen tap the SIM Access tab then tap Connec...

Page 75: ...Chapter 4 Setting Up Your Device 4 1 Basic Settings 4 2 Personalizing the Today Screen 4 3 Protecting Your Device...

Page 76: ...ms Time tab 2 Tap Visiting 3 Select the correct time zone and change the time or date Regional settings The style in which numbers currency dates and times are displayed is specified in regional setti...

Page 77: ...zing with a PC Connecting to a network Restoring information from a backup Note If you synchronize multiple devices with the same PC each device must have a unique name To change the device name 1 Tap...

Page 78: ...ired day Tap again to deselect the day 4 Tap the time to open a clock and set the time for the alarm Tip You can drag the hour and minute hand of the clock to set the time 5 Tap the alarm icon to spec...

Page 79: ...mizing settings of phone services see Help on your device 4 2 Personalizing the Today Screen The Today screen shows your upcoming appointments active tasks and information about incoming messages You...

Page 80: ...ification information check box To set options for displaying appointments on the Today screen If you have a large number of appointments you may want to specify the kind of appointments that are disp...

Page 81: ...s and shortcuts to appear in the Start menu Programs folder Navigate to the Windows Start Menu Programs folder of your device then create folders and shortcuts that you want 4 3 Protecting Your Device...

Page 82: ...ered a hint the hint will be displayed after the wrong password is entered five times Each time a wrong password is entered the device response time gets longer until the device appears to be not resp...

Page 83: ...our Computer 5 1 About Synchronization 5 2 Setting Up Windows Mobile Device Center on Windows Vista 5 3 Setting Up ActiveSync on Windows XP 5 4 Synchronizing With Your Computer 5 5 Synchronizing via B...

Page 84: ...oftware to your computer connect and synchronize your device with your computer by using one of the following methods Connect and synchronize using the supplied USB sync cable Upon connecting the sync...

Page 85: ...you are asked to create a Windows Mobile partnership with your device Follow the steps below to create a partnership 1 Connect your device to your PC Windows Mobile Device Center configures itself an...

Page 86: ...and Video ___ new pictures video clips are available for import a wizard guides you to tag and transfer photos from your device to the Photo Gallery on your Windows Vista PC Click Pictures Music and...

Page 87: ...n is complete click Done 6 On the Getting Started with Windows Mobile screen click Close Set up synchronization in ActiveSync Follow the steps below to set up a synchronization partnership 1 Connect y...

Page 88: ...left of the Windows Mobile Device Center To end synchronization before it completes click From ActiveSync on your PC When you connect your device to your PC ActiveSync automatically opens on your PC...

Page 89: ...zed with only one PC Troubleshoot sync connection problem When a PC is connected to the Internet or a local network in some cases the PC may disconnect the connection with your device in favour of the...

Page 90: ...ve battery power turn off Bluetooth when not in use 5 6 Synchronizing Music and Video If you want to carry your music or other digital media along with you while you travel set up Microsoft Windows Me...

Page 91: ...Chapter 6 Organizing Contacts Appointments Tasks and Other Information 6 1 Contacts 6 2 SIM Manager 6 3 Calendar 6 4 Tasks 6 5 Notes 6 6 Voice Recorder...

Page 92: ...indows Live contacts Contacts that you communicate with using Windows Live Messenger or MSN Just like Outlook contacts you can also enter complete information for a Windows Live contact For more infor...

Page 93: ...p the phone number then tap Menu Save to Contacts To edit contact information tap the contact name then tap Menu Edit To add a contact to your SIM card 1 Tap Start Contacts 2 Tap New then select SIM C...

Page 94: ...n the Quick Scroll bar on the right of the screen scroll to or tap a letter to go directly to the part of the Contacts list where contact names start with that letter Quick Scroll bar Note You can dis...

Page 95: ...2 Tap Menu Send Contact Beam then select a device where to beam the contact to Note Before beaming make sure Bluetooth is turned on and set to visible mode on your device and the target mobile device...

Page 96: ...and phone number 3 Tap Save to save the information on your SIM card Tip To change contact information on your SIM card tap a SIM contact and edit it After modifying tap Save To copy SIM contacts to y...

Page 97: ...to the SIM card 3 Under the Mark column you can change the indicator that will be appended to the SIM contact names for each phone number type To do so select a phone type tap Edit enter your desired...

Page 98: ...ntment so that it can be grouped with other related appointments Tap Categories then select a preset category Business Holiday Personal or Seasonal or tap New to create your own category 6 When finish...

Page 99: ...ment details Agenda view Tap to switch views Indicates that there is a conflict with another appointment To see detailed appointment information in any view tap the appointment To view appointments by...

Page 100: ...he e mail account to use for sending meeting requests tap Menu Tools Options Appointments tab Tap the Send meeting requests via box and choose to send via your Outlook E mail POP3 IMAP4 or Windows Liv...

Page 101: ...ated tasks Tap Categories then select a preset category Business Holiday Personal or Seasonal or tap New to create your own category 4 When finished tap OK Tip You can easily create a short to do type...

Page 102: ...due dates check box 4 Tap OK To locate a task When your list of tasks is long you can display a subset of the tasks or sort the list to quickly find a specific task 1 Tap Start Programs Tasks 2 In th...

Page 103: ...nput Method icon 4 When finished tap OK to return to the note list Notes To select handwritten text tap and hold next to the writing As soon as dots appear and before they form a complete circle quick...

Page 104: ...recording record from the note list To add a recording to a note create or open a note 4 Tap the Record icon to begin recording your voice Tap the Stop icon when finished recording To change recording...

Page 105: ...ice recordings by tapping beside the folder name on the top left of the screen and then in the menu choose the folder where to save future recordings To play back a voice recording On the Voice Record...

Page 106: ...device accept the file transfer to receive the file To set the voice recording as a ring tone Select the desired voice recording the tap Menu Set as Ringtone To rename or move a recording 1 Select a...

Page 107: ...Chapter 7 Exchanging Messages 7 1 Messaging 7 2 Text Messages 7 3 MMS 7 4 Types of E mail Accounts 7 5 E mail Setup Wizard 7 6 Using E mail...

Page 108: ...ect a messaging account Do one of the following Tap Start Messaging The Account Picker screen then appears where you can select an account While you are in a message list of a certain account for exam...

Page 109: ...nformation that will be displayed as your signature 6 If you want the signature to be added whenever you reply or forward messages select the Use when replying and forwarding check box 7 Repeat steps...

Page 110: ...sending the message that you are composing tap Menu Message Options then select the Request message delivery notification check box To always receive a delivery notification tap Menu Tools Options in...

Page 111: ...h your wireless service provider s MMS settings If the MMS settings are not yet configured on your device you can add the settings while composing an MMS message To configure MMS message settings 1 Ta...

Page 112: ...service providers to the Settings screen you can choose one as your default provider Select the provider s name in the list then tap Set As Default Create and send MMS messages You can compose MMS mes...

Page 113: ...dd more slides tap or tap Menu Slides Insert Slide Repeat steps 5 and 6 to insert photos videos text and audio onto your slides 8 Tap Send to send the MMS message Tip You can also send an MMS message...

Page 114: ...pens Tap Record to start recording and Stop to end the recording Tap Play to listen to the recorded audio clip then tap Add The new audio clip is then inserted into your MMS message View and reply to...

Page 115: ...Menu Save to Blacklist 5 Tap Done Tip To view the Blacklist on the message list tap Menu MMS Options Blacklist tab To unblock a phone number and allow the sender to send you MMS messages remove the nu...

Page 116: ...To set up your company e mail account so that you can access Outlook e mail messages wirelessly you must set up your device to synchronize via a wireless LAN or over the air connection with your comp...

Page 117: ...select download options set the e mail format as HTML or plain text and more For more information see To customize download and format settings 7 Tap Finish To specify e mail server settings If Auto...

Page 118: ...delivered when you tap Send If you prefer to save outgoing messages to the Outbox folder first clear the check box In this case you will need to manually send messages by tapping Menu Send Receive Us...

Page 119: ...To add more recipients enter their e mail addresses separating them with a semicolon You can also tap To if you want to add e mail addresses stored in Contacts 7 Enter a subject and compose your mess...

Page 120: ...list to only the e mails that contain sender names and e mail subjects that start with SA View and reply to messages To read an incoming message By default only the first few kilobytes of a message a...

Page 121: ...nd Tip You can customize ActiveSync to exclude addresses including your own from being added to the recipient list Tap Menu Options in ActiveSync select the E mail item tap Settings then tap Advanced...

Page 122: ...For more information see Chapter 8 2 Synchronization automatically begins and your device sends and receives Outlook e mail Tip You can also manually synchronize anytime by tapping Sync in ActiveSync...

Page 123: ...Options on the Account Picker screen or tap Menu Tools Options while you re in a message list 2 Tap your e mail account 3 Keep tapping Next until you see Message format and Message download limit on t...

Page 124: ...size from the Download attachments smaller than list box 6 Tap Finish To store attachments on a storage card 1 Tap Start Messaging 2 Tap Menu Options Storage tab 3 Select the When available use this...

Page 125: ...8 Working With Company E mails and Meeting Appointments 8 1 Synchronizing with the Exchange Server 8 2 Working With Company E mails 8 3 Managing Meeting Requests 8 4 Finding Contacts in the Company Di...

Page 126: ...ction 1 Tap Start Messaging New E mail Account 2 Enter your e mail address Clear the Try to get e mail settings automatically from the Internet check box then tap Next 3 Select Exchange server in the...

Page 127: ...e mails and other information to your device 8 2 Working With Company E mails Your device gives you instant access to your company e mails and lets you manage your messages easier Direct Push Fetch M...

Page 128: ...ush via Comm Manager 1 Tap Start Programs Comm Manager 2 On the Comm Manager screen tap the DirectPush button to enable or disable DirectPush When enabled the ON indicator is activated which indicates...

Page 129: ...irement Fetch Mail works for your device only if your company is using Microsoft Exchange Server 2007 or higher 1 Tap Start Messaging Outlook E mail 2 Tap an e mail message to open it 3 By default onl...

Page 130: ...s will be downloaded and displayed in a Search Results folder Requirement Your company must be using Microsoft Exchange Server 2007 or higher 1 Tap Start Messaging Outlook E mail 2 Tap Menu Tools Sear...

Page 131: ...gher Flags are disabled or hidden if e mails are synchronized with earlier versions of Microsoft Exchange Server To flag or unflag a message 1 Tap Start Messaging Outlook E mail 2 Select a message or...

Page 132: ...s from your device you can invite attendees to your meeting and check their status to know about their availability When you receive a meeting request you can reply by accepting or declining the reque...

Page 133: ...s 1 Tap Start Calendar 2 Tap a meeting request that you previously sent then tap Attendees The list of required and optional attendees will be listed Notes For information about creating a meeting req...

Page 134: ...y Requirement Access to the Company Directory is available only if your organization is running Microsoft Exchange Server 2003 SP2 or higher and you have completed your first synchronization with the...

Page 135: ...a contact to select it Notes You can save a contact from the Company Directory to your device by selecting the contact then tapping Menu Save to Contacts You can search on the following information as...

Page 136: ...136 Working With Company E mails and Meeting Appointments...

Page 137: ...Chapter 9 Working With Documents and Files 9 1 Microsoft Office Mobile 9 2 Adobe Reader LE 9 3 Copying and Managing Files 9 4 ZIP 9 5 Backing Up Data...

Page 138: ...ce Mobile 2 Tap the Office Mobile application that you want to use Notes Word Mobile does not fully support some features of Microsoft Office Word such as revision marks and password protection Some d...

Page 139: ...desired direction of the page Press NAVIGATION up down right left to move to the desired direction of the page Tap to move to the previous page tap to move to the next page Tap to jump to the first pa...

Page 140: ...b Right click a folder in your PC then click Paste 4 To copy a file from your PC to your device a Browse the folders on your PC right click the file you want to copy then click Copy b Right click a f...

Page 141: ...device by allowing you to compress files in the conventional ZIP format It also allows you to extract files from a zip file To start ZIP on your device Tap Start Programs ZIP Each time you start ZIP...

Page 142: ...lect Mode Select files by tapping each file Tap a selected file to deselect it To select all files tap and hold on the screen then tap Select All 7 Tap Add 8 Tap Menu File Close Archive 9 5 Backing Up...

Page 143: ...ith the tap of a button Note To change backup options or location you will need to do it in Advanced mode 1 On the Basic mode screen tap Backup Now 2 Specify a password between 6 to 15 characters in l...

Page 144: ...password protected the password must be entered before the backup file can be displayed in the tree view 3 In the tree view select the items you want to be restored 4 Tap Restore and follow the on scr...

Page 145: ...2 O2 Connection Settings 10 3 Ways of Connecting to the Internet 10 4 Wi Fi 10 5 GPRS 3G 10 6 Dial up 10 7 Starting a Data Connection 10 8 Internet Explorer Mobile 10 9 Windows Live 10 10 Using Your D...

Page 146: ...see Airplane Mode in Chapter 3 2 Tap to switch the phone on or off Tap Settings Phone to set the ring tone and other phone settings See Chapter 4 for details 3 Tap to switch Bluetooth or off Tap Setti...

Page 147: ...may need to restart your device for the O2 Connection Settings to complete the configuration Tap Yes to restart To manually select the network operator You can also manually select your network operat...

Page 148: ...connection Proxy A Proxy connection is used to access the Internet using an existing connection to your corporate or WAP network 10 4 Wi Fi Wi Fi provides wireless Internet access over distances of u...

Page 149: ...p Work if the wireless network connects your device to a private network 3 If the wireless network is secured by a network key enter the key then tap Connect Next time you use your device to detect wi...

Page 150: ...ccessfully connects to a wireless network the arrows stop moving Wi Fi Status screen Tap Start Settings Connections tab Wireless LAN Main tab to see the name of the wireless network that your device i...

Page 151: ...Internet and to send and receive picture messages on your device You will need a data plan to use your wireless service provider s GPRS 3G network Check with your wireless service provider to find out...

Page 152: ...To set up a dial up connection to your Internet Service Provider ISP on your device you need the same settings that you normally use when you dial up from your computer This includes the ISP server ph...

Page 153: ...ce you can manually start a connection 1 Tap Start Settings Connections tab Connections 2 Tap Manage existing connections 3 Tap and hold the name of the desired connection then tap Connect To disconne...

Page 154: ...g Internet Explorer Mobile please go to http www microsoft com windowsmobile help pocketpc browseinternet mspx To view a Web page using finger scrolling and panning Slide your finger upward to scroll...

Page 155: ...and Hotmail contacts Set up Windows Live The first time you use Windows Live sign in by using your Windows Live ID which is your Windows Live Mail or Hotmail address and password To set up Windows Li...

Page 156: ...f Windows Live you will see a search bar navigation bar and an area where you can customize to show your picture 1 Live Search Bar 2 Tap the Left or Right arrow to switch between Windows Live Messenge...

Page 157: ...enger your device must be connected to the Internet For information about setting up an Internet connection see Ways of Connecting to the Internet in this chapter Launch Messenger and sign in To open...

Page 158: ...age screen then start talking After you have recorded a message tap Send Add Windows Live contacts You can add new Windows Live contacts in Live Messenger or in Contacts To add a Windows Live contact...

Page 159: ...l Windows Mobile Device Center or Microsoft ActiveSync version 4 5 or later on the computer If want to use a Bluetooth connection make sure your computer has built in Bluetooth capability If your comp...

Page 160: ...twork Connection list select the name of the connection that your device uses to connect to the Internet 6 Tap Connect 7 On your computer set up a Bluetooth Personal Area Network PAN with your device...

Page 161: ...ommunications technology Devices with Bluetooth capabilities can exchange information over a distance of about eight meters without requiring a physical connection Bluetooth modes Bluetooth on your de...

Page 162: ...Your device displays the names of other Bluetooth devices within range 3 Tap the desired device name in the box then tap Next 4 Specify a passcode to establish a secure connection The passcode can be...

Page 163: ...he partnership s name on the Devices tab then tap Delete Connect a Bluetooth hands free or stereo headset For hands free phone conversations you can use a Bluetooth hands free headset such as a car ki...

Page 164: ...well as files from your device to your computer or to another Bluetooth enabled device Note If your computer does not have built in Bluetooth capability you need to connect and use a Bluetooth adapte...

Page 165: ...ottom right of your computer screen and select Receive a File 3 Now you are ready to beam On your device select an item to beam The item can be an appointment in your calendar a task a contact card or...

Page 166: ...rer 3 Select the Enable File Sharing check box You can use the default Bluetooth shared folder or tap Browse to use another folder as your shared folder 4 Tap OK To use Bluetooth Explorer 1 Bluetooth...

Page 167: ...To print contact information 1 Tap Start Contacts and then select the contact whose information you want to print 2 Tap Menu Print via Bluetooth 3 Tap Menu Search Device Your device starts to search f...

Page 168: ...of the following In Pictures Videos select the JPEG file and then tap Menu Print via Bluetooth In File Explorer tap and hold the JPEG file and then on the menu tap Print via Bluetooth 2 Follow steps 3...

Page 169: ...Chapter 11 Using GPS 11 1 Guidelines and Preparation for Using GPS 11 2 Downloading Satellite Data via QuickGPS 11 3 GPS Controls...

Page 170: ...ains metal it will be difficult for the GPS signal to pass through For better signal reception connect your device to an external GPS antenna External GPS antenna connector Wireless communication prod...

Page 171: ...t the device securely in place Avoid placing the device in the areas shown in the following diagram 1 Do not place where it will block the driver s vision 2 Do not place where air bags could deploy 3...

Page 172: ...from a Web server instead of from the satellites using the Internet connection on your device which can be via ActiveSync or 3G GPRS This significantly speeds up the time for determining your GPS posi...

Page 173: ...inded again Tap OK to open the QuickGPS program and download the latest data Autodownload when data expires Allows ephemeris data to be automatically updated onto your device when the data has expired...

Page 174: ...owser screen press NAVIGATION up to zoom in press NAVIGATION down to zoom out on a map Use the NAVIGATION CONTROL to scroll through items in a menu Press the ENTER button to select a menu item and ope...

Page 175: ...apter 12 Experiencing Multimedia 12 1 Camera 12 2 Camera Album 12 3 Pictures Videos 12 4 Windows Media Player Mobile 12 5 Streaming Media 12 6 Audio Manager 12 7 Using Audio Booster 12 8 Using FM Radi...

Page 176: ...ically switches to landscape mode when you open Camera To exit the Camera Tap the Exit icon on the Camera screen CAMERA button Capture modes The camera on your device allows you to capture pictures an...

Page 177: ...in one direction and stitches the images to create a panoramic view of a scene Sports Captures consecutive photo shots 3 5 7 or 10 Burst Captures a sequence of still images maximum 30 as long as the...

Page 178: ...he CAMERA button or the ENTER button when taking consecutive shots in Burst mode Release the button to stop taking shots On screen controls and indicators The on screen controls and indicators disappe...

Page 179: ...EL to zoom in an out 4 Album Tap to open Camera Album See Camera Album for details 5 Quick Settings Panel Tap to open the Quick Settings Panel See Quick Settings Panel for details 6 Menu Tap to open t...

Page 180: ...he device memory or on the storage card 3 Camera The camera icon indicates the current camera being used Tap to cycle through the different cameras Main Camera 3 megapixel CMOS camera that is at the b...

Page 181: ...ferent lighting conditions White balance settings include Auto Daylight Night Incandescent and Fluorescent Zooming Before capturing a still image or a video clip you can zoom in to make the object in...

Page 182: ...ll 128 x 96 1x and 2x MMS Video Medium 176 x 144 1x and 2x Small 128 x 96 1x and 2x Contacts Picture Large 480 x 640 1 0x to 2 0x Medium 240 x 320 1 0x to 4 0x Picture Theme Determined by the current...

Page 183: ...eturn to the live Camera screen Delete Remove the captured image or video Send Send via e mail or MMS View View the image in the Camera Album program or play the captured video in Windows Media Player...

Page 184: ...lable options in this tab depend on the capture mode selected Effect Choose a special effect such as Grayscale Sepia etc to apply to your photos or video clips Time Stamp Photo Sports and Burst modes...

Page 185: ...this tab depend on the capture mode selected Capture Format Select the desired file format Shutter Sound Choose whether or not you want the camera to make a shutter sound when you press the ENTER or...

Page 186: ...r select Off to capture video without audio Prefix When Default is selected as the prefix the file name of each new captured file is set to IMAGE or VIDEO followed by a sequential number for example I...

Page 187: ...n to increase decrease the value 3 Tap to close the submenu without applying and saving the changes 4 Tap to reset all properties to their default values 5 Tap to save the settings 2 3 4 1 5 Show Remi...

Page 188: ...n Camera Album Do one of the following Tap Start Programs Camera Album In the Touch Cube touch Photos or Videos In the Camera program tap Depending on the capture mode you are in Camera Album will eit...

Page 189: ...ENTER to open the on screen menu Icon Function Icon Function Touch to send the image via one of your Messaging accounts Touch to start the slide show Touch to assign the image as a contact picture To...

Page 190: ...o zoom in or out of an image While viewing an image make a full circle motion on the screen with your finger Slide your finger clockwise on an area to zoom in on that area Slide your finger counter cl...

Page 191: ...to go to the next image To play back video files On the main Camera Album screen touch the thumbnail of the video file you want to play back Windows Media Player then plays back the file Tip You can a...

Page 192: ...ice Copy pictures and GIF animation files from your PC or a storage card to the My Pictures folder on your device Copy video files to the My Videos folder For more information about copying and managi...

Page 193: ...t a media file and then tap Menu to choose from a list of options that you can do with the selected media file You can send the selected media file via one of your messaging accounts or beam it to ano...

Page 194: ...Player Mobile You can use Windows Media Player Mobile to play digital audio and video files that are stored on your device or on a network such as on a Web site Video File Formats Supported File Exten...

Page 195: ...trols such as Play Pause Next Previous and Volume and the video window You can change the appearance of this screen by choosing a different skin Now Playing screen The screen that displays the Now Pla...

Page 196: ...click the name of your device then click Set Up Sync Note To set up media synchronization on a storage card right click Storage Card in the left panel of Windows Media Player then click Set Up Sync 5...

Page 197: ...layer Help Play media Use the Library to find and play songs videos and playlists that are stored on your device or removable storage card To update the Library 1 If you are not on the Library screen...

Page 198: ...creen tap Menu Library 2 Tap to select a category for example My Music or My Playlists 3 Select a media file that you want then tap Menu Queue Up This adds the file to the Now Playing list Repeat this...

Page 199: ...er In Internet Explorer you can open a Web page containing RTSP Real Time Streaming Protocol links to streaming media content then play the content in the Streaming Media program 1 Tap Start Internet...

Page 200: ...ls to play pause zoom in or out adjust the sound volume and more To view streaming video information You can view the properties and general information of a streaming video clip such as video codec a...

Page 201: ...Audio Manager Notes Audio Manager searches for all music files stored on your device memory and memory card that have the following audio formats MP3 WMA AAC and AAC It will search in the following l...

Page 202: ...d lock icon shown before song titles indicates that the rights for the music files have expired and you will not be able to play them Tap Delete if you want to delete these files Note Audio Manager ke...

Page 203: ...ager and can be edited Notes Audio Manager will search for playlists in the following locations Device Playlists Application Data HTC AudioManager playlists Memory card Storage Card Playlists If a Win...

Page 204: ...ROL to select a song in the Library or tap a song to play it in Music Player then tap Menu Set as Ring Tone 2 If the selected music is an MP3 file tap Trim if you want to trim it first to make it shor...

Page 205: ...r disables the equalizer Select the check box to enable the equalizer and to fine tune its settings if desired See Equalizer for more information 2 3D Sound Adds a three dimensional effect to sound Dr...

Page 206: ...y To create a custom equalizer preset 1 Select the Equalizer check box to enable the equalizer 2 Tap 3 Adjust the frequency bands to your desired values by dragging the equalizer controls The selected...

Page 207: ...itch between the wired headset and speaker when listening to FM To open FM Radio Tap Start Programs FM Radio The first time this program is used it will automatically scan for available FM channels in...

Page 208: ...ails 3 Decreases the radio frequency by 0 1MHz 4 Stereo Mono Allows you to switch between Mono and Stereo modes There are times that FM radio stations sound clearer when you listen to them in Mono mod...

Page 209: ...hen you select a preset FM station 3 Shows the received signal strength 4 Shows the radio frequency Device controls used in FM Radio Navigation Press NAVIGATION left right to search the FM band for th...

Page 210: ...et replaces the frequency To save FM stations on the Presets screen 1 Tune to the desired FM frequency then tap Presets 2 On the Presets screen tap that appears on the desired preset number where you...

Page 211: ...o stations Stereo Toggles between using Stereo or Mono mode when listening to an FM radio station Mute Toggles between muting and restoring the volume Output Select whether to use the device Speaker o...

Page 212: ...212 Experiencing Multimedia...

Page 213: ...Chapter 13 Managing Your Device 13 1 Adding and Removing Programs 13 2 Resetting Your Device 13 3 Managing Memory 13 4 Windows Update 13 5 Battery Saving Tips...

Page 214: ...nect your device to the PC 4 Double click the exe file To remove programs 1 Tap Start Settings System tab Remove Programs 2 In the Programs in storage memory list select the program you want to remove...

Page 215: ...files from the storage card before using Clear Storage performing a hard reset or updating the ROM system software Otherwise you will no longer be able to access the encrypted files on the storage car...

Page 216: ...re copy your files back to the storage card 1 Tap Start Settings System tab Clear Storage 2 Enter 1234 then tap Yes 13 3 Managing Memory To see how much memory is available for use tap Start Settings...

Page 217: ...e The first time you run Windows Update you need to set up how you want Windows Update to check for patches on the Microsoft Web site 1 Tap Start Settings Systems tab Windows Update 2 On the Update Se...

Page 218: ...R to switch off the display Tap Start Settings System tab Power to open the Power settings screen On the Advanced tab of the Power settings screen you can specify when your device automatically turns...

Page 219: ...devices only when you are trying to establish a Bluetooth partnership For more information about Bluetooth see Chapter 10 Lower the volume Close battery intensive programs such as the Camera when you...

Page 220: ...220 Managing Your Device...

Page 221: ...Chapter 14 Using Other Applications 14 1 Voice Speed Dial 14 2 Java 14 3 Spb GPRS Monitor...

Page 222: ...d contact then tap Add Voice Tag Select the desired contact then tap Menu Add Voice Tag Tap the desired contact to open the contact s detailed screen then tap Menu Add Voice Tag 3 Select the phone num...

Page 223: ...o launch the program by pressing the VOICE COMMAND button on the left side of the device and saying the voice tag Make a call or launch programs using a voice tag 1 Tap Start Programs Voice Speed Dial...

Page 224: ...te the MIDlet MIDlet suite while connected to the Internet 3 Select the MIDlet MIDlet suite to download 4 Information about the MIDlet MIDlet suite is then displayed Tap Continue 5 Confirm to start do...

Page 225: ...Dlet suites to free up memory space To create folders 1 On the Java screen tap Menu New Folder 2 Enter a folder name then tap Create To rename a MIDlet or folder 1 Tap and hold a MIDlet MIDlet suite o...

Page 226: ...screen instructions on your PC and your device to complete the installation The Today Plug in After you have installed GPRS Monitor on your device you will find its program icon in Start Programs In...

Page 227: ...ing status information Icon Bar 2 Traffic Full bar corresponds to 100 Each bar is 20 Icon Bar 3 Battery Each bar corresponds to 20 of the total charge Icon Bar 1 Speed Full bar corresponds to 19KB sec...

Page 228: ...to be notified when a traffic limit is reached 1 On the GPRS Monitor screen tap Tools Options 2 Enable the notifications on the Day Warn and Month Warn tabs You can specify up to three daily and thre...

Page 229: ...Appendix A 1 Regulatory Notices A 2 Specifications...

Page 230: ...pliance with these directives implies conformity to the following European Norms in parentheses are the equivalent international standards EN 60950 1 IEC 60950 1 Safety of Information Technology Equip...

Page 231: ...08 Electromagnetic compatibility and radio spectrum matters ERM Base stations BS and user equipment UE for IMT 2000 third generation cellular networks ETSI EN 300 328 Electromagnetic compatibility and...

Page 232: ...tion The guidelines are based on the safety standards previously set by international standards bodies American National Standards Institute ANSI IEEE C95 1 1992 National Council on Radiation Protecti...

Page 233: ...quality and cause your device to operate at a higher power level than needed Avoiding contact with the antenna area when the phone is IN USE optimizes the antenna performance and the battery life SAR...

Page 234: ...equipment at end of life The purpose of this Directive is as a first priority the prevention of WEEE and in addition to promote the reuse recycling and other forms of recovery of such wastes so as to...

Page 235: ...data the actual available memory is less than what is written Operating System Windows Mobile 6 Professional Power Battery Rechargeable Lithium ion battery 1350 mAh Charging Time 2 5 3 hours Battery...

Page 236: ...camera VGA CMOS colour camera Resolution Photo 2048x15 36 1600x1200 UXGA 1280x960 SXGA 640x480 VGA 320x240 QVGA 160x120 QQVGA Video 176x144 QCIF 128x96 Digital Zoom Up to 8X Connections I O Port HTC E...

Page 237: ...n and amber lights for HSDPA UMTS EDGE GSM GPRS standby message and network status as well as for notification and battery charging status Shows a flashing red light when the battery level reaches 5 o...

Page 238: ...238 Appendix...

Page 239: ...ower 29 save battery power 151 218 Beam via Bluetooth 164 Block Recognizer 56 Bluetooth Bluetooth Explorer 42 166 Bluetooth le sharing 166 Bluetooth shared folder 166 hands free headset 163 modem 160...

Page 240: ...58 HSDPA 47 Camera Album 42 188 Car kit phones 73 Clear Storage 216 Clock Alarms 45 76 Comm Manager 42 46 146 Company Directory 134 Conference call 66 Configure data connection settings 26 Connect dev...

Page 241: ...Recognizer 56 Library screen Windows Media Player Mobile 195 Live Messenger 157 M Mail search 58 Make call from Call History 63 from Contacts 62 from Phone program 62 from SIM Manager 65 from Speed D...

Page 242: ...iew pictures 192 Picture Theme capture mode 177 PIN 60 81 Playback screen Windows Media Player Mobile 195 Playlists Audio Manager 203 Windows Media Player Mobile 198 Play GIF animation 193 Play media...

Page 243: ...45 77 Backlight 45 76 77 Certi cates 45 Clear Storage 45 216 Clock Alarms 45 76 78 Customer Feedback 45 Device Information 45 Encryption 45 82 Error Reporting 45 GPS 45 Key Lock 45 Long Press End Key...

Page 244: ...dows Media Player Mobile 198 Turn device on and off 26 Turn phone function on and off 60 146 U USB modem 159 USB to PC 89 V Vibrate 61 Vibration 77 Video call 67 Video capture mode 177 View MMS 114 pi...

Page 245: ...Index 245 Z ZIP create archive 142 open zip le and extract les 141 overview 43 141 Zoom Camera 181...

Page 246: ...246 Index...
Reviews: