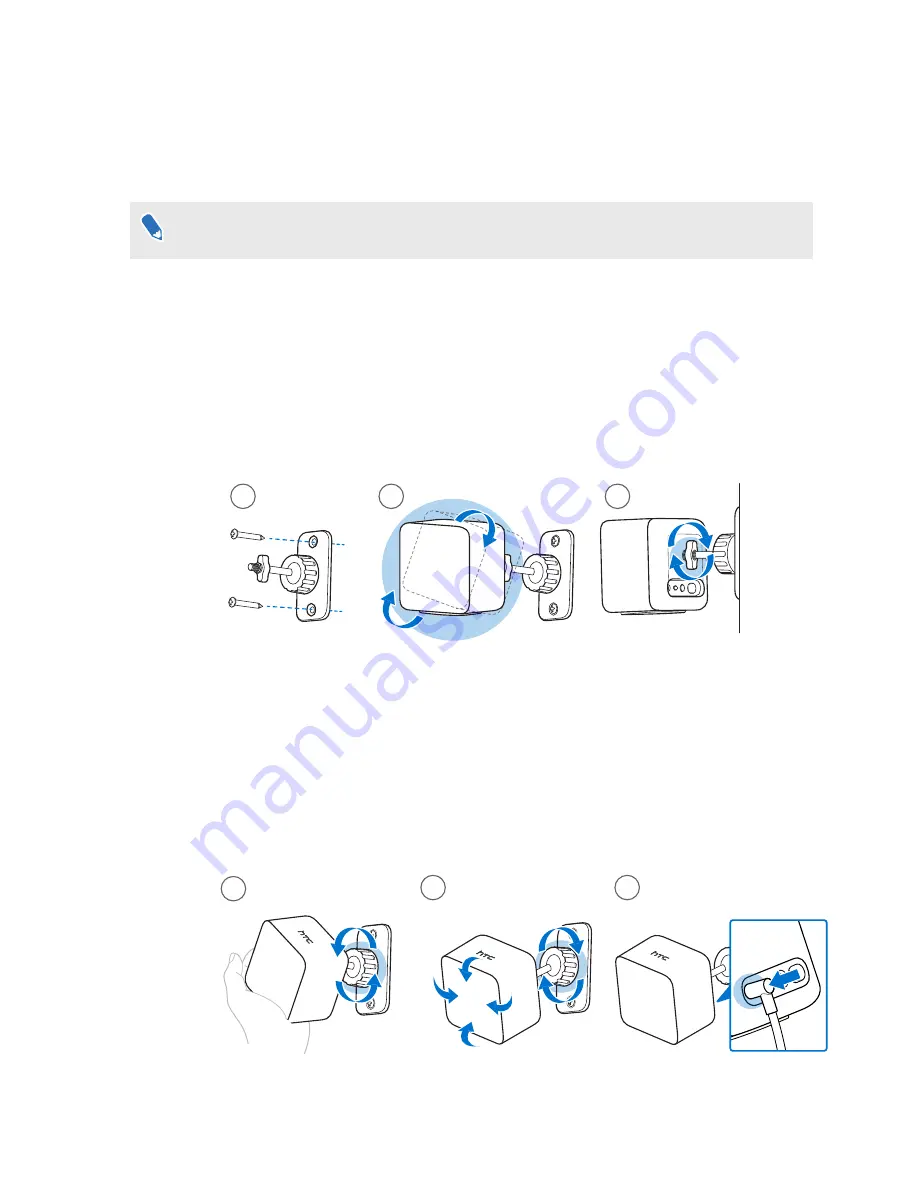
Using the mounting kit
For best results, install the base stations using a mounting kit. If you previously bought first-
generation VIVE hardware, the mounting kit is provided as an in-box item. Otherwise, you can
separately purchase a similar mounting kit from a third-party supplier.
You will need a screwdriver or drill to install the mounts. Ask a professional for help when
using power tools.
1.
Mark where you want to install each of the mounts on your wall, and then screw the
mounts in.
When mounting on concrete or drywall, first drill ¼ inch holes and insert anchors before
screwing mounts in.
2.
Rotate the base station to screw it onto the threaded ball joint. Do not screw the base
station all the way in, only enough to be stable and oriented correctly.
3.
Tighten the wingnut to the base station to secure it in place.
1
2
3
4.
To adjust the angle of the base station, loosen the clamping ring while carefully holding
the base station to prevent it from falling.
5.
Tilt the base station toward the play area.
Make sure it has an unobstructed view of the other base station. Each base station has a
120-degree field of view. They should be angled down between 30 and 45 degrees.
To fix the angle of the base station, tighten the clamping ring back in.
6.
Attach the power cable to each base station.
4
6
5
40
Base stations
Summary of Contents for VIVE Pro HMD
Page 1: ...VIVE Pro HMD User guide...


