Electrical Connection
Your Invertig 130 DC/HF requires a single-phase 230-volt
power supply wired for 16 amps.
Should you remove the plug to install your own plug, the
yellow-green wire is the ground wire and the blue and brown
wires are the hot leads.
All electrical connections should be performed by a qualified
electrician in accordance with the National Electrical Code and
local codes and ordinances.
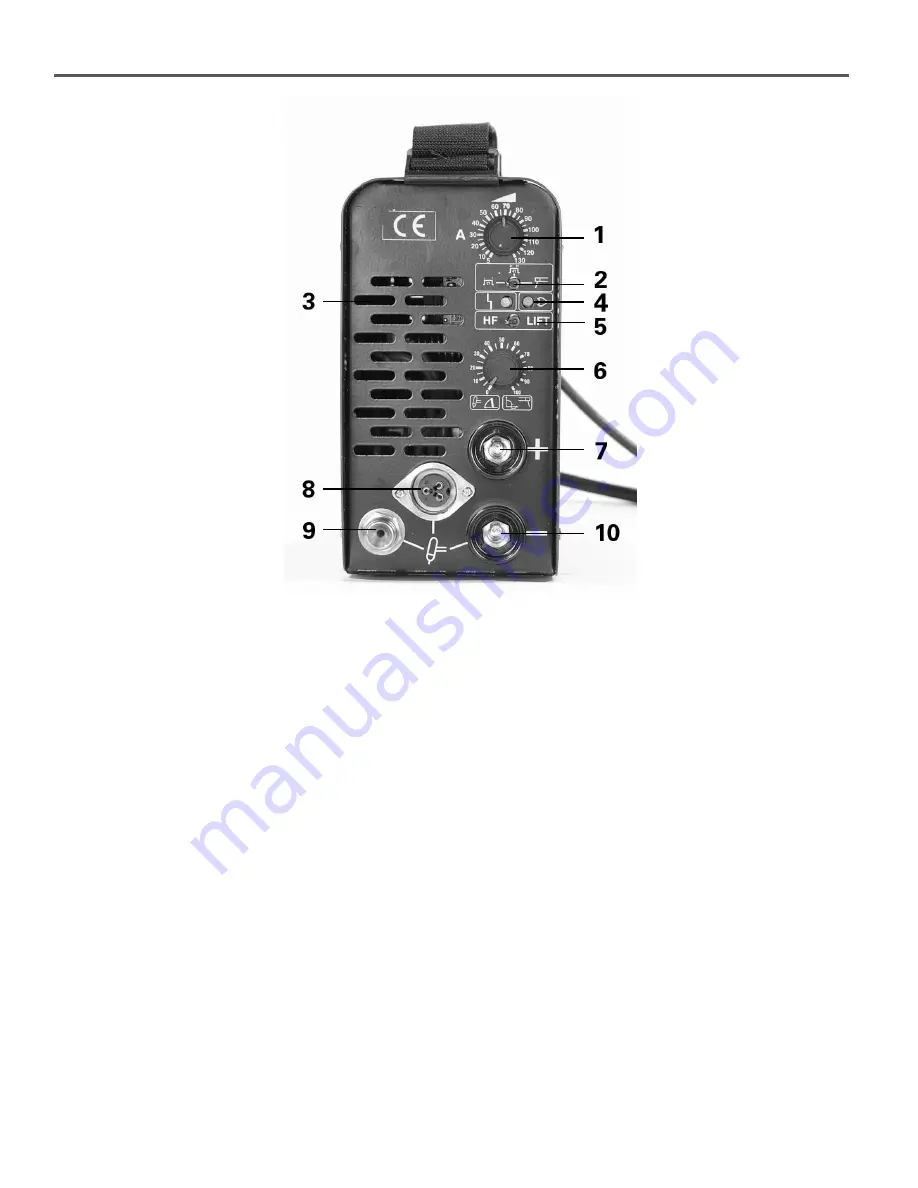
Front Panel Controls
(See Fig. 1)
1) Amperage Adjustment Knob
This knob determines the maximum welding amperage.
The amperage on your Invertig 130DC/HF adjusts from 5 to
130 amps.
When using a remote amperage control, the amperage
adjustment knob is used to limit the maximum amperage for
your particular welding application. For example, when
welding .060" mild steel, I adjusted the amperage knob to 80
amps. This is about 20% more power than I need for welding
the .060" steel. When I depress the foot pedal completely, the
maximum amperage will now be 80 amps.
Setting the machine so the maximum amperage is 80 amps vs.
the maximum output of the machine of 130 amps, the pedal
becomes less sensitive. More of a movement in the pedal
results in a smaller variance of the amperage, making it easier
to control the heat and therefore easier to control your puddle.
2) Welding Mode Switch
The welding mode switch allows you to select the welding
mode of your Invertig 130DC/HF.
A. TIG 2T Mode
- With the torch trigger or foot pedal depressed,
your Invertig 130DC will start the arc. When the trigger is
released, the unit will stop. Select this welding mode for
operation with the foot pedal or the torch mounted amperage
control. This will generally be the most common mode of
operation.
B. TIG 4T Mode
- This is like a lock on trigger on a drill or
grinder. This mode is generally used with a TIG torch which
has a trigger to start and stop the arc. It is generally not used
with a foot pedal or a torch mounted amperage control.
When you depress the trigger on the torch, your Invertig
130DC/HF provides pre-gas flow for as long as the trigger is
depressed. When the trigger is released, it will slope up to the
welding amperage that has been selected. When the trigger is
depressed again, the welding current will slope down. When
the trigger is released, the arc will extinguish, and the post flow
will start.
Fig 1 - Front Controls


