BT Downloader
User Guide
Chapter 2 - System Setup
Installation
Before the device can be accessed via the local network, it has to be connected and
turned on.
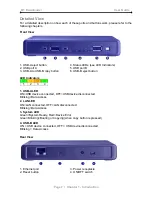
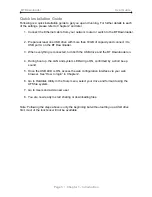
1. Connect the Ethernet cable from your network router or switch to the BT Downloader.
2. Prepare at least one USB drive and connect it to one of the USB ports on the BT
Download.
3. When everything is connected, turn both the USB drive and the BT Downloader on.
4. During boot up, the LAN LED will go ON as the network connection is detected.
5. The system LED will blink and go steady as soon as the system has finished
booting, confirmed by a short beep sound.
6. Once the system is ready, it will detect the USB drive and the USB LED will light up
green.
7. Done, your device is now ready for access and further setup.
Note: If the BT Downloader is turned on but can not acquire an IP address, it
will warn the user with a beep sound. To turn off the warning signal, make sure the
Ethernet cable is connected properly and the BT Downloader has access to the
local network to acquire the IP address.
USB Eject Procedure
To remove a USB drive, use the eject button located next to each of the USB ports.
1. Press the corresponding eject button and release it again.
2. The system will confirm that the eject button has been pressed with a short beep
sound.
3. Once the drive is ready to be removed, the system will confirm it with another two
short beep sounds.
4. You can now turn off the USB drive and remove the USB cable.
Shut Down Procedure
To turn off the BT Downloader, stop all current downloads, then turn off the power using
the ON/OFF switch. Once the system has shut down,remember also turning off the power
to your USB drives.
USB File System
To use the file and user management as well as the BitTorrent™ function, we strongly
recommend formatting one drive using the XFS file system. Other drives connected to the
BT Download can either use FAT 32, allowing both read and write access, or
NTFS which only allows read access. For optimum performance and functionality, we
recommend using XFS.
Page 4 / Chapter 2 - System Setup


