Thank you for choosing the Mobile Broadband USB
Stick. With your USB Stick, you can access a wireless
network at high speed.
Note:
This manual describes the appearance of the USB Stick, as well as the procedures for
preparation, installation, and removal. For operation details about the management
program, see the online help included in the management program.
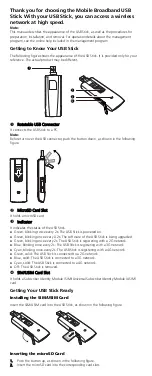
Getting to Know Your USB Stick
The following figure shows the appearance of the USB Stick. It is provided only for your
reference. The actual product may be different.
1
2
3
4
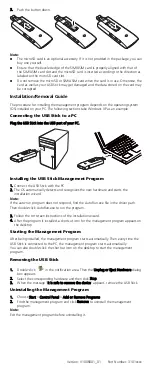
Rotatable USB Connector
It connects the USB Stick to a PC.
Note:
Before turn over the USB connector, push the button down, as shown in the following
figure.
MicroSD Card Slot
It holds a microSD card.
Indicator
It indicates the status of the USB Stick.
Green, blinking twice every 2s: The USB Stick is powered on.
Green, blinking once every 0.2s: The software of the USB Stick is being upgraded.
Green, blinking once every 2s: The USB Stick is registering with a 2G network.
Blue, blinking once every 2s: The USB Stick is registering with a 3G network.
Cyan, blinking once every 2s: The USB Stick is registering with a 4G network.
Green, solid: The USB Stick is connected to a 2G network.
Blue, solid: The USB Stick is connected to a 3G network.
Cyan, solid: The USB Stick is connected to a 4G network.
Off: The USB Stick is removed.
SIM/USIM Card Slot
It holds a Subscriber Identity Module (SIM)/Universal Subscriber Identity Module (USIM)
card.
Getting Your USB Stick Ready
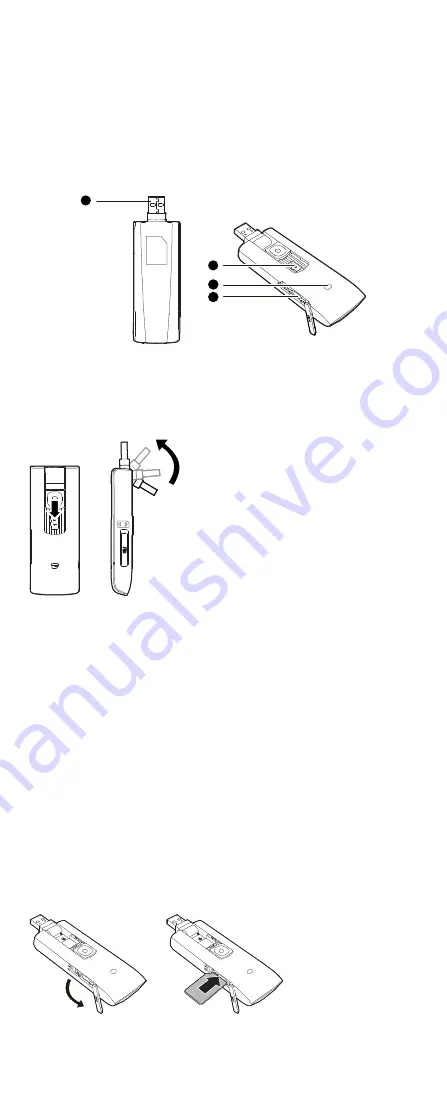
Installing the SIM/USIM Card
Insert the SIM/USIM card into the USB Stick, as shown in the following figure.
Inserting the microSD Card
1.
Push the button up, as shown in the following figure.
2.
Insert the microSD card into the corresponding card slots.


