background image

23

1. Add a rack-mounted HR04A.

2. Set the running parameters and control parameters of the rack-mounted HR04A on the 

WebUI.

Initial Configuration

2.2

On the 

Running Parameters

tab page, you are advised to set 

Supply air temperature settings

to 

20

°

C

Return air temperature settings

to 

30

°

C

, and 

Dehumidification settings

to 

50% RH

.

Before commissioning, ensure that the indoor and outdoor units have been powered on 

properly. Before starting the compressor, ensure that the electric heating belt of the 

crankcase has been preheated for more than 12 hours.

If the one-way pipe to the indoor unit is longer than 10 m, you need to add refrigerant 

during commissioning.

Before charging refrigerant, ensure that air is exhausted from the gas pipe connected to the 

refrigerant cylinder.

Commissioning Procedure

2.3

1. Log in to the ECC800-Pro WebUI as 

admin

, and choose 

Monitoring

Cooling 

>

Rack-

mounted air conditioner HR04A1 

to enter the smart cooling product commissioning page.

2. Choose 

Controls

Control Information

, set 

Power on/off 

to 

ON

, and click 

Submit

.

3

Power-On Commissioning for the Management System

Preparations and WebUI Login

3.1

Change the password immediately after the first login.

Preparations and App Login

3.2

1. Log in to Huawei AppGallery (http://a.vmall.com/), search for 

FusionModule

, and tap 

Download

to obtain the installation package.

2. Install the app.

3. Hold down the SW button on the ECC800-Pro for less than 3s to enable the WiFi function.

4. (Optional) Enable the WiFi function on the ECC800-Pro WebUI.

5. Log in to the app.

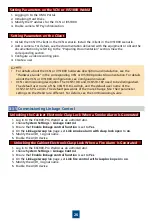
1. Connect a network cable between the PC network port and the WAN_1 port on the ECC800-

Pro.

2. Configure the PC IP address and the WAN_1 IP address in the same network segment.

3. Set LAN parameters.

4. Set Internet Explorer parameters.

5. Log in to the ECC800-Pro WebUI.

Performing Startup Password Authentication

3.3

1. Authenticate the startup password on the WebUI.

a) Log in to the ECC800-Pro WebUI as an administrator.

Summary of Contents for FusionModule 500

Page 1: ...Huawei Technologies Co Ltd FusionModule500 Smart Mini Data Center Quick Guide Issue 02 Date 2020 12 25 ...

Page 2: ...abinet for installing half height rPDUs vertically Power distribution 6 kVA UPS rPDU Only half height vertical rPDUs are supported Lithium battery 100 Ah 48 V DC Operating temperature Indoor 0 C to 40 C outdoor 20 C to 45 C Operating humidity 5 95 RH IP rating IP20 Maximum power of a single cabinet 3 kW Installation mode Installed on a concrete floor or an electrostatic discharge ESD floor Altitud...

Page 3: ...less than or equal to 5 m 1 Outdoor Unit Installation Scenario Installation Scenarios Outdoor Unit Placed Higher than Indoor Unit Indoor Unit Placed Higher than Outdoor Unit Outdoor unit The liquid pipe should not be exposed to direct sunlight Cabinet Oil trap Tilted gas pipe Indoor unit Movable floor Condensate drainpipe Underfloor thermal insulation layer Floor Sealed Maximum 7 5 m Maximum 20 m ...

Page 4: ... check that the vertical distance between the top of the 2000 mm high cabinet and the floor is 2000 mm 3 mm Then use a level to check that the cabinet is level Do not remove the anchor bolts Otherwise rework is required if the cabinet height does not meet requirements 2 Installing an Indoor Unit 1 Remove filler panels 2 Push the indoor unit into the bottom of the cabinet along the guide rails Hard...

Page 5: ... air intake vent and air exhaust vent of the condenser are not dirty or blocked Install an outdoor unit in a clean area that is away from residential areas At a high place with strong winds install the outdoor unit against a wall to ensure the normal operating of fans Install a baffle plate when necessary to prevent the outdoor unit from toppling in strong winds Install an outdoor unit against a w...

Page 6: ...outdoor unit and drill holes in the concrete base Then secure the outdoor unit to the concrete base using expansion bolts 6 Clearance from the wall 300 mm Clearance from the wall 500 mm Clearance from the wall 300 mm Air exhaust side 2000 mm Air intake side 150 mm ...

Page 7: ... If a copper pipe needs to be routed through the wall seal both ends of the copper pipe before routing it through the wall After a pipe is connected charge dry nitrogen test leakage and vacuumize the pipe 1 Obtain tools 2 Drill holes in the wall 3 Install the refrigerant pipe and check whether the pipe thread is sealed for protection 4 Connect the threaded connector Bottom piping Top piping 5 If a...

Page 8: ...Remove the baffle plate from the water pipe hole at the bottom of the cabinet and install the drainpipe After connecting the drainpipe power on the smart cooling product add water to the water pan until the low float switch is raised and check whether drainage is normal Ensure that the condensate pipe is not bent during installation and connection ...

Page 9: ...units need to be provided by the customer The supply voltage must be within the normal range 187 V to 253 V The original cables in the unit cannot be changed under any circumstances Do not reversely connect the L and N cables Ensure that all wiring terminals are securely installed All safety protection devices in the unit are set before delivery Do not adjust them by yourself Cables must be routed...

Page 10: ...r affect the system operation Do not use oxygen or acetylene for a leakage test 1 Reducing valve 2 Nitrogen cylinder 3 Low pressure gauge 4 High pressure gauge 5 Gas pipe needle valve 6 Liquid pipe needle valve 5 Connect a pressure gauge to the gas pipe needle valve and liquid pipe needle valve of the indoor unit and connect a vacuum pump 6 Check that all pressure gauge valves are open 7 Check tha...

Page 11: ... Devices 9 1 Installing Lithium Batteries 12 1 9 2 Install Busbars 9 3 Installing PDU2000s If there is more than one lithium battery install busbars The busbars need to be installed 2 U above the last lithium battery Determine the busbar installation position based on the lithium battery configuration ...

Page 12: ...ors 1 Unpack the two T H sensors and attach one to the 33 U position on the right post of the front door and the other to the 3 4 U position on the right post of the rear door of the cabinet 2 Set the DIP switch address of the T H sensor on the front door to 2 and that of the T H sensor on the rear door to 1 The installation positions of the T H sensors can be adjusted as required The default devi...

Page 13: ...ctor to the 5th U position on the left mounting bar of the cabinet rear door 10 6 Optional Installing a Camera 1 Optional Install an SD card 2 Secure the camera to the mounting plate 1 Cable outlet 10 5 Installing an Electrode Water Sensor 1 Place the water sensor on the floor under the cabinet 2 Route the water sensor cable through the cable hole in the lower cover of the cabinet 3 Connect it to ...

Page 14: ...switch to the WAN_1 port on the ECC800 Pro using a network cable 5 Insert a power module into the power slot of the LAN switch It is recommended that the LAN switch be installed in the 35th U position of the cabinet You can adjust the position based on the site requirements 14 4 Adjust the camera 5 Install the transparent cover 3 Secure the mounting plate to the top of cabinet front door ...

Page 15: ... chassis c Install the hard disk screws Ensure that the metallic plate of the SATA cable faces upward e Install the hard disk in No 1 position f Push the hard disk until the two preinstalled screw heads slide into the cucurbit holes d Install the SATA cable and power cable 1 SATA cable 2 Power cable 15 ...

Page 16: ...e chassis h Install a hard disk in No 0 position in the same way i Reinstall the upper cover of the chassis and screws j Install the floating nuts k Install mounting ears on the VCN510 l Secure the VCN510 to the 19th U and 20th U positions in the cabinet You can adjust the position based on the site requirements ...

Page 17: ...by 45 degrees and take out the upper and then lower layers of hard disk tray c Place the hard disks with ports facing upwards and align the screw holes on the hard disk tray with the hard disks and fasten the screws d Insert the hard disk tray back at 45 degrees with the opening of its locking buckle facing downwards hold the screw in the red framed part to lower the hard disk tray until it is lev...

Page 18: ... disks on the upper layer as shown in the lower left figure f Close the chassis cover and use a PH2 screwdriver to fasten the rear screws 2 Install the device a Install the cage nuts for guide rails and then Install guide rails b Install the cage nuts that secure the IVS1800 c Install mounting ears d Install the IVS1800 in the cabinet 3 Power on the device ...

Page 19: ... Smart Module 2 Connecting the Power Cables of the Cabinet Top Cabling Bottom Cabling 3 Connecting PDU2000 Power Cables Connect input power cables to the power distribution unit Connect input power cables to the power distribution unit ...

Page 20: ...ribution unit and the UPS Connect one end of a network cable to the RS485_IN port on the electronic clasp lock on the front door of the cabinet and connect the other end to the COM3 port on the ECC800 Pro Connect one end of another network cable to the OUT port on the electronic clasp lock on the front door of the cabinet and connect the other end of the network cable to the RS485_IN port on the e...

Page 21: ...nsor on the rear door in series Connecting T H Sensor Cables 5 4 1 Ground terminal 2 GE1 port 3 GE2 port 4 Power button 5 Power port 1 Connect one end of the ground cable to the grounding terminal of the device and the other end to the grounding point of the network cabinet 2 Connect one end of the network cable to any GE network port on the VCN510 or IVS1800 3 Connect one end of the power cable t...

Page 22: ...operly in the same direction Passed Failed Excess sections of cable ties are neatly cut Passed Failed There is no unnecessary adhesive tape or cable tie on cables Passed Failed Routed cables are convenient for future maintenance and expansion Passed Failed Labels at the cable ends are clear Passed Failed Electrical All ground cables are copper cables with diameters meeting the requirements No swit...

Page 23: ...hours Otherwise the compressor may be faulty and Huawei will not be liable for any loss caused thereby Powering on Devices 2 1 UPS Power On Commissioning 1 1 1 Switch on the external battery circuit breaker if any 2 Press ON MUTE to start the UPS The UPS will enter the standby mode Press and hold SELECT on a non setting screen to access the login screen for parameter settings The initial password ...

Page 24: ...ing Rack mounted air conditioner HR04A1 to enter the smart cooling product commissioning page 2 Choose Controls Control Information set Power on off to ON and click Submit 3 Power On Commissioning for the Management System Preparations and WebUI Login 3 1 Change the password immediately after the first login Preparations and App Login 3 2 1 Log in to Huawei AppGallery http a vmall com search for F...

Page 25: ...UPS2000G L based on the actual situation The setting example indicates that the UPS2000G is connected to the COM4 port on the ECC800 Pro 1 Log in to the ECC800 Pro WebUI as an administrator add a UPS2000G L 2 Click Test Connect 2 Use the Service Expert app to authenticate the startup password a Log in to Huawei AppGallery https a vmall com search for Service Expert and tap Download to obtain the i...

Page 26: ... alarm threshold and Low humidity alarm threshold are 35 0 C 5 0 C 85 0 RH and 15 0 RH respectively Commissioning Event Notification 3 9 1 Choose System Settings Event Notification 2 Set outbox parameters 3 Add an email address for receiving emails 4 Add a mobile number for receiving event notifications 5 Set the alarm notification delay time and add alarm notification parameters 6 Click Confirm I...

Page 27: ...in the VCN scenario Install the iClient in the IVS1800 scenario 2 Add a camera For details see the documentation delivered with the equipment or obtain the documentation by referring to the Preparing Documentation section View the corresponding section 3 Configure a video recording plan 4 Create a user Setting Parameters on the VCN or IVS1800 WebUI 1 Logging In to the OMU Portal 2 Initializing Har...

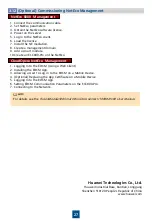
Page 28: ...the FusionModule500 Smart Mini Data Center V100R021C00 User Manual Huawei Technologies Co Ltd Huawei Industrial Base Bantian Longgang Shenzhen 518129 People s Republic of China www huawei com NetEco 6000 Management CloudOpera NetEco Management 1 Logging In to the EDCM Using a Web Client 2 Installing the EDCM App 3 Allowing a User to Log in to the EDCM on a Mobile Device 4 Optional Replacing the Ap...

Page 29: ...485_IN RS485_IN BMS AI DI_2 RS485_IN RS485_OUT RS485_IN GE1 VCN510 IVS1800 UPS Build out resistor COM_OUT COM_IN COM_IN COM_OUT Description Signal cable Signal cable pre connected before delivery Water sensor SPD Camera Server Using 2288X V5 as an example LAN switch Using the LAN switch with24 ports as an example ESM ESM Cabinet Electronic Clasp Lock WiFi module Cabinet ground point Smoke detector...

Reviews: