Thank you for choosing the HiLink Mobile Broadband
dongle. With your HiLink dongle, you can access a
mobile broadband network at high speed.
Note:
This user guide describes the appearance of the HiLink dongle, as well as the process for
installing the dongle, and information about the Web User Interface (UI)
Getting to Know Your HiLink dongle
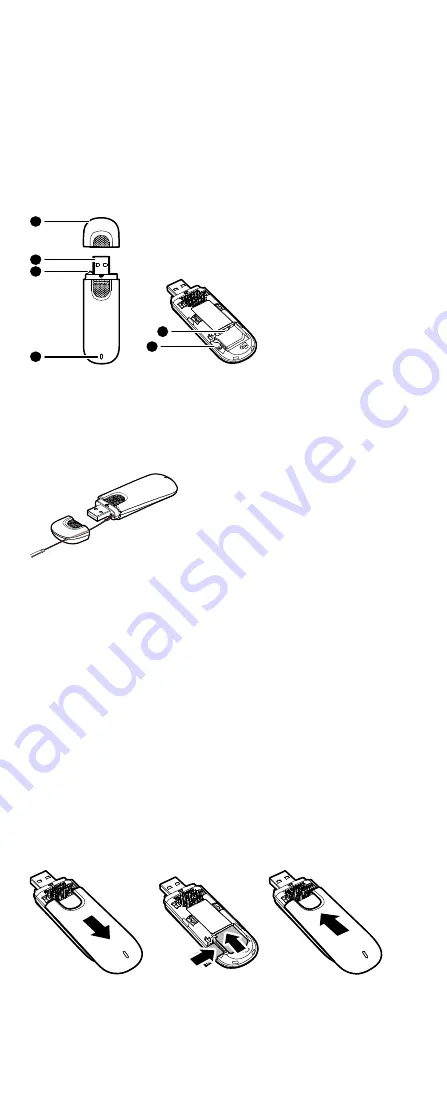
The following figure shows the appearance of the HiLink dongle. It is provided only for
your reference. The actual product may be different.
1
3
2
2
4
5
USB Connector
This connects the HiLink dongle to a PC.
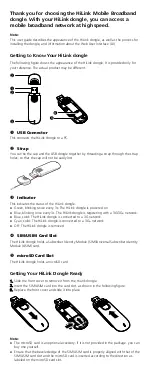
Strap
You can tie the cap and the USB dongle together by threading a strap through the strap
holes, so that the cap will not be easily lost.
Indicator
This indicates the status of the HiLink dongle.
Green, blinking twice every 3s: The HiLink dongle is powered on.
Blue, blinking once every 3s: The HiLink dongle is registering with a 3G/3G+ network.
Blue, solid: The HiLink dongle is connected to a 3G network.
Cyan, solid: The HiLink dongle is connected to a 3G+ network.
Off: The HiLink dongle is removed.
SIM/USIM Card Slot
The HiLink dongle holds a Subscriber Identity Module (SIM)/Universal Subscriber Identity
Module (USIM) card.
microSD Card Slot
The HiLink dongle holds a microSD card.
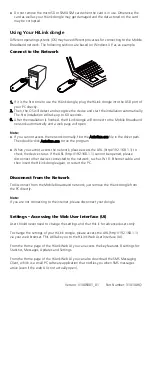
Getting Your HiLink Dongle Ready
1.
Slide the front cover to remove it from the HiLink dongle.
2.
Insert the SIM/USIM card into the card slot, as shown in the following figure.
3.
Replace the front cover and slide it into place.
Note:
The microSD card is an optional accessory. If it is not provided in the package, you can
buy one yourself.
Ensure that the beveled edge of the SIM/USIM card is properly aligned with that of the
SIM/USIM card slot and the microSD card is inserted according to the direction as
labeled on the microSD card slot.


