background image


NetCol8000-C(070-260) In-room Chilled Water 
Smart Cooling Product


User Manual


Issue 

06


Date 

2020-01-13


HUAWEI TECHNOLOGIES CO., LTD. 

Summary of Contents for NetCol8000-C

Page 1: ...NetCol8000 C 070 260 In room Chilled Water Smart Cooling Product User Manual Issue 06 Date 2020 01 13 HUAWEI TECHNOLOGIES CO LTD ...

Page 2: ...tomer All or part of the products services and features described in this document may not be within the purchase scope or the usage scope Unless otherwise specified in the contract all statements information and recommendations in this document are provided AS IS without warranties guarantees or representations of any kind either express or implied The information in this document is subject to c...

Page 3: ...cal support personnel System engineers Hardware installation personnel Commissioning engineers Data configuration engineers Maintenance personnel Symbol Conventions The symbols that may be found in this document are defined as follows Symbol Description Indicates a hazard with a high level of risk which if not avoided will result in death or serious injury Indicates a hazard with a medium level of...

Page 4: ... equipment damage and environment deterioration Change History Changes between document issues are cumulative The latest document issue contains all the changes made in earlier issues Issue 06 2020 01 13 Updated the safety information Issue 05 2019 01 15 Updated the manual name and so on Issue 04 2018 09 30 Optimized the Connecting an Upflow Differential Pressure Sensor section and so on Issue 03 ...

Page 5: ...el Description 11 2 2 Appearance and Components 12 2 3 Controller 18 2 3 1 Appearance and Ports 18 2 3 2 Functions and Features 21 2 4 Monitoring System 22 2 5 Operating Conditions 22 2 6 Technical Specifications 24 3 Installation Guide 29 3 1 Installation Precautions 29 3 1 1 Precautions 29 3 1 2 Tools 32 3 1 3 Material Preparations 34 3 1 3 1 Water Inlet Pipe of the Wet Film Humidifier 34 3 1 3 ...

Page 6: ...ttom Pipe Routing 69 3 5 2 2 2 Side Pipe Routing 70 3 5 3 Connecting Water Pipes 73 3 5 3 1 Connecting the Drainpipe 73 3 5 3 2 Optional Connecting the Water Inlet Pipe for the Wet Film Humidifier 75 3 5 4 Optional Leakage Test with Nitrogen 76 3 5 5 Leakage Test with Water 78 3 6 Cable Connections 81 3 6 1 Precautions 81 3 6 2 Positions of Electric Ports 81 3 6 3 Connecting Power Cables 84 3 6 4 ...

Page 7: ...ting Communications Parameters SNMP Protocol 140 4 4 5 Optional Setting WIFI Parameters 145 4 5 Startup 146 4 6 Startup Wizard 153 4 7 Optional Power off 157 4 8 Checking After Commissioning 158 5 WebUI 160 5 1 Preparations and WebUI Login 160 5 2 WebUI Introduction 163 6 System Operation and Maintenance 167 6 1 Routine Maintenance Overview 167 6 2 Monthly Maintenance 168 6 3 Semiannual Maintenanc...

Page 8: ...ng the Screen 281 7 1 13 How to Modify a Password 282 7 1 14 How to Set Alarm Parameters 285 7 1 15 How to Commission Single Component 286 7 1 16 Restoring Factory Settings 287 7 1 17 Which Parameters Are Restored to Default Values After Default Settings Are Operated 288 7 1 18 Exporting Data 289 7 1 19 How to Export and Import a Configuration file 290 7 1 20 How to Change the SSH Access Password ...

Page 9: ...talling operating or maintaining the equipment The safety instructions in this document are only supplements to local laws and regulations Huawei will not be liable for any consequences of the following circumstances Operation beyond the conditions specified in this document Installation or use in environments which are not specified in relevant international or national standards Unauthorized mod...

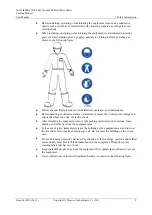
Page 10: ...ling a conductor surface or terminal measure the contact point voltage and ensure that there is no risk of electric shock After installing the equipment remove idle packing materials such as cartons foam plastics and cable ties from the equipment area In the case of a fire immediately leave the building or the equipment area and turn on the fire alarm bell or make an emergency call Do not enter th...

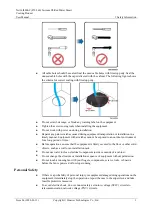
Page 11: ...pment with scratches cannot be exposed to an outdoor environment for a long period of time Before operations ensure that the equipment is firmly secured to the floor or other solid objects such as a wall or an installation rack Do not use water to clean electrical components inside or outside of a cabinet Do not change the structure or installation sequence of equipment without permission Do not t...

Page 12: ...ns and are clear of the sources and degree of various potential hazards in equipment installation operation maintenance Trained personnel personnel who are technically trained have required experience are aware of possible hazards on themselves in certain operations and are able to take protective measures to minimize the hazards on themselves and other people Operators operation personnel who may...

Page 13: ...uting cables ensure that a distance of at least 30 mm exists between the cables and heat generating components or areas This prevents damage to the insulation layer of the cables Do not route cables behind the air intake and exhaust vents of the equipment Ensure that cables meet the VW 1 flame spread rating requirements Bind cables of the same type together When routing cables of different types e...

Page 14: ... Environment Requirements To prevent fire due to high temperature ensure that the ventilation vents or heat dissipation system are not blocked when the equipment is running Install the equipment in an area far away from liquids Do not install it under areas prone to condensation such as under water pipes and air exhaust vents or areas prone to water leakage such as air conditioner vents ventilatio...

Page 15: ...to warn away irrelevant personnel Carry the operation machinery and tools properly to prevent them from falling off and causing injuries Personnel involving working at heights are not allowed to throw objects from the height to the ground or vice versa Objects should be transported by tough slings hanging baskets highline trolleys or cranes Ensure that guard rails and warning signs are set at the ...

Page 16: ... that it is intact and confirm its load bearing capacity Do not overload it Ensure that the ladder is securely positioned The recommended angle for a ladder against the floor is 75 degrees as shown in the following figure An angle rule can be used to measure the angle Ensure that the wider end of the ladder is at the bottom or protective measures have been taken at the bottom to prevent the ladder...

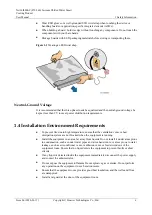
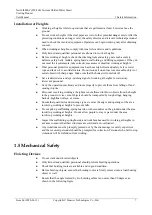
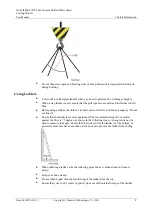
Page 17: ... be aware of unstable or heavy objects on the cabinet Be cautious to avoid injury when moving heavy objects When moving the equipment by hand wear protective gloves to prevent injuries Move or lift the equipment by holding its handles or lower edges Do not hold the handles of modules such as power supply units fans and boards that are installed in the equipment because they cannot support the weig...

Page 18: ...n to high pressure components such as the compressor and refrigerant pipe to prevent the refrigerant system from being cracked or exploded due to misoperations Refrigerant Frostbite Refrigerant leakage may cause frostbite Take protective measures for example wear antifreeze gloves when handling refrigerant Storage and Recycling Do not store devices near a heat source or under direct sunshine Keep ...

Page 19: ...070 260 In room Chilled Water Smart Cooling Product User Manual 2 Product Overview Issue 06 2020 01 13 Copyright Huawei Technologies Co Ltd 11 2 Product Overview 2 1 Model Description Figure 2 1 Naming conventions 1 ...

Page 20: ...aming conventions 2 2 2 Appearance and Components Appearance The NetCol8000 C in room chilled water smart cooling product downflow units have four architectures one door two door three door and four door for downflow units only and onsite assembly required and the upflow units have three architectures one door two door and three door as shown in the following figures ...

Page 21: ...iew Issue 06 2020 01 13 Copyright Huawei Technologies Co Ltd 13 Figure 2 3 Upflow smart cooling product with one door left and downflow smart cooling product with one door right Figure 2 4 Upflow smart cooling product with two doors left and downflow smart cooling product with two doors right ...

Page 22: ...l8000 C 070 260 In room Chilled Water Smart Cooling Product User Manual 2 Product Overview Issue 06 2020 01 13 Copyright Huawei Technologies Co Ltd 14 Figure 2 5 Upflow smart cooling product with three doors ...

Page 23: ...8000 C 070 260 In room Chilled Water Smart Cooling Product User Manual 2 Product Overview Issue 06 2020 01 13 Copyright Huawei Technologies Co Ltd 15 Figure 2 6 Downflow smart cooling product with three doors ...

Page 24: ...om Chilled Water Smart Cooling Product User Manual 2 Product Overview Issue 06 2020 01 13 Copyright Huawei Technologies Co Ltd 16 Figure 2 7 Downflow smart cooling product with four doors Components Figure 2 8 Upflow components ...

Page 25: ...ath design which greatly improves the heat exchange efficiency Chilled water valve The chilled water valve also known as the chilled water proportional integral regulating valve features incremental proportional integral and derivative PID control with precise adjustment and accurate control EC fan The EC fan uses a high end brand and provides high reliability and long service life The highly effi...

Page 26: ...e heating capacity and even heating Motorized damper Gravity damper When an smart cooling product is powered off the damper is closed intelligently to prevent loss of air volume and cooling capacity Fresh air free cooling damper It fully uses the outdoor natural cooling source intelligently adjusts the fresh air and return air ratios and fan speed and saves energy by over 30 a year compared with t...

Page 27: ...corresponds to the alarm with the highest severity level and the buzzer status corresponds to the unacknowledged alarm with the highest severity level Figure 2 10 Display panel 1 Indicator 2 Display panel Table 2 1 Indicator and buzzer status description Alarm Status Indicator Buzzer The device is operating properly or a warning is generated Green No buzzing There is an unacknowledged major alarm ...

Page 28: ...e WiFi module locally connect to the smart cooling product over the Service Expert app Obtain the initial startup password during deployment View or obtain the running information about the smart cooling product during preventive maintenance Applicable to V200R001C20 and later versions NOTE Only Huawei service engineers or authorized service engineers are allowed to use the WiFi module To ensure s...

Page 29: ...s backup to improve reliability When a smart cooling product in the group is faulty the backup smart cooling product starts to operate automatically to improve the reliability of the smart cooling product system Each smart cooling product enters the active mode one by one periodically The number of operating smart cooling products varies depending on the thermal load in the equipment room to meet ...

Page 30: ... a security mechanism The smart cooling product supports communications protocols such as Modbus RTU Modbus TCP and SNMP facilitating connection to the network management system The controller intelligently identifies abnormal parameter settings incorrect commands and rejects them automatically If the indoor temperature fluctuates beyond the normal range an audible and visible alarm signal is sent...

Page 31: ...irements Item Specifications Door Width 1 3 m height 2 3 m Floor Floor bearing capacity 400 kg m2 Pipe routing Left and bottom pipe routing and left pipe routing Maintenance distance Front maintenance distance 900 mm Power distribution requirements Leakage circuit breakers are not recommended for the active power supply route If a leakage circuit breaker is required by the customer or local regula...

Page 32: ...ey are equipped with heating and humidification functions If 4x10 mm2 cables are to be used change the screws on the power cable clip Find the corresponding screws in the accessory Table 2 6 Parameter table Model Config uration Power system Maximum Current with Heating and Humidificatio n Without Heating or Humidificatio n Recommended Switch with Heating and Humidification Without Heating or Humid...

Page 33: ...e 4 x 6mm2 4 x 4mm2 Standby 4 x 4mm2 NetCol 8000 C 110 Single route 380 48 0V AC 3PH 50 60H z 29 9A 8 9A C40 C25 4 x 6mm2 4 x 4mm2 Dual route 380 41 5V AC 3PH 50 60H z Active 29 9A 8 9A Standby 8 9A Active C40 C25 Standby C25 Active 4 x 6mm2 4 x 4mm2 Standby 4 x 4mm2 NetCol 8000 C 130 Single route 380 48 0V AC 3PH 50 60H z 29 9A 8 9A C40 C25 4 x 6mm2 4 x 4mm2 Dual route 380 41 5V AC 3PH 50 60H z A...

Page 34: ...tandby C25 Active 4 x 6mm2 4 x 4mm2 Standby 4 x 4mm2 NetCol 8000 C 190 Single route 380 48 0V AC 3PH 50 60H z 34 1A 13 1A C40 C25 4 x 6mm2 4 x 4mm2 Dual route 380 41 5V AC 3PH 50 60H z Active 34 1A 13 1A Standby 13 1A Active C40 C25 Standby C25 Active 4 x 6mm2 4 x 4mm2 Standby 4 x 4mm2 NetCol 8000 C 220 Single route 380 48 0V AC 3PH 50 60H z 38 3A 17 3A C50 C25 4 x 6mm2 4 x 4mm2 2000 x 3600 x 1000...

Page 35: ...city kW 6 12 12 12 Optional Humidification capacity kg h 5 8 8 8 Air filter level G4 G4 G4 G4 Net weight kg 340 600 615 635 Table 2 8 Downflow smart cooling product specifications 2 Parameter NetCol8000 C150 D NetCol8000 C160 D NetCol8000 C190 D Number of fans 3 3 3 Air volume m3 h 34500 42000 40500 Optional Heating capacity kW 12 12 12 Optional Humidification capacity kg h 12 12 12 Air filter lev...

Page 36: ... capacity kW 12 12 Optional Humidification capacity kg h 12 12 Air filter level G4 G4 Net weight kg 1195 1225 Table 2 10 Upflow smart cooling product specifications Parameter NetCol8000 C070 U NetCol8000 C130 U NetCol8000 C190 U Number of fans 1 2 3 Air volume m3 h 13200 26400 39600 Optional Heating capacity kW 6 12 12 Optional Humidification capacity kg h 5 8 12 Air filter level G4 G4 G4 Net weig...

Page 37: ...installing seal the top of the NetCol8000 C by using a baffle or plastic bag to prevent dust entering If the NetCol8000 C has been disassembled and needs to be installed against a wall onsite combine the cabinets before the installation Layout Requirements Check whether the environment meets the requirements before installation and whether reconstruction is required for routing water pipes and cab...

Page 38: ...pipe routing 1 1 NetCol8000 C The height of raised floors is greater than 400 mm W indicates the distance between smart cooling products The minimum W for upflow units is 300 mm and the minimum W for downflow units is 500 mm L indicates the front maintenance distance and the minimum L is 900 mm If this requirement cannot be met the minimum L after front doors are removed can be 800 mm ...

Page 39: ...logies Co Ltd 31 Figure 3 2 Layout of bottom pipe routing 2 1 NetCol8000 C The height of raised floors is greater than 800 mm L indicates the front maintenance distance and the minimum L is 900 mm If this requirement cannot be met the minimum L after front doors are removed can be 800 mm Figure 3 3 Layout of side pipe routing 1 NetCol8000 C ...

Page 40: ...ance and the minimum L is 900 mm If this requirement cannot be met the minimum L after front doors are removed can be 800 mm 3 1 2 Tools Table 3 1 Table 3 2 Table 3 3 and Table 3 4 list the tools for installing the NetCol8000 C Add or delete tools as required Table 3 1 General tools Name Specifications and Appearance Adjustable wrench 200 mm x 24 mm Phillips screwdriver M4 M6 M8 Flat head screwdri...

Page 41: ...seal tape for screw threads are as follows The sealant or seal tape for screw threads must be able to withstand temperatures higher than 85 C The sealant or seal tape should apply to all pipe material Anaerobic metal pipe thread sealant with polytetrafluorethylene PTFE for short as the filler Glycol solution resistance adapting to the thread size with pipeline Maximum seal gap is less than 0 5 mm ...

Page 42: ...red the materials from Huawei you do not need to purchase them elsewhere For details about the specifications of such materials to be purchased see the following sections Engineering procurement materials that are not configured by Huawei and need to be purchased from another vendor 3 1 3 1 Water Inlet Pipe of the Wet Film Humidifier The water inlet pipe of the wet film humidifier can be connected...

Page 43: ...screw threads engineering purchasing 5 Hose clamp mandatory 6 Hose inner diameter of 19 mm made of EPDM or other material engineering purchasing 3 1 3 2 Drainpipe Figure 3 5 Drainpipe 1 3 4 in BSPP inner screw connection reserved device port 2 Hard pipe conversion adapter 3 4 in BSPT exterior screw connection and hard pipe connector connection engineering procurement 3 Hard pipe PP R pipe engineer...

Page 44: ...o Ltd 36 3 1 3 3 Chilled Water Inlet and Outlet Pipes Figure 3 6 Connecting the water inlet and outlet pipes 1 G 2 in connected over screw threads reserved device port 2 DN50 seamless steel pipe with an external threaded connector engineering purchase 3 1 3 4 Pipe Support Preparations Figure 3 7 shows a pipe support The supports used onsite prevails ...

Page 45: ...ng point in the turning section 3 1 3 5 Cables The site ground resistance must be less than 0 1 ohm The cable flame spread rating must be at least VB Select power cables with appropriate diameters based on the maximum working currents When connecting cables fit them with protective hoses Table 3 5 Description about the cables matching the C16A switch Application Scenario Name Technical Requirement...

Page 46: ...ting insertion depth 12 mm blue Delivered with the fittings Network cable for teamwork Standard network cable standard configuratio n Signal cable shielded straight through cable 10 m MP8 II CC4P0 5GY S MP8 II FTP 1 PCS 10 m Table 3 6 Description about the cables matching the C25A switch Applicati on Scenario Name Technical Requirements Remarks Indoor unit Power cable optional Electrical power cab...

Page 47: ...C40A C50A switch Applicat ion Scenario Name Technical Requirements Remarks Indoor unit Power cable optional Electrical power cable 600 V 1000 V ZA RVV 5 x 6 mm2 black five core wires red yellow green blue black 46 A outdoor cable CE The length is determined by site survey Do not install the neutral wire blue Cut it off and wrap it securely using insulation tape onsite M6 OT terminal of power cable...

Page 48: ...r supply to NetCol8000 C220 and NetCol8000 C260 when they are equipped with heating and humidification functions If 4x10 mm2 cables are to be used change the screws on the power cable clip Find the corresponding screws in the accessory 3 2 System Layout Diagram 3 2 1 Upflow Figure 3 8 System layout diagram A Chilled water inlet B Chilled water outlet 1 Balance valve or isolation valve 2 Water filt...

Page 49: ...ater inlet pipe near the smart cooling product 3 2 2 Downflow Figure 3 9 System layout diagram A Chilled water inlet B Chilled water outlet 1 Balance valve or isolation valve 2 Water filter 3 Isolation valve 4 Soft connection 5 Chilled water inlet and outlet pipe connectors 6 Chilled water valve 7 Heat exchanger Components shown by 5 6 and 7 in the preceding figure are delivered with the smart coo...

Page 50: ...ome fittings are missing or do not comply with the packing list record the information and contact your local Huawei immediately End 3 3 2 Checking Fittings Check the following items after unpacking the product The cabinet exterior is in good condition and free of collision and scratch If any collision or scratch is founded report it to the carrier immediately Check fitting kinds and quantities ac...

Page 51: ...mart Cooling Product User Manual 3 Installation Guide Issue 06 2020 01 13 Copyright Huawei Technologies Co Ltd 43 Figure 3 10 Upflow needle valve 1 Drainage valve 2 Exhaust valve Figure 3 11 Downflow needle valve 1 Drainage valve 2 Exhaust valve ...

Page 52: ...esiccant bag under the heat exchanger of the upflow unit Remove the fan maintenance baffle plate of the downflow unit and take out the desiccant bag inside the cabinet Check that thermal insulation foam is in close contact with the pipes there is no crack in each cutting position and the chilled water valve is tightly wrapped by thermal insulation foam 3 4 2 Exhausting Nitrogen Prerequisites Befor...

Page 53: ...tCol8000 C 070 260 In room Chilled Water Smart Cooling Product User Manual 3 Installation Guide Issue 06 2020 01 13 Copyright Huawei Technologies Co Ltd 45 Figure 3 12 Upflow exhaust valve 1 Exhaust valve ...

Page 54: ...gure 3 13 Downflow exhaust valve 1 Exhaust valve Procedure Step 1 Slowly open the exhaust valve to exhaust nitrogen Step 2 Fasten the exhaust valve when no air exhausts at the valve End 3 4 3 Removing the Pallet Procedure Step 1 Open the front door and remove the rear door Step 2 Remove the bolts that secure the cabinet and the pallet using a 19 socket wrench ...

Page 55: ... front door Step 4 Close the front door and reinstall the rear door End 3 4 4 Optional Cabinet Assembly Applicable only to Downflow Units with Four Doors Context Operations should be conducted in a spacious and safe environment After the cables are connected mark the terminals and bind them along the cabinet beam using cable ties Ensure that nitrogen is completely exhausted from the exhaust valves...

Page 56: ...g Product User Manual 3 Installation Guide Issue 06 2020 01 13 Copyright Huawei Technologies Co Ltd 48 Figure 3 15 Removing the rear door Step 2 Use quick release screws to secure the front and rear columns of the module 2 and module 3 to assemble the unit ...

Page 57: ...t User Manual 3 Installation Guide Issue 06 2020 01 13 Copyright Huawei Technologies Co Ltd 49 Figure 3 16 Assembling the modules Step 3 Use a 15 socket wrench to remove the hold hoop that secures the main pipe remove the black sealing ring and remove the pipe plug ...

Page 58: ...al 3 Installation Guide Issue 06 2020 01 13 Copyright Huawei Technologies Co Ltd 50 Figure 3 17 Removing the pipe plug Step 4 Connect the main pipe using hoses Secure the pipe ports using black sealing rings and clamp them using hold hoops Figure 3 18 Connecting the main pipe ...

Page 59: ...ndensate pipe to the module 3 using hold hoops Figure 3 19 Connecting the condensate drainpipe Step 6 Pull out the fan power cable terminals X103 and X104 of module 2 connect them to the power cable terminals of fan 3 and fan 4 respectively and bind the power cables along the cabling beam Step 7 Connect the signal cable terminal X302 of module 2 to that of module 3 and bind the power cables along ...

Page 60: ... you move the cabinet to the installation position assemble the cabinet in reverse order of the disassembling procedure and based on the cabinet door numbers The following uses a three door cabinet as an example to describe the disassembling procedure Connect every two modules together using eight quick release screws four on the front door and four on the rear door Collect the cables in the first...

Page 61: ...ptional Open the front door and disconnect the cable from the electric heater only disconnect the cable from the electric heater in the second module Step 5 Cut open the thermal insulation foam around the pipe hold hoops using a utility knife and tear off the thermal insulation foam Set aside the black sealing ring after separating pipes You need to reinstall them when assembling the cabinet Set a...

Page 62: ...sassemble the cabinet and move the cabinet inside to the installation position Figure 3 22 Removing quick release screws Step 8 Reassemble the system by performing Step 7 to Step 1 Attach the thermal insulation foam to pipe joints after water is injected and air is exhausted Connect the fan power cable and signal cable and then bind them using cable ties The marks on the terminals should remain th...

Page 63: ...ck absorption pads need to be attached to the top of the bases For a single door and double dour cabinet tighten only the four screws at both sides Eight screws need to be tightened to secure a quadruple door cabinet Tighten the four screws at both ends of the cabinet and one diagonal line of each of the two modules in the middle Figure 3 23 Securing equipment 3 4 7 Lowering a Fan Applicable To Do...

Page 64: ...on Guide Issue 06 2020 01 13 Copyright Huawei Technologies Co Ltd 56 Figure 3 24 Lowered fan 1 Indoor raised floor 2 Indoor concrete floor Procedure Step 1 Open the front door Step 2 Unscrew the fan maintenance baffle plate using a Phillips screwdriver Figure 3 25 Removing the baffle plate ...

Page 65: ...Ltd 57 When removing the fan support beam assign one person to hold the fan Step 3 Unscrew the fan support beam from the fan and the cabinet using a 13 socket wrench Figure 3 26 Removing the fan support beam Step 4 Turn the fan to 45 degrees to the cabinet bottom push the fan along the guide rails at both sides and press down the fan until it is level ...

Page 66: ... room Chilled Water Smart Cooling Product User Manual 3 Installation Guide Issue 06 2020 01 13 Copyright Huawei Technologies Co Ltd 58 Figure 3 27 Turning a fan Step 5 Secure the beam under the fan to the cabinet using screws ...

Page 67: ...lled Water Smart Cooling Product User Manual 3 Installation Guide Issue 06 2020 01 13 Copyright Huawei Technologies Co Ltd 59 Figure 3 28 Securing the fan support beam Step 6 Secure the fan to the cabinet Figure 3 29 Securing the fan ...

Page 68: ...000 C 070 260 In room Chilled Water Smart Cooling Product User Manual 3 Installation Guide Issue 06 2020 01 13 Copyright Huawei Technologies Co Ltd 60 End 3 5 Connecting Pipelines 3 5 1 Cabinet Hole Positions ...

Page 69: ...adding of holes at the proper positions based on the onsite cable routing method and route the cables through the holes Cables can be routed from the bottom or side of the upflow units Knock off the padding of holes at the proper positions based on the onsite cable routing method and route the cables through the holes 3 5 1 1 Holes in the Side Panel Figure 3 30 Holes in the side panel of an upflow...

Page 70: ...awei Technologies Co Ltd 62 Figure 3 31 Holes in the side panel of a downflow unit unit mm 1 Chilled water inlet pipe hole 2 Chilled water outlet pipe hole 3 Reserved 4 Reserved 5 Humidifier water inlet pipe hole 6 Signal cable hole hole for the pressure tube of the differential pressure sensor 7 Power cable hole 8 Drainpipe hole ...

Page 71: ...ure 3 32 Holes at the bottom unit mm 1 Chilled water inlet pipe hole 2 Chilled water outlet pipe hole 3 Power cable hole 4 Signal cable hole hole for the pressure tube of the differential pressure sensor 5 Humidifier water inlet pipe hole 6 Drainpipe hole 3 5 2 Connecting the Chilled Water Pipe Context Before installing the pipe release all nitrogen from the pipe to avoid personal injury ...

Page 72: ...eparate holes Make only the necessary knock out holes otherwise the system performance may be degraded After pipes are routed for the NetCol8000 C seal the gap between the pipe and the pipe hole To minimize the noise due to device vibration perform the following operations When the routing direction of the chilled water pipe is changed add a fastener at the position that is 1000 mm away from the c...

Page 73: ...the cabinets are not placed abreast onsite you are advised to route the pipes from one side of the cabinets Procedure Step 1 To avoid deforming the pipe use a 75 open end wrench to fix the pipe nut use a 36 open end wrench to fix the plug and then remove the plug as shown by 1 in Figure 3 34 Figure 3 34 Installing Pipes Step 2 Apply thread sealant evenly on the joints of external screw threads and...

Page 74: ...ed for pasting thermal insulation foam screw thread sealant Procedure Step 1 Cut the thermal insulation foam around the pipe hold hoop using a utility knife and tear the foam Step 2 Loosen the left knocking off padding cover of the cabinet using a Phillips screwdriver Take out the cover and remove the knocking off padding Figure 3 35 Removing the knocking off padding cover The direction in which t...

Page 75: ... the plug at the lower part of the bend and then remove the plug Figure 3 37 Removing a pipe hold hoop and plug Step 5 Connect the threaded connecting ends removed from the straight pipe to the external pipe apply thread sealant on the joints of external screw threads and secure them using a 75 open end wrench and an 18 pipe wrench as shown by 1 in Figure 3 38 Step 6 Connect the other end of the s...

Page 76: ...20 01 13 Copyright Huawei Technologies Co Ltd 68 Step 7 Secure the pipe using hold hoops as shown by 3 in Figure 3 38 Figure 3 38 Connecting pipes Step 8 After wrapping the pipes with thermal insulation foam install the left knocking off padding cover Figure 3 39 Installing the left knocking off padding cover ...

Page 77: ... insulation foam around the whole pipeline Based on the hardening property of yellow adhesive inject water and preserve the pressureat least 8 hours after an adapter is connected Step 2 To avoid deforming the pipe use a 75 open end wrench to fix the pipe nut use a 36 open end wrench to fix the plug and then remove the plug as shown by 2 in Figure 3 40 Step 3 Apply thread sealant evenly on the join...

Page 78: ...insulation foam sealant used for pasting thermal insulation foam screw thread sealant Procedure Step 1 Cut the thermal insulation foam around the pipe hold hoop using a utility knife and tear the foam Connect pipes wrap thermal insulation foam around the whole pipeline and then install pipe clamps Step 2 Remove the pipe clamp securing the vertical pipe using a Phillips screwdriver as shown by 1 in...

Page 79: ...es are tightened by using hold hoops is for reference only The onsite situation prevails Figure 3 41 Removing a hold hoop Step 4 Remove the hold hoop securing the bend using a 15 socket wrench To avoid deforming the pipe use a 75 open end wrench to fix the pipe nut use a 36 open end wrench to fix the plug at the lower part of the bend and then remove the plug as shown in the following figure ...

Page 80: ... an 18 pipe wrench As shown by 1 in Figure 3 43 Step 6 Route the other end of the straight pipe through the side door to the pipe of the smart cooling product using a black sealing ring seal the pipe connection point using a black sealing ring as shown by 2 in Figure 3 43 Step 7 Secure the pipe using hold hoops as shown by 3 in Figure 3 43 Step 8 Attach thermal insulation foam to the pipe and then...

Page 81: ...Issue 06 2020 01 13 Copyright Huawei Technologies Co Ltd 73 Figure 3 43 Connecting pipes End 3 5 3 Connecting Water Pipes Drainpipe and water inlet pipe for the wet film humidifier optional can be routed from the bottom or one side The figures are for reference only 3 5 3 1 Connecting the Drainpipe ...

Page 82: ...01 13 Copyright Huawei Technologies Co Ltd 74 The drainpipe must have gradients 1 100 is recommended but no trap is allowed The entire drainpipe should be closely wrapped with thermal insulation foam Figure 3 44 Connecting the upflow drainpipe 1 Drainpipe Figure 3 45 Connecting the downflow drainpipe 1 Drainpipe ...

Page 83: ...e the drainpipe and the hose using a hold hoop Port reserved in the device 3 4 in BSPP port with inner screw threads Onsite connection 3 4 in BSPT port connected to a PPR rigid pipe through outer screw threads 3 5 3 2 Optional Connecting the Water Inlet Pipe for the Wet Film Humidifier Install a water filtering device at the port of the water inlet pipe for the wet film humidifier The following fi...

Page 84: ... to facilitate maintenance The water pressure should be in the range of 100 700 kPa The water should be free from large particles 3 5 4 Optional Leakage Test with Nitrogen Context Install a reducing valve at the outlet of the nitrogen cylinder The outlet pressure of the reducing valve must be not more than 0 8 MPa Procedure Step 1 Rotate the chilled water valve to the maximum openness OPEN Step 2 ...

Page 85: ...NetCol8000 C 070 260 In room Chilled Water Smart Cooling Product User Manual 3 Installation Guide Issue 06 2020 01 13 Copyright Huawei Technologies Co Ltd 77 Figure 3 48 Upflow Figure 3 49 Downflow ...

Page 86: ...main pipe before water is supplied to the smart cooling product Turn off the isolation valves on the water inlet and outlet pipes before the cleaning and turn them on afterwards If a cabinet has been disassembled check that hold hoops on the pipe connectors do not leak If there is no water leakage wrap the hold hoops with thermal insulation foam Open the exhaust valve of each heat exchanger to exh...

Page 87: ...NetCol8000 C 070 260 In room Chilled Water Smart Cooling Product User Manual 3 Installation Guide Issue 06 2020 01 13 Copyright Huawei Technologies Co Ltd 79 Figure 3 50 Opening the chilled water valve ...

Page 88: ...y water may spill out of the water pan due to high pressure Step 4 Adjust the air exhausting speed until no air flows out of the valve Then close the exhaust valve Step 5 If a leakage test with nitrogen has been performed skip this step Raise the water pressure in the chilled water pipe to 0 8 MPa If no leakage occurs after 30 minutes retain the pressure for 24 hours The expected result is that th...

Page 89: ...C 3 Ph 50 Hz 60 Hz for single power supply 380 415 V AC 3 Ph 50 Hz 60 Hz for dual power supplies N wire not required Only trained and qualified personnel are allowed to connect cables Before connecting cables use a voltmeter to measure the input power voltage and ensure that the power supply is off All the NetCol8000 Cs are safely grounded before being powered on Keep cables away from the fans and...

Page 90: ...ng Product User Manual 3 Installation Guide Issue 06 2020 01 13 Copyright Huawei Technologies Co Ltd 82 Figure 3 52 External ports of a connection box with a single power supply 1 Signal terminal block 2 Active power supply QF1 3 Cable clamp 4 Ground screw ...

Page 91: ...de Issue 06 2020 01 13 Copyright Huawei Technologies Co Ltd 83 Figure 3 53 External ports of a connection box with dual power supplies 1 Signal terminal block 2 Standby power supply QF2 3 Active power supply QF1 4 Cable clamp 5 Standby power supply ground screw 6 Active power supply ground screw ...

Page 92: ...hrough cable clips Route and bind the cables along the beams or columns of the unit The cabinet has no input neutral wire You can cut the blue neutral wire and wrap it using insulation tape Cables can be routed from the bottom or side of the upflow units and cables can be routed from the bottom side or top of the downflow units Knock off the padding of holes at the proper positions based on the on...

Page 93: ...t User Manual 3 Installation Guide Issue 06 2020 01 13 Copyright Huawei Technologies Co Ltd 85 Step 2 Connect the PE cable to the cabinet ground screw as shown in the following figure Upflow Figure 3 55 Underfloor cabling for upflow units with a single power supply ...

Page 94: ...70 260 In room Chilled Water Smart Cooling Product User Manual 3 Installation Guide Issue 06 2020 01 13 Copyright Huawei Technologies Co Ltd 86 Figure 3 56 Underfloor cabling for upflow units with dual power supplies ...

Page 95: ... 070 260 In room Chilled Water Smart Cooling Product User Manual 3 Installation Guide Issue 06 2020 01 13 Copyright Huawei Technologies Co Ltd 87 Figure 3 57 Side cabling for upflow units with a single power supply ...

Page 96: ... 260 In room Chilled Water Smart Cooling Product User Manual 3 Installation Guide Issue 06 2020 01 13 Copyright Huawei Technologies Co Ltd 88 Figure 3 58 Side cabling for upflow units with dual power supplies Downflow ...

Page 97: ...ling Product User Manual 3 Installation Guide Issue 06 2020 01 13 Copyright Huawei Technologies Co Ltd 89 Figure 3 59 Overhead cabling for downflow units with a single power supply Figure 3 60 Overhead cabling for downflow units with dual power supplies ...

Page 98: ... 260 In room Chilled Water Smart Cooling Product User Manual 3 Installation Guide Issue 06 2020 01 13 Copyright Huawei Technologies Co Ltd 90 Figure 3 61 Underfloor cabling for downflow units with a single power supply ...

Page 99: ...0 260 In room Chilled Water Smart Cooling Product User Manual 3 Installation Guide Issue 06 2020 01 13 Copyright Huawei Technologies Co Ltd 91 Figure 3 62 Underfloor cabling for downflow units with dual power supplies ...

Page 100: ...070 260 In room Chilled Water Smart Cooling Product User Manual 3 Installation Guide Issue 06 2020 01 13 Copyright Huawei Technologies Co Ltd 92 Figure 3 63 Side cabling for downflow units with a single power supply ...

Page 101: ...ue 06 2020 01 13 Copyright Huawei Technologies Co Ltd 93 Figure 3 64 Side cabling for downflow units with dual power supplies Step 3 A ground cable must be routed from the equipotential bonding point of the cabinet to the ground The following figure shows the equipotential bonding point of the cabinet ...

Page 102: ...r Manual 3 Installation Guide Issue 06 2020 01 13 Copyright Huawei Technologies Co Ltd 94 Figure 3 65 Equipotential bonding point of an upflow unit 1 Equipotential bonding point Figure 3 66 Equipotential bonding point of a downflow unit 1 Equipotential bonding point End ...

Page 103: ...minal block No Definition Function 1 Smoke sensor wiring terminal 24 V two line photoelectric smoke sensor The signal output cables for reporting smoke alarms are connected to terminals X2 1 and X2 2 After the smoke sensor is installed an alarm is generated when a fire occurs 2 Remote startup and shutdown terminal Terminals X2 3 and X2 4 can be set to remotely shut down an smart cooling product Sp...

Page 104: ...ir damper YV2 The fresh air function needs to be enabled 7 Return air damper YV2 terminal motorized damper YV3 terminal Return air damper YV2 Terminals X2 15 X2 18 are connected to the return air damper actuator to open and close the return air damper The return air damper is used together with the direct free cooling plenum The fresh air function needs to be enabled Motorized damper YV3 Terminals...

Page 105: ...are on the main control module Figure 3 68 shows a main control module Figure 3 68 Main control module 1 FE_1 LCD FE 2 CAN_IN input port of the teamwork CAN northbound RS485 port 3 RS485 12 V T H module port 4 Main control board handle 5 SW reserved 6 DIP switch 7 COM northbound RS485 port 8 CAN_OUT output port of the teamwork CAN northbound RS485 port 9 FE_2 for FE teamwork 10 Alarm indicator 11 ...

Page 106: ...elded RJ45 connector to avoid signal interference Route the teamwork cable along the left post in front of the cabinet The default networking mode is CAN networking In CAN networking a maximum of 32 smart cooling products can be teamworked If CAN networking is required onsite set Teamwork CAN resistor enable for the first and last smart cooling products to Yes over the LCD Connect the CAN_OUT port...

Page 107: ...ei Technologies Co Ltd 99 Figure 3 70 Teamwork cable route in the downflow scenario Figure 3 71 Connecting the CAN teamwork cable Make the network cable by referring to the following figure if required onsite If the two wire system is adopted for northbound RS485 monitoring onsite only RS485 T D and RS485 T D pins need to be crimped ...

Page 108: ...he other end to the monitoring device as shown in Figure 3 73 Figure 3 73 Connecting the FE monitoring network cable End Connecting the RS485 Monitoring Network Cable Modbus RTU When monitoring smart cooling products over northbound RS485 the EMS needs 3 seconds to collect data from one smart cooling product Therefore the time required for collecting data from N smart cooling products in a group i...

Page 109: ...cts grouped by four are connected to the EMS The customer can adjust the number of smart cooling products in each group based on performance requirements Set the northbound RS485 grouping switches namely toggle switches 2 and 3 on the main control module for the smart cooling product addressed 4 x N to OFF except the smart cooling product in the end Retain the default settings of other toggle swit...

Page 110: ...re Step 1 Connect one end of the two core cable for the water leakage sensor to the water leakage sensor Install the water leakage sensor 0 5 m away from the cabinet If there is a raised floor install the water leakage sensor under the raised floor and keep the water leakage sensor contact downwards Step 2 Connect the water leakage sensor For upflow units Route the cable through the cable hole at ...

Page 111: ...e 06 2020 01 13 Copyright Huawei Technologies Co Ltd 103 Figure 3 75 Connecting the water leakage sensor for an upflow unit For downflow units Route the cable through the cable hole at the bottom and route it along the post and beam of the cabinet through the cable trough under the electric control box ...

Page 112: ...ble to terminals X2 9 and X2 10 on the terminal block Step 4 Secure cables to the water leakage sensor using cable ties End 3 6 7 Optional Connecting the Gravity Damper Applicable To Upflow Units For details about how to connect the gravity damper see the documents delivered with it 3 6 8 Optional Connecting the Motorized Damper Applicable To Downflow Units After powering on the NetCol8000 choose ...

Page 113: ... configured to detect the temperatures of cold hot aisles They can be flexibly installed on the server cabinet based on site situations It is recommended that the T H sensors be deployed near heat sources in the hot aisle or in places which lacks cooling air in the cold aisle Place the T H sensors on the cabinet adjacent to the smart cooling product without directly facing the exhaust vents of the...

Page 114: ...ing the T H sensors outside the cabinet connect the OUT port of one T H sensor inside the cabinet to the IN port of the next T H sensor outside the cabinet Connect all T H sensors in series in this way The T H sensors should be 1 5 m above the ground 33 U Each smart cooling product supports a maximum of three T H sensors in the cold and hot aisles respectively Step 2 Set the DIP switches of T H se...

Page 115: ...Hot aisle T H sensor 2 22 OFF ON ON OFF ON OFF Hot aisle T H sensor 3 23 ON ON ON OFF ON OFF Direct ventilat ion Fresh air temperature and humidity 29 ON OFF ON ON ON OFF Temperature and humidity at the return air valve 27 ON ON OFF ON ON OFF The default addresses of T H sensors purchased from Huawei are 1 Keep the last RS485_R toggle switch at OFF After the addresses are set power on the device O...

Page 116: ...istance between two binding points should not exceed 2 5 m 3 6 11 1 Connecting an Upflow Differential Pressure Sensor Prerequisites Install either the differential pressure sensor or the cap If the cap is installed skip this section The hoses and cables are bound along the routes Context After powering on the NetCol8000 choose Settings System Settings Common Settings and set Air side difference pr...

Page 117: ...e longer PU hose to the port without the Lo silk screen under the differential pressure sensor and route the hose through the top of the cabinet to the supply air pipe static pressure box There should be two binding points adjacent to the pressure inlet The distance between the binding point closer to the pressure inlet and the pressure inlet should not exceed 25 mm and the distance between two bi...

Page 118: ... Ltd 110 You do not need to connect the other port on the pressure differential sensor to the PU hose The pressure tube of the differential pressure sensor passes through the middle of the thermal insulation foam close to the inner side of the cabinet Figure 3 81 Connecting the pressure tubes Step 3 Connect cables to the differential pressure sensor ...

Page 119: ... Context The pressure tube at the air return side needs to be bound to the top cabinet beam horizontally If a blocked damper is configured route the pressure tube through the hole reserved in the damper enclosure frame and bind the pressure tube to the cable bridge inside the damper enclosure frame After powering on the NetCol8000 choose Settings System Settings Common Settings and set Air side di...

Page 120: ...inlet The distance between the binding point closer to the pressure inlet and the pressure inlet should not exceed 25 mm and the distance between two binding points is within 20 30 mm as shown by 1 in Figure 3 84 Step 3 Connect the longer PU hose to the port without the Lo silk screen under the differential pressure sensor and route the hose to the outside through the cable hole at the bottom of t...

Page 121: ... Chilled Water Smart Cooling Product User Manual 3 Installation Guide Issue 06 2020 01 13 Copyright Huawei Technologies Co Ltd 113 Figure 3 84 Connecting the pressure tubes Step 4 Connect cables to the differential pressure sensor ...

Page 122: ...talling the cap attach the thermal insulation foam in the accessories to the top beam of the smart cooling product and ensure that the reserved holes in the thermal insulation foam are aligned with the holes in the beam Check that the cap is intact and free from scratches that the sheet metal is not bent and that the screws are secure Context Adjust the shutter angle as required Normally keep the ...

Page 123: ...d 30 degrees to avoid that part of the cold air flows back to the smart cooling product affecting the cooling effects Procedure Step 1 Remove the cap front panel using a Phillips screwdriver Place the cap on the top of the cabinet It takes two persons to install the cap using a 2 m step ladder Figure 3 86 Removing the cap front panel Step 2 Secure the left and right sides of the cap using six M5 s...

Page 124: ...ater Smart Cooling Product User Manual 3 Installation Guide Issue 06 2020 01 13 Copyright Huawei Technologies Co Ltd 116 Figure 3 87 Securing a cap Step 3 Secure the cap front panel to the frame and adjust the angle of the front panel blade ...

Page 125: ...ap should be well sealed to the smart cooling product to ensure good sealing performance in between Figure 3 88 Installing the front panel End 3 7 Installation Verification After installing a unit check the components listed in Table 3 12 Table 3 12 Check items after the indoor unit installation Check Item Expected Result Actual Result Cabinet The cabinet is installed properly without any tilt Pas...

Page 126: ...e downflow unit is lowered and secured to the cabinet bottom plate Passed Failed The fan has no foreign matter inside Passed Failed Air filter The air filter is correctly installed according to the airflow direction marked on the frame Passed Failed Differential pressure switch The cable ties are securely tightened around pressure tubes Passed Failed There is no foreign matter in pressure tubes Th...

Page 127: ...breakers are correct Passed Failed Control cables are properly connected Passed Failed All cables connectors and bolts are secured Passed Failed Optional Pressure diff sensor The pressure tube is secured by cable ties Passed Failed There is no foreign matter in pressure tubes The pressure tubes show no obvious bends Passed Failed The pressure diff sensor is secured reliably and steadily Passed Fai...

Page 128: ...lation Guide Issue 06 2020 01 13 Copyright Huawei Technologies Co Ltd 120 Check Item Expected Result Actual Result g plenum The T H sensor is secured reliably and steadily as required Passed Failed The differential pressure tube is reliably secured without blockage or bend Passed Failed ...

Page 129: ...ked Step 2 Applicable only to downflow units Check that the fan is lowered Step 3 Check that the fan switch QF4 and electric heater switch QF3 optional are turned on and the smart cooling product is properly grounded Step 4 Verify that the input voltage meets the requirement Step 5 Verify that the indoor unit power cable is connected properly Step 6 Verify that the water sensor is properly install...

Page 130: ...t has two power inputs turn on the active power switch QF1 and standby power switch QF2 Step 2 After the system is powered on for the first time the Quick Settings screen is displayed Log in as the admin user as shown in Figure 4 1 Figure 4 1 Initial power on Table 4 1 Preset password User Preset Password Permission Description admin administrator user 000001 People can operate all menus operator ...

Page 131: ...will not be liable for any consequences of the unauthorized modification Only certified pros are allowed to modify the advanced parameters Unauthorized modifications may lead to device malfunction or damage For system security purposes change the preset password after first login After login you are allowed to perform operations until being logged out if no operation is performed within 3 minutes ...

Page 132: ...r Teamwork function Disable or enable the teamwork function If the teamwork function is disabled this device is operating according to its own control If the teamwork function is enabled this device works in harmony with others that in the same group Set this parameter based on the onsite device heat distribution Networking mode Networking mode for the teamwork The networking mode set on the scree...

Page 133: ...dity exceeds the certain humidity range of the humidity set point Disable indicates that the dehumidification function will not be enabled Enabled when active power indicates that the dehumidification function will be enabled when the main power is active and the ambient humidity exceeds the certain humidity range of the humidity set point T H sensor visible for V200R0 02 version Temperatur e and ...

Page 134: ...pe are set the device conducts cooling or heating based on the settings Set this parameter as required Return air temperature 26 35 C recommended Supply air temperature 18 24 C recommended Cold aisle temperature 18 24 C recommended Hot aisle temperature 26 35 C recommended Humidity setpoint After the Temperature and humidity control type and the humidity value under this type are set the device co...

Page 135: ...address of the smart cooling product as planned The EMS communicates with the smart cooling product through this address The communication addresses of two smart cooling products connecting to the same EMS must be unique End 4 3 Home Screen You can tap the menu items buttons or icons on the screen to enter related screens or perform operations such as Running Alarms and Settings The controller mai...

Page 136: ...ates that the smart cooling product is in diagnostic mode Tap the icon to exit from the diagnostic mode 5 The buzzer status The buzzer status can be set to On or Off The icon indicates that the buzzer is on When the buzzer is on it buzzes when an alarm is generated When the buzzer is buzzing you can tap anywhere on the screen to mute the buzzer After the buzzer is muted it still buzzes when a new ...

Page 137: ... button indicates that there is no teamwork control at present indicates that there is teamwork control without alarms at present indicates that there is teamwork control with alarms at present 4 4 Initial Configuration 4 4 1 Setting Temperature and Humidity Values and Enabling T H Sensors Prerequisites The T H sensors outside the cabinet need to be enabled when they are installed otherwise skip S...

Page 138: ...ot aisle containment you are advised to choose Cold aisle if the cold aisle T H sensors are configured and choose Supply air if the cold aisle T H sensors are not configured When the application scenario is non aisle containment you are advised to choose Return air and choose Cold aisle if the cold aisle T H sensors are configured Hot aisle is not recommended Temperature control mode This paramete...

Page 139: ...t the device conducts humidifying or dehumidifying based on the settings Set this parameter as required 40 60 RH recommended End 4 4 2 Optional Setting the Pressure Difference Control Prerequisites If the differential pressure sensors are installed perform the following operations accordingly If the differential pressure sensors are not installed skip this part Procedure Step 1 On the home screen ...

Page 140: ... advised not to change the value End 4 4 3 Setting Teamwork Control Parameters Prerequisites Assign teamwork group number and teamwork unit address for the teamwork controlled smart cooling products as follows Teamwork group no Group the smart cooling products in adjacent areas as one that is assign one teamwork group number for them At most four teamwork groups can be assigned 1 4 Teamwork unit a...

Page 141: ...tion Principle Default Value Teamwork group No Set the assigned teamwork control number The number of the teamwork controlled group which is the same for all the devices in the group 1 Air conditioner address Set the assigned smart cooling product address Smart cooling product addresses should be different from each other NA Enable Teamwork CAN resistor Indicates the build out resistor status of e...

Page 142: ...e For V200R002 version the software will not restart when the networking mode is changed Networked over CAN or MAC_CAN CAN network indicates teamwork control over a CAN bus MAC_CAN network teamwork control over an FE port MAC_CAN network Number of smart cooling products in this group Number of the smart cooling products in this group 1 to 32 can be set Total number of the smart cooling products in...

Page 143: ...sable the master device does not synchronize data to the slave device and all the smart cooling products operate based on their own requirements not referring to the mode delivered by the master device When the requirement control is Anti competitive running the master device synchronizes data the temperature and humidity control type and set points of the master device and other parameters to the...

Page 144: ...l the smart cooling products by performing Step 1 and Step 2 Step 4 On the home screen of any teamwork controlled smart cooling product tap If the teamwork control succeeds the teamwork topology of the smart cooling product in the group is displayed as shown in Figure 4 5 Table 4 7 describes the note for the screen Figure 4 5 Teamwork topology Table 4 7 Notes for the screen No Parameters Note 1 On...

Page 145: ...with green frame indicates the device itself as shown in A non green frame indicates the other device in the group as shown in 6 Ground color red bright gray Red indicates that a critical alarm is generated as shown in Bright gray indicates that the device is operating without any critical alarms as shown in If teamwork succeeds the teamwork icon is green If teamwork fails the teamwork icon is red...

Page 146: ...ion and the settings of teamwork control parameters 4 4 4 Setting Communications Parameters 4 4 4 1 Setting Communications Parameters Modbus RTU Protocol Context To set communications parameters log in as the admin user Procedure Step 1 On the home screen choose Settings Comm Settings Modbus Settings Step 2 Set baud rate and communication address by following instructions in Table 4 8 Table 4 8 Ba...

Page 147: ... Set according to the actual plan Step 3 Tap Submit Step 4 On the home screen choose Settings Comm Settings Modbus Settings Step 5 Set parameters for Modbus TCP by following instructions Table 4 10 Modbus TCP parameter settings Parameter Setting Setting Method Link mode Server Client Server and client If you set Link mode to Server the smart cooling product as a server supports two client connecti...

Page 148: ...mmunications Parameters SNMP Protocol Context To set communications parameters log in as the admin user This section is suitable only for SNMP Skip this section if you use Modbus Record the values entered in this section They will be used when you access a smart cooling product to an EMS element management system One smart cooling product supports concurrent access of up to 6 EMSs through SNMP Pro...

Page 149: ... the text box after Read Community as shown in Figure 4 7 Set Read Community as planned tap and then tap Submit Figure 4 7 Setting read community 2 Tap the text box after Write Community as shown in Figure 4 8 Set Write Community as planned tap and then tap Submit Figure 4 8 Setting write community Step 4 Add an SNMPv3 user 1 Tap Add under SNMP V3 2 Enter a planned value for User Name select value...

Page 150: ...igure 4 9 Setting the protocol type Passwords of an authentication protocol and proprietary protocol must comply with the following policies The password must consist of 8 15 characters and contain at least two types of characters among uppercase letters A Z lowercase letters a z and digits 0 9 A password must be different from the corresponding user name or inverted user name A password must not ...

Page 151: ...uawei Technologies Co Ltd 143 Figure 4 10 Setting an SHA password 4 Set AES Password and Confirm Password as planned and tap as shown in Figure 4 11 Figure 4 11 Setting an AES password 5 Tap Submit Step 5 Tap the text box after SNMP Port as shown in Figure 4 12 Set SNMP Port to the actual port number tap and then tap Submit ...

Page 152: ...Tap Next Page Step 7 Set SNMP trap parameters 1 Tap Add under SNMP Trap 2 Set Trap Address as planned and Trap Port to the actual port number Trap Port is set to null by default 3 Select the SNMP Version If an SNMPv3 user is configured it is recommended that SNMP Version be set to SNMPv3 4 If SNMP Version is set to SNMPv3 select an SNMPv3 user name and then tap as shown in Figure 4 13 Figure 4 13 ...

Page 153: ...re 4 14 shows successful file export Before using a USB flash drive ensure that its data has been scanned by antivirus software and is secure Figure 4 14 Exporting the MIB file successfully 4 4 5 Optional Setting WIFI Parameters Prerequisites After connecting the WIFI module of the USB interface to the USB port of the smart cooling product display WIFI Settings is enabled to be set Procedure Step ...

Page 154: ...nnect to the WiFi When you enable the WiFi function for the first time you need to set a password the WiFi has no preset password Enable WiFi Enable the WiFi function The default status is Disable Step 3 Tap Submit End 4 5 Startup Download the Service Expert app from Huawei app store and runs on Android Apply for permission after downloading the app Step 1 Tap Start on the home screen of the ACC I...

Page 155: ...e 4 17 is displayed tap Confirm to start the smart cooling product Figure 4 17 Startup Step 2 Select Offline Boot or Online Boot as required on the Service Expert app for initial startup verification The Service Expert app can be downloaded from Huawei app store and runs on Android User interfaces displayed in this document correspond to the APP software version V100R001C00B043T007 and are for ref...

Page 156: ...uct Then enter the password on the home screen of the ACC to start the smart cooling product For online boot activate the startup password on the mobile phone app to start the smart cooling product If the initial startup verification is passed startup verification is not required afterwards After factory settings are restored re verification for startup is required End Offline Boot Step 1 Open the...

Page 157: ... Chilled Water Smart Cooling Product User Manual 4 Commissioning Issue 06 2020 01 13 Copyright Huawei Technologies Co Ltd 149 Figure 4 18 Offline boot Step 3 Tap Offline Activation and the screen shown in Figure 4 19 is displayed ...

Page 158: ...able on the home screen of the ACC shown in Figure 4 15 Tap Generate PWD to generate a startup password If startup verification fails when you do not enter the password within 5 min or the password you enter is incorrect the generated password will be invalid for the sake of security The initial startup verification fails you need to generate a new startup password Step 5 Tap Password on the home ...

Page 159: ... Settings Comm Settings WIFI Settings on the home screen of the ACC Then set WiFi parameters and enable the WiFi function Step 3 Connect the mobile phone to the smart cooling product WiFi and ensure proper communications between the mobile phone app and the smart cooling product Step 4 Open the Service Expert app Step 5 Tap StartUp on the home screen of the app and the screen shown in Figure 4 20 ...

Page 160: ...the LCD Table 4 12 Parameter description Parameter Setting Method Site Select the site as required Device Type Select the device type that needs to be connected Select NetCol8000 C in this situation Link Enable the connection between the device and the WiFi network IP Port and devAddr Enter the values as planned For details see values on the Modbus settings screen Step 6 Tap Login after the parame...

Page 161: ...8 Tap OK and follow instructions as prompted on the screen until the success message for the startup is displayed on the screen End 4 6 Startup Wizard Context The startup wizard allows for commissioning of components such as the fan electric heater and chilled water valve It also supports component automatic operation and automatic device checking and can output commissioning report ...

Page 162: ...d due to a fault clear the alarm and then perform wizard commissioning again Tapping No or Exit submission timeout and system exception all result in commissioning failures Choose Maint Wizard Startup to enter the Wizard Startup screen for new commissioning Procedure Step 1 On the home screen choose Maint Wizard Startup as shown in Figure 4 22 Figure 4 22 Startup wizard For the initial startup wiz...

Page 163: ...ning items If the system is not configured with the electric heater and humidifier components the electric heater and humidifier commissioning items will not appear on the screen If the heating function and humidification function are disabled you cannot select the electric heater and humidifier items All the items are selected by default if you first enter the screen where you select commissionin...

Page 164: ...mandatory After commissioning for a component succeeds the system automatically performs commissioning for the next component you selected If commissioning fails startup wizard ends Step 6 View the commissioning result Figure 4 26 is displayed if component commissioning succeeds Figure 4 26 Commissioning successfully Figure 4 27 is displayed if component commissioning fails which ends startup wiza...

Page 165: ...echnologies Co Ltd 157 Figure 4 27 Commissioning unsuccessfully If commissioning fails tap Commissioning failed in Figure 4 27 to view the details as shown in Figure 4 28 Figure 4 28 Details of failure End 4 7 Optional Power off Context In shutdown mode the Shutdown button is green unavailable and the Start button is gray available ...

Page 166: ...er switch QF2 Step 4 Optional If the smart cooling product needs to be maintained in power off mode or long term power off switch off the smart cooling product circuit breaker on PDC If the NetCol8000 C will be idle for a long time ensure that the circulation water inside the system has a temperature no lower than 3 C or has used antifreeze liquid otherwise the heat exchanging pipes of the smart c...

Page 167: ...bottom plate or it has been cleaned The needle valve plug is secured torque of 0 45 0 05 N m and valve bonnet is tightened Passed Failed The foreign matter inside the water pan and bottom plate is cleaned up Passed Failed The air filter is correctly installed according to the air flow direction on the frame Passed Failed Check that the chilled water valve is closed Passed Failed ...

Page 168: ...the IP address subnet mask and default gateway Step 3 Configure the PC IP address and the smart cooling product IP address in the same network segment If the smart cooling product IP address is 192 168 0 10 subnet mask is 255 255 255 0 and default gateway is 192 168 0 1 set the PC IP address to 192 168 0 11 subnet mask to 255 255 255 0 and default gateway to 192 168 0 1 Step 4 Set LAN parameters I...

Page 169: ...ng Product User Manual 5 WebUI Issue 06 2020 01 13 Copyright Huawei Technologies Co Ltd 161 Figure 5 1 Setting internet options 3 Optional Click the Connections tab and select LAN settings 4 Optional Under Proxy server clear Use a proxy server for your LAN ...

Page 170: ...right Huawei Technologies Co Ltd 162 Figure 5 2 Setting proxy server 5 Click OK Step 5 Log in to the WebUI of the smart cooling product 1 Enter https IP address such as IP address https 192 168 0 10 in the address box of the browser and then press Enter to enter the WebUI login page Figure 5 3 WebUI login page ...

Page 171: ... website not recommended Figure 5 4 Problem of the security certificate 2 On the login page enter the preset user name admin and preset password Changeme select the language and click Log In Change the password after your first login An account is logged out due to timeout if no operation is performed within 10 minutes after system login End 5 2 WebUI Introduction For data transmission security th...

Page 172: ...01 13 Copyright Huawei Technologies Co Ltd 164 Figure 5 5 Home page Table 5 1 Functions provided by the home page Tab Functions Plan View View the temperature and humidity control type and setpoints View cooling output fan output humidifying output and heating output Active Alarms Query active alarms ...

Page 173: ... actual menu hierarchy prevails WebUI Common Functions Table 5 2 WebUI common functions Menu Functions Monitoring Monitor the device running information in real time set device running parameters and control the device running For example set temperature and humidity parameters enable temperature and humidity sensor set the mode of heating and humidifying and set fan control type ...

Page 174: ...y certificate Set the time zone time and date Set the IP address SNMP and NetEco network parameters Set the Modbus network parameters Set the SNMP network parameters Maintenance Upgrade the software of the smart cooling product and its sub components Query the version and e labels Query and export fault information Manage users for example adding and deleting a user Import and export configuration...

Page 175: ...Huawei equipment must receive thorough training understand all necessary safety precautions and be able to correctly perform all operations Pay attention to the safety symbols on the equipment and all safety instructions in this document The safety precautions given in this document do not cover all safety precautions Huawei will not be liable for any consequence caused by violation of the safety ...

Page 176: ...or fan generates no abnormal sound during operation such as metal friction sound and harsh noises Clear foreign matter and check that screws securing the fan are tightened Check that the screws on the indoor fan are not loose or distorted Tighten or replace the screws Water pan water pan is not blocked Clean the water pan Wet film humidifier Check that the humidifier float has no scale Clean up th...

Page 177: ... system is available skip this item Rectify the fault or contact Huawei technical support Electric heater Check that the electric heater is fixed reliably Retighten the electric heater and its switch Check that the electric heater surfaces are not eroded Replace the electric heater Wet film humidifier Check that the valve on the water inlet pipe for the wet film humidifier is open When the NetCol8...

Page 178: ...e water leakage sensor is securely installed N A Differential pressure sensor Check that the pressure inlet tube is not blocked or over bent Reinstall the pressure inlet tube Check that cables to the differential pressure sensor are securely connected Reconnect the cables Motorized Damper Gravi ty Damper Applicable to motorized damper Check that cables to the actuator are securely connected Reconn...

Page 179: ... version Alar m ID Alarm Name Alarm Severi ty Impact Possible Cause Solution a001 Return air 1 2 3 4 temp invalid Major An alarm is triggered 1 The cables to the temperature sensor are loose or damaged 2 The temperature sensor is faulty 1 Check the cables to the temperature sensor 2 Maintain or replace the temperature sensor Fresh air temperature invalid Return air damper temp invalid a002 Return ...

Page 180: ...dity sensors are located in inappropriate positions 2 The thermal load power is low 3 The ambient temperature is below the lower threshold 4 The low temperature alarm threshold is inappropriate 5 The value detected by the temperature sensor or temperature and humidity sensor is different from the actual value 6 The air filters are blocked 7 The chilled water valve is stuck or faulty 1 Adjust the p...

Page 181: ...Major An alarm is triggered The accumulated runtime of the fan exceeds the alarm threshold Maintain or replace the indoor fan and clear the accumulated runtime a20a Indoor fan 1 2 3 4 drive overheated Critical N A The indoor fan is faulty Maintain or replace the indoor fan a20b Indoor fan 1 2 3 4 drive open phase Critical N A 1 The cables to the indoor fan are loose or damaged 2 The indoor fan is ...

Page 182: ...iately 4 The pressure inlet tube of the differential pressure switch is blocked or disconnected 5 The cables to the differential press switch are loose or damaged 6 The motorized damper is faulty 7 Applicable to motorized damper The motorized damper is disabled 1 Maintain or replace the air filters 2 Replace the differential press switch 3 Adjust the threshold of the differential press switch 4 Ma...

Page 183: ...n 1 The power supply voltage is below the lower threshold 2 The cables to the SPD three phase detection board are loose or damaged 3 The SPD three phase detection board is faulty 1 Check the power supply voltage 2 Check the cables to the SPD three phase detection board 3 Replace the SPD three phase detection board a032 Power BC undervoltag e Major An alarm is triggered and the system is shut down ...

Page 184: ...point a042 Remote shutdown alarm Critical An alarm is triggered and the system is shut down 1 The remote shutdown dry contact is triggered 2 The cables to the remote shutdown dry contact are loose or damaged 1 Check the status of the remote shutdown dry contact 2 Check the cables to the remote shutdown dry contact a043 Floor water overflow Critical An alarm is triggered and the system is shut down...

Page 185: ...orresponds to the temperature and humidity control type for the master unit on this smart cooling product a048 Supply air high temperature alarm Critical An alarm is triggered 1 The temperature sensors or temperature and humidity sensors are located in inappropriate positions 2 The thermal load power is high or the cooling capacity is insufficient 3 The ambient temperature exceeds the upper thresh...

Page 186: ... replace the air filters 7 Maintain or replace the faulty CW valve a050 Cold aisle high temperature alarm Critical An alarm is triggered 1 The temperature sensors or temperature and humidity sensors are located in inappropriate positions 2 The thermal load power is high or the cooling capacity is insufficient 3 The ambient temperature exceeds the upper threshold 4 The high temperature alarm thresh...

Page 187: ...rature and humidity sensor are loose or damaged 2 The temperature and humidity sensor is faulty 1 Check the cables to the temperature sensor 2 Maintain or replace the temperature and humidity sensor a080 CW valve x exceed runtime alarm Warnin g An alarm is triggered The accumulated runtime of the chilled water valve exceeds the alarm threshold Maintain or replace the chilled water valve and clear ...

Page 188: ... Check whether other causes exist if the alarm persists in a long time after startup 3 Measure the ambient temperature 4 Adjust the low temperature alarm threshold 5 Calibrate or replace the temperature sensor or temperature and humidity sensor 6 Maintain or replace the air filters 7 Maintain or replace the chilled water valve a093 High humidity Warnin g An alarm is triggered 1 The load is low 2 T...

Page 189: ...erature 1 Check the temperature of supplied chilled water 2 Adjust the supply water high temperature alarm threshold 3 Calibrate or replace the supply water temperature sensor a098 Supply wate r LT Warnin g An alarm is triggered 1 The temperature of chilled water is lower than the supply water low temperature alarm threshold 2 The supply water low temperature alarm threshold is inappropriate 3 The...

Page 190: ...e temperature sensor a109 Cold aisle humid invalid Major An alarm is triggered 1 The cables to the temperature and humidity sensor are loose or damaged 2 The temperature and humidity sensor is faulty 1 Check the cables to the temperature sensor 2 Maintain or replace the temperature and humidity sensor a110 Cold aisle temp humid board comm failed Major An alarm is triggered 1 The cables to the T H ...

Page 191: ...ve unit is offline 1 Modify teamwork settings for slave units to enable slave units to join the teamwork group 2 Set total number of units on the master unit to the actual number of units 3 Check the cable connection and running conditions of the slave units a118 Main power off Major N A 1 The primary power supply is faulty 2 The cables to the primary power supply are loose or damaged 1 Check the ...

Page 192: ...red and the humidifier is shut down 1 The water pump inlet is blocked 2 Cables to the humidifier pump are loose or damaged 3 The humidifier pump is faulty 4 The water pump races due to a liquid level detection fault 5 The humidifier pump is blocked 1 Clear the blockage from the water pump inlet 2 Verify that the humidifier pump cable is properly connected 3 Replace the pump if it is faulty 4 Recti...

Page 193: ...m a193 Supply air Pressure diff invalid Major An alarm is triggered 1 The differential pressure sensor cable is not properly connected 2 The pressure tube for the differential pressure sensor is reversely connected 3 The differential pressure sensor is faulty 1 Check the cable connection to the differential pressure sensor 2 Check the tube connection to the differential pressure sensor 3 Maintain ...

Page 194: ...excessive chilled water valve openness 4 Check the pressure and temperature of chilled water 5 Maintain or replace the chilled water valve a207 Indoor fan unify interrupt Major An alarm is triggered 1 All sensors for controlling the indoor fan are disabled 2 All cablesto the sensors forcontrolling the indoor fan are loose or damaged 3 All sensors for controlling the indoor fan are faulty 1 Enable ...

Page 195: ...ction board are loose or damaged 3 The backup SPD three phase detection board is faulty 1 Check the backup power supply voltage 2 Check the cables to the backup SPD three phase detection board 3 Replace the backup SPD three phase detection board a216 Standby power overfreq Major N A 1 The power supply frequency is too high 2 The SPD three phase test board is faulty 1 Check the backup power supply ...

Page 196: ...rm Major N A 1 The control cable to the return air damper is not properly connected 2 The return air damper is faulty 1 Check the control cable connection to the return air damper 2 Maintain or replace the return air damper a229 Return air damper feedback fault Major N A 1 The control cable to the return air damper is not properly connected 2 The return air damper is faulty 1 Check the control cab...

Page 197: ... Adjust the threshold set on the differential pressure switch 4 Dredge or replace the pressure tube 5 Check the cable connection to the differential pressure switch of the fresh air unit 6 Maintain or replace the direct free cooling plenum 7 Enable the direct free cooling plenum Table 6 5 Alarm description V200R002 software version Alarm ID Alarm Name Alarm Severity Impact Possible Cause Solution ...

Page 198: ...e or damaged 2 The temperature sensor is faulty 1 Check the cables to the temperature sensor 2 Maintain or replace the temperature sensor A002 01 Return air high temperature alarm Critical N A 1 The temperature sensors or temperature and humidity sensors are located in inappropriat e positions 2 The thermal load power is high or the cooling capacity is insufficient 3 The ambient temperature exceed...

Page 199: ... pressure and temperature of chilled water 7 Maintain or replace the chilled water valve A003 01 Return air low temperature alarm Warning N A 1 The temperature sensors or temperature and humidity sensors are located in inappropriat e positions 2 The thermal load power is low 3 The ambient temperature is below the lower threshold 4 The low temperature alarm threshold is inappropriat e 5 The value d...

Page 200: ...omm failed Major N A 1 The cables to the temperature and humidity sensor are loose or damaged 2 The DIP switch of the temperature and humidity sensor is set incorrectly 3 The temperature and humidity sensor is faulty 4 The communicati ons port of the main control board is faulty 1 Check the cables to the temperature and humidity sensor 2 Set the DIP switch of the temperature and humidity sensor co...

Page 201: ...aintain or replace the main control board Return air 3 temp humid sensor comm failed Major N A 1 The cables to the temperature and humidity sensor are loose or damaged 2 The DIP switch of the temperature and humidity sensor is set incorrectly 3 The temperature and humidity sensor is faulty 4 The communicati ons port of the main control board is faulty 1 Check the cables to the temperature and humi...

Page 202: ...IP switch of the temperature and humidity sensor correctly 3 Maintain or replace the temperature and humidity sensor 4 Maintain or replace the main control board Cold aisle 2 temp humid sensor comm failed Major N A 1 The cables to the temperature and humidity sensor are loose or damaged 2 The DIP switch of the temperature and humidity sensor is set incorrectly 3 The temperature and humidity sensor...

Page 203: ...f the main control board is faulty 1 Check the cables to the temperature and humidity sensor 2 Set the DIP switch of the temperature and humidity sensor correctly 3 Maintain or replace the temperature and humidity sensor 4 Maintain or replace the main control board Hot aisle 1 temp humid sensor comm failed Major N A 1 The cables to the temperature and humidity sensor are loose or damaged 2 The DIP...

Page 204: ...ctly 3 The temperature and humidity sensor is faulty 4 The communicati ons port of the main control board is faulty 1 Check the cables to the temperature and humidity sensor 2 Set the DIP switch of the temperature and humidity sensor correctly 3 Maintain or replace the temperature and humidity sensor 4 Maintain or replace the main control board Hot aisle 3 temp humid sensor comm failed Major N A 1...

Page 205: ...or are loose or damaged 2 The DIP switch of the temperature and humidity sensor is set incorrectly 3 The temperature and humidity sensor is faulty 4 The communicati ons port of the main control board is faulty 1 Check the cables to the temperature and humidity sensor 2 Set the DIP switch of the temperature and humidity sensor correctly 3 Maintain or replace the temperature and humidity sensor 4 Ma...

Page 206: ...1 temp humid sensor comm failed Major N A 1 The cables to the temperature and humidity sensor are loose or damaged 2 The DIP switch of the temperature and humidity sensor is set incorrectly 3 The temperature and humidity sensor is faulty 4 The communicati ons port of the main control board is faulty 1 Check the cables to the temperature and humidity sensor 2 Set the DIP switch of the temperature a...

Page 207: ...Warning An alarm is triggered 1 The accumulated runtime of the indoor fan exceeds the alarm threshold 1 Maintain or replace the indoor fan and clear the accumulated runtime A023 01 Electric heater 1 fault Major An alarm is triggered and the electric heater is shut down 1 The cables to the temperature switch are loose or damaged 2 The temperature switch is faulty 3 The manual reset switch is not re...

Page 208: ...ic heater exceeds the alarm threshold 1 Maintain or replace the electric heater and clear the accumulated runtime A025 01 Air filter blocked alarm Warning An alarm is triggered and the electric heater and humidifier of the smart cooling product are shut down 1 Air filters are blocked or dirty 2 The differential pressure switch is faulty 3 The threshold set for the differential pressure switch is i...

Page 209: ...lters are blocked or dirty 2 The differential pressure switch is faulty 3 The threshold set for the differential pressure switch is inappropriat e 4 The pressure tube of the differential pressure switch is blocked or disconnected 5 The cables to the differential pressure switch are loose or damaged 6 The air damper for the air filter is faulty 7 The air damper for the air filter is not 1 Maintain ...

Page 210: ...utdown alarm Major An alarm is triggered and the smart cooling product is shut down 1 The remote shutdown dry contact is triggered 2 The cables to the remote shutdown dry contact are loose or damaged 1 Check the status of the remote shutdown dry contact 2 Check the cables to the remote shutdown dry contact A044 01 Smoke sensor alarm Critical An alarm is triggered and the smart cooling product is s...

Page 211: ...al value 6 The chilled water flow is insufficient or the supply water temperature is high 7 The chilled water valve is stuck or faulty humidity sensors 2 Add smart cooling products or contact Huawei technical support 3 Measure the ambient temperature Check whether other causes exist if the alarm persists in a long time after startup 4 Adjust the high temperature alarm threshold 5 Calibrate or repl...

Page 212: ...led water valve is stuck or faulty sensors 2 Contact Huawei technical support 3 Measure the ambient temperature Check whether other causes exist if the alarm persists in a long time after startup 4 Adjust the low temperature alarm threshold 5 Calibrate or replace the temperature sensor or temperature and humidity sensor 6 Maintain or replace the air filters 7 Maintain or replace the chilled water ...

Page 213: ...hilled water valve is stuck or faulty support 3 Measure the ambient temperature Check whether other causes exist if the alarm persists in a long time after startup 4 Adjust the high temperature alarm threshold 5 Calibrate or replace the temperature sensor or temperature and humidity sensor 6 Check the pressure and temperature of chilled water 7 Maintain or replace the chilled water valve A051 01 H...

Page 214: ... or faulty 3 Measure the ambient temperature Check whether other causes exist if the alarm persists in a long time after startup 4 Adjust the high temperature alarm threshold 5 Calibrate or replace the temperature sensor or temperature and humidity sensor 6 Check the pressure and temperature of chilled water 7 Maintain or replace the chilled water valve A077 02 Indoor fan 1 fault Major An alarm is...

Page 215: ...ggered and the corresponding fan is shut down The indoor fan is faulty Maintain or replace the indoor fan Indoor fan 3 fault Major An alarm is triggered and the corresponding fan is shut down The indoor fan is faulty Maintain or replace the indoor fan Indoor fan 4 fault Major An alarm is triggered and the corresponding fan is shut down The indoor fan is faulty Maintain or replace the indoor fan A0...

Page 216: ... faulty Maintain or replace the indoor fan Indoor fan 4 fault Major An alarm is triggered The indoor fan is faulty Maintain or replace the indoor fan A077 20 Indoor fan 1 fault Major An alarm is triggered and the corresponding fan is shut down 1 The indoor fan ground cable is loose or damaged 2 The indoor fan is faulty 1 Check the ground cable connection to the indoor fan 2 Maintain or replace the...

Page 217: ...eshold Maintain or replace the chilled water valve and clear the accumulated runtime A091 01 Cold aisle low temperature alarm Warning N A 1 The temperature sensors or temperature and humidity sensors are located in inappropriat e positions 2 The thermal load power is low 3 The ambient temperature is below the lower threshold 4 The low temperature alarm threshold is inappropriat e 5 The value detec...

Page 218: ...inappropriat e positions 2 The thermal load power is low 3 The ambient temperature is below the lower threshold 4 The low temperature alarm threshold is inappropriat e 5 The value detected by the temperature sensor or temperature and humidity sensor is different from the actual value 6 The air filters are blocked 7 The chilled water valve 1 Adjust the positions of the temperature sensors or temper...

Page 219: ...e high humidity alarm threshold is inappropriat e 5 The value detected by the temperature and humidity sensor is different from the actual value 1 Contact Huawei technical support 2 Measure the ambient humidity 3 Adjust the position of the temperature and humidity sensor 4 Adjust the high humidity alarm threshold 5 Calibrate or replace the temperature and humidity sensors A094 01 Low humidity alar...

Page 220: ...arm is triggered 1 The temperature of chilled water is higher than the supply water high temperature alarm threshold 2 The supply water high temperature alarm threshold is inappropriat e 3 The supply and return water pipes are reversely installed 4 The supply and return water sensors are reversely installed 5 The supply water temperature displayed is different from the actual temperature 1 Check t...

Page 221: ...water 2 Adjust the supply water low temperature alarm threshold 3 Calibrate or replace the supply water temperature sensor A105 01 Indoor fan failure alarm Critical An alarm is triggered 1 The indoor fan is faulty 2 The cables to the indoor fan are loose or damaged 3 The power supply to the indoor fan is abnormal 1 Maintain or replace the indoor fan 2 Check the cables to the indoor fan 3 Check the...

Page 222: ... fan 2 Maintain or replace the indoor fan Indoor fan 3 communication failed Major An alarm is triggered 1 The indoor fan communicati ons cable is loose or damaged 2 The indoor fan is faulty 1 Check the communicati ons cable connection to the indoor fan 2 Maintain or replace the indoor fan Indoor fan 4 communication failed Major An alarm is triggered 1 The indoor fan communicati ons cable is loose ...

Page 223: ...led Major N A 1 The communicati ons cable is not connected properly 2 The SPD and voltage detection board is faulty 3 The communicati ons port of the main control board is faulty 1 Check the communicati ons cable 2 Replace the SPD and voltage detection board 3 Maintain or replace the main control board A174 01 SPD function failure Major N A The SPD and voltage detection board is faulty Replace the...

Page 224: ...rm threshold Maintain or replace the wet film of the humidifier and clear the accumulated runtime A181 01 Humidifier pump exceed runtime alarm Warning N A The accumulated runtime of the water pump exceeds the alarm threshold Maintain or replace the water pump and clear the accumulated runtime A182 01 Water supply abnormal alarm Major An alarm is triggered and the humidifier is shut down 1 The wate...

Page 225: ...ential pressure sensor is faulty 1 Check the cable connection to the differential pressure sensor 2 Check the tube connection to the differential pressure sensor 3 Maintain or replace the differential pressure sensor A208 01 Indoor fan 1 blocked alarm Major An alarm is triggered and the corresponding fan is shut down 1 The indoor fan blade is stuck 2 The indoor fan is faulty 1 Clear the blockage 2...

Page 226: ...he smart cooling product via the LCD or NetEco A26B 01 Indoor fan 1 power supply abnormal Major An alarm is triggered and the corresponding fan is shut down 1 The indoor fan ground cable is loose or damaged 2 The indoor fan is faulty 1 Check the ground cable connection to the indoor fan 2 Maintain or replace the indoor fan Indoor fan 2 power supply abnormal Major An alarm is triggered and the corr...

Page 227: ...n is faulty Maintain or replace the indoor fan Indoor fan 4 power supply abnormal Major An alarm is triggered and the corresponding fan is shut down The indoor fan is faulty Maintain or replace the indoor fan A26B 04 Indoor fan 1 power supply abnormal Major An alarm is triggered and the corresponding fan is shut down 1 The cables to the indoor fan are loose or damaged 2 The indoor fan is faulty 1 ...

Page 228: ...he main control board is set incorrectly for teamwork 2 The teamwork cables are loose or damaged 3 Any two smart cooling product units have the same address 4 No smart cooling product unit is configured as the master unit 5 The master unit is powered off 6 The software versions of the smart cooling products in the group are inconsistent 7 The sensor that corresponds to the temperature and humidity...

Page 229: ...s 2 The number of smart cooling product units is incorrectly set on the master unit 3 A slave unit is offline 1 Modify teamwork settings for slave units to enable slave units to join the teamwork group 2 Set the total number of units on the master unit to the actual number of units 3 Check the teamwork cable connection and running status of the slave units A273 01 Teamwork function abnormal alarm ...

Page 230: ...ve 2 Maintain or replace the chilled water valve A279 01 Motorized damper fault Critical An alarm is triggered and the smart cooling product is shut down 1 The control cable to the air damper is loose or damaged 2 The air damper is faulty 1 Check the control cable connection to the air damper 2 Maintain or replace the air damper A279 02 Motorized damper fault Critical An alarm is triggered The air...

Page 231: ...ling function is off 1 The control cable to the air damper is loose or damaged 2 The air damper is faulty 1 Check the control cable connection to the air damper 2 Maintain or replace the air damper Return air damper fault Critical An alarm is triggered 1 The control cable to the air damper is loose or damaged 2 The air damper is faulty 1 Check the control cable connection to the air damper 2 Maint...

Page 232: ...midity sensor is faulty 1 Check the cables to the temperature and humidity sensor 2 Maintain or replace the temperature and humidity sensor Return air 4 temp humid sensor fault Major N A 1 The cables to the temperature and humidity sensor are loose or damaged 2 The temperature and humidity sensor is faulty 1 Check the cables to the temperature and humidity sensor 2 Maintain or replace the temperat...

Page 233: ...d sensor fault Major N A 1 The cables to the temperature and humidity sensor are loose or damaged 2 The temperature and humidity sensor is faulty 1 Check the cables to the temperature and humidity sensor 2 Maintain or replace the temperature and humidity sensor Hot aisle 1 temp humid sensor fault Major N A 1 The cables to the temperature and humidity sensor are loose or damaged 2 The temperature a...

Page 234: ...idity sensor 2 Maintain or replace the temperature and humidity sensor Fresh air 1 temp humid sensor fault Major N A 1 The cables to the temperature and humidity sensor are loose or damaged 2 The temperature and humidity sensor is faulty 1 Check the cables to the temperature and humidity sensor 2 Maintain or replace the temperature and humidity sensor Return air damper 1 temp humid sensor fault Ma...

Page 235: ...nd humidity sensor are loose or damaged 2 The temperature and humidity sensor is faulty 1 Check the cables to the temperature and humidity sensor 2 Maintain or replace the temperature and humidity sensor Return air 3 temp humid sensor fault Major N A 1 The cables to the temperature and humidity sensor are loose or damaged 2 The temperature and humidity sensor is faulty 1 Check the cables to the te...

Page 236: ...ace the temperature and humidity sensor Cold aisle 2 temp humid sensor fault Major N A 1 The cables to the temperature and humidity sensor are loose or damaged 2 The temperature and humidity sensor is faulty 1 Check the cables to the temperature and humidity sensor 2 Maintain or replace the temperature and humidity sensor Cold aisle 3 temp humid sensor fault Major N A 1 The cables to the temperatu...

Page 237: ...d 2 The temperature and humidity sensor is faulty 1 Check the cables to the temperature and humidity sensor 2 Maintain or replace the temperature and humidity sensor Hot aisle 3 temp humid sensor fault Major N A 1 The cables to the temperature and humidity sensor are loose or damaged 2 The temperature and humidity sensor is faulty 1 Check the cables to the temperature and humidity sensor 2 Maintai...

Page 238: ...eplace the temperature and humidity sensor A27F 01 Water overflow alarm Critical An alarm is triggered and all the parts expect for indoor fans are shut down 1 The water overflow sensor detects water or the sensor is faulty 2 The drainage filter is blocked 3 The drainpipe is blocked 4 The drainpipe is blocked 5 The high liquid level sensor is faulty 1 While configuring the water overflow sensor ch...

Page 239: ...ower or single power is supplied 1 The power supply frequency is below the lower threshold 2 The SPD and voltage detection board is faulty 1 Check that the power supply voltage is within the operating range 2 Replace the SPD and voltage detection board Backup power frequency abnormal Major An alarm is triggered and the smart cooling product is shut down when the standby power is supplied 1 The pow...

Page 240: ... and the smart cooling product is shut down when the main power or single power is supplied 1 The power supply voltage is below the lower threshold 2 The cables to the SPD and voltage detection board are loose or damaged 3 The SPD and voltage detection board is faulty 1 Check that the power supply voltage is within the operating range 2 Check the cable connection to the SPD and voltage detection b...

Page 241: ...o the SPD and voltage detection board 3 Replace the SPD and voltage detection board Backup power voltage abnormal Major An alarm is triggered and the smart cooling product is shut down when the standby power is supplied 1 The power supply voltage is below the lower threshold 2 The cables to the SPD and voltage detection board are loose or damaged 3 The SPD and voltage detection board is faulty 1 C...

Page 242: ...nd voltage detection board is faulty 1 Check that the power supply voltage is within the operating range 2 Check the cable connection to the SPD and voltage detection board 3 Replace the SPD and voltage detection board A281 20 Power voltage abnormal Major An alarm is triggered and the smart cooling product is shut down when the main power or single power is supplied 1 The power supply voltage exce...

Page 243: ... standby power is supplied 1 The power supply voltage exceeds the upper threshold 2 The SPD and voltage detection board is faulty 1 Check that the power supply voltage is within the operating range 2 Replace the SPD and voltage detection board A281 80 Power voltage abnormal Major An alarm is triggered and the smart cooling product is shut down when the main power or single power is supplied 1 The ...

Page 244: ...ltage detection board 3 Check the cable connection to the primary power supply and compressor drive Backup power phase sequence abnormal Major An alarm is triggered and the smart cooling product is shut down when the standby power is supplied 1 The power grid is unstable 2 The SPD and voltage detection board may be faulty if it is configured 3 The cables to the primary power supply or compressor d...

Page 245: ... Replace the indoor fan The northbound communication is abnormal The northbound communications cable is incorrectly connected Check that the northbound communications cable is connected to the northbound communications port on the main control module The ambient temperature and humidity sensor cannot detect the humidity and temperature Parameter settings on the controller are incorrect Check that ...

Page 246: ... are not over bent and the drainpipe connectors are securely installed The pipes leak Check the pipes and weld the pipe or fasten related bolts if the pipes leak The water inlet solenoid valve cannot be closed Replace the water inlet solenoid valve Drainage capacity of the NetCol8000 C decreases The drainpipe is bend or trapped Check that drainpipes are free from bends and traps Ensure that the he...

Page 247: ...pressure sensor is faulty Replace the differential pressure sensor The pressure tube is blocked or over bent Replace the pressure tube or route the pressure tube again The motorized damper does not operate The actuator cable is not properly connected Check and reconnect the cable to the motorized damper actuator The actuator is faulty and does not operate Replace the actuator The motorized damper ...

Page 248: ... Technologies Co Ltd 240 Procedure Step 1 Open the cabinet front door Each module has four filters Install the air filter based on the air flow direction indicated on the frame Step 2 Remove the sheet metal fastener from the air filter using a Phillips screwdriver hold the handle and pull out the air filter Figure 6 1 Removing an upflow air filter ...

Page 249: ...ilter Step 3 Install a new air filter by performing Step 2 to Step 1 Step 4 On the home screen choose Maint Performance Maint to enter the performance maintenance screen and clear the runtime of the air filter End 6 7 2 Replacing the Wet Film Humidifier Context Tool Phillips screwdriver Procedure Step 1 Choose Settings System Settings System Control and choose Humid Disable Step 2 Open the cabinet...

Page 250: ...aintenance Issue 06 2020 01 13 Copyright Huawei Technologies Co Ltd 242 Figure 6 3 Removing an upflow wet film humidifier Figure 6 4 Removing a downflow wet film humidifier Step 3 Remove the sheet metal fastener using a Phillips screwdriver Step 4 Hold the release sleeve and remove the water inlet pipe ...

Page 251: ...formance Maint screen and clear the runtime of the wet film humidifier Step 8 Choose Settings System Settings System Control Humid Action End 6 7 3 Replacing the Differential Pressure Switch Context Tool Phillips screwdriver Procedure Step 1 Tap Shutdown on the LCD home screen Exercise caution because the device is still energized when it is shut down over the LCD Step 2 Open the front door and tu...

Page 252: ...4 Figure 6 5 Removing an upflow differential pressure switch Figure 6 6 Removing a downflow differential pressure switch Step 5 Remove the screw from the differential pressure switch cover and take out the cable Step 6 Set the new differential pressure switch to 500 Pa install a new differential pressure switch by performing Step 5 to Step 3 and then close the front door ...

Page 253: ...CD home screen choose Settings Alarm Settings Main Board and check whether Air filter blocked is set to Allow Step 8 Choose Maint Diagnostic Mode Enter and set Indoor fan to 100 Step 9 Block almost 100 air volume at the return air side using a plastic foam board or baffle plate and check whether the Air filter blocked alarm is generated If the alarm is generated the differential pressure switch wo...

Page 254: ... 2020 01 13 Copyright Huawei Technologies Co Ltd 246 Figure 6 7 Replacing an upflow T H sensor Figure 6 8 Replacing a downflow T H sensor Before installing the new T H sensor ensure that its DIP switch setting is consistent with that on the original T H sensor That is the first toggle switch is ON and the others are OFF ...

Page 255: ...except 52272560 and 52272562 Tools diagonal pliers cable ties Procedure Step 1 Tap Shutdown on the LCD home screen Step 2 Open the front door and turn off the general switch For a device that has two power inputs turn off the active power switch QF1 and standby power switch QF2 Step 3 Cut off the cable tie on the actuator cable and disconnect the wiring terminals X2 22 X2 25 from the connection bo...

Page 256: ...tuator Step 5 Install a new water valve actuator 1 Optional Use an actuator handle to remove the locating pin from the hole in the new actuator mounting kit as shown in Figure 6 10 Figure 6 10 Removing a locating pin The T port of the water valve body faces left and the connecting plate is fitted in with the screws on the left The handle is kept upwards 2 Rotate the T port of the water valve body ...

Page 257: ... 2 Actuator 3 Connecting plate 4 Actuator handle 3 Install the new water valve actuator by performing Step 5 2 to Step 1 connect the actuator cable and then secure the cable using cable ties End 6 7 6 Replacing the Water Valve Actuator Applicable Only to 52272560 and 52272562 Context Application scope BOM numbers 52272560 and 52272562 Tools diagonal pliers cable ties Procedure Step 1 Tap Shutdown ...

Page 258: ...rewdriver into the hole in front of the actuator and turn the screwdriver in the specified direction to unscrew the actuator as shown by 3 in Figure 6 12 Figure 6 12 Removing the actuator of a chilled water valve Step 6 Install the new water valve actuator by performing Step 5 to Step 1 connect the actuator cable and then secure the cable using cable ties End 6 7 7 Replacing the Chilled Water Valv...

Page 259: ...ter valves for upflow and downflow units is the same After the installation wrap copper pipes reserved for the device with thermal insulation foam The shaft of the new actuator must be installed in the position where the old actuator shaft is installed Step 5 Replace the chilled water valve body Install the chilled water valve in reverse order of removing it and attach thermal insulation foam Step...

Page 260: ...ecurity torx wrench Exercise caution during replacement as the fan is comparably heavy A step ladder 2 m high is required to replace the upflow fan It takes two persons to move the fan 6 7 8 1 Replacing the Fan Upflow Procedure Step 1 Tap Shutdown on the LCD home screen Exercise caution because the device is still energized when it is shut down over the LCD Step 2 Open the front door and turn off ...

Page 261: ...ion and Maintenance Issue 06 2020 01 13 Copyright Huawei Technologies Co Ltd 253 Figure 6 14 Removing the fan maintenance baffle plate Step 3 Remove the fan power cable terminals and signal cable terminals Remove the four screws that secure the fan using a 13 socket wrench and pull out the fan ...

Page 262: ...t Huawei Technologies Co Ltd 254 Figure 6 15 Removing the screws that secure the fan Step 4 After pulling out the fan halfway press the buckle on the left under the fan and pull out the fan completely When the buckle is pressed it takes two persons to hold the fan up to avoid fan dropping Figure 6 17 shows where to hold when moving the fan ...

Page 263: ...Product User Manual 6 System Operation and Maintenance Issue 06 2020 01 13 Copyright Huawei Technologies Co Ltd 255 Figure 6 16 Pressing the fan buckle Figure 6 17 Moving the fan Step 5 Remove the screws that secure the fan bottom plate and support to the fan ...

Page 264: ...ction box Step 6 Remove the connection box cover using a security torx wrench Figure 6 19 Removing a connection box cover Step 7 Open the connection box Hold the area marked by gray in the following figure using a small flat head screwdriver remove the signal cable and power cable shown in the following figure and then remove the screw in the area marked by yellow namely the PE cable using a flat ...

Page 265: ...and clear its alarm Ensure that the indoor fan communication failure alarm to be cleared corresponds to the fan that is being processed Step 10 Tap Repair in the lower left corner The Connect the cable to the communications port on the fan to be repaired and disconnect the cables from the communications ports on other faulty fans message is displayed Then tap Yes The command is triggered successfu...

Page 266: ...ll energized when it is shut down over the LCD Step 2 Open the front door and turn off the general switch For a device that has two power inputs turn off the active power switch QF1 and standby power switch QF2 Then remove the fan maintenance cover using a Phillips screwdriver Figure 6 21 Removing the fan maintenance baffle plate Step 3 Remove screws that secure the fan and the fan support using a...

Page 267: ...ration and Maintenance Issue 06 2020 01 13 Copyright Huawei Technologies Co Ltd 259 Figure 6 22 Removing the screws that secure the fan Step 4 Lift the fan and remove the support beam at the bottom Then rotate the fan to 90 degrees to the bottom and secure the removed beam to the fan bottom ...

Page 268: ...rt Cooling Product User Manual 6 System Operation and Maintenance Issue 06 2020 01 13 Copyright Huawei Technologies Co Ltd 260 Figure 6 23 Turning a fan Figure 6 24 Secure the beam Step 5 Remove the connection box cover using a security torx wrench ...

Page 269: ...61 Figure 6 25 Removing a connection box cover Step 6 Open the connection box Hold the area marked by gray in the following figure using a small flat head screwdriver remove the signal cable and power cable shown in the following figure and then remove the screw in the area marked by yellow namely the PE cable using a flat head screwdriver Figure 6 26 Cable connections ...

Page 270: ...The preceding figure shows fan 2 Step 7 Remove the screws that secure the fan bottom plate and pull the entire fan out of the cabinet As the fan is heavy two persons need to work in collaboration to pull out the fan to avoid personal injury Figure 6 27 Removing the screws that secure the fan bottom plate Step 8 Remove the screws that secure the fan bottom plate to the fan ...

Page 271: ... cooling product Then replace the next fan and clear its alarm Ensure that the indoor fan communication failure alarm to be cleared corresponds to the fan that is being processed Step 11 Tap Repair in the lower left corner The Connect the cable to the communications port on the fan to be repaired and disconnect the cables from the communications ports on other faulty fans message is displayed Then...

Page 272: ...d in the same slot of the faulty PSU Otherwise the smart cooling product may fail to work properly When replacing a main control module remove the cable from the module To replace the main control module download the software and ACC software upgrade guide from Huawei websites and upgrade it on the LCD Procedure Step 1 Tap Shutdown on the LCD home screen Exercise caution because the device is stil...

Page 273: ...om the subrack as shown by 2 in Figure 6 29 When installing a new PSU ensure that the handle is in the lower part of the PSU Step 4 Insert the spare PSU into the corresponding slot of the power distribution subrack and push the latch downwards to lock the PSU End 6 7 10 Replacing the Electric Heater Context Recommended tools and materials protective gloves a Phillips screwdriver water proof glue d...

Page 274: ...ving it to prevent it from dropping 6 7 10 1 Replacing the Electric Heater Upflow Procedure Step 1 Tap Shutdown on the display s home screen Exercise caution because the device is still energized when it is shut down over the display Step 2 Open the front door and turn off the general switch For a device that has two power inputs turn off the active power switch QF1 and standby power switch QF2 Wa...

Page 275: ...System Operation and Maintenance Issue 06 2020 01 13 Copyright Huawei Technologies Co Ltd 267 Figure 6 30 Removing the fan maintenance baffle plate Step 4 Remove the two bolts that secure the electric heater support and take out the support Figure 6 31 Removing an electric heater ...

Page 276: ...eater and check that the heater operates properly Then exit from the diagnostic mode Step 8 On the home screen choose Maint Performance Maint to enter the performance maintenance screen and clear the runtime of the electric heater End 6 7 10 2 Replacing the Electric Heater Downflow Step 1 Tap Shutdown on the display s home screen Exercise caution because the device is still energized when it is sh...

Page 277: ...t Huawei Technologies Co Ltd 269 Figure 6 33 Removing the fan maintenance baffle plate Step 4 Remove the two bolts that secure the electric heater support and take out the support Figure 6 34 Removing an electric heater support Step 5 Remove the four bolts from both ends of the electric heater and take out the electric heater and its cable ...

Page 278: ...xit from the diagnostic mode Step 8 On the home screen choose Maint Performance Maint to enter the performance maintenance screen and clear the runtime of the electric heater End 6 7 11 Replacing the Low Liquid Level Detector Context Tool Phillips screwdriver Procedure Step 1 Tap Shutdown on the LCD home screen Step 2 Open the front door and turn off the general switch For a device that has two po...

Page 279: ...and Maintenance Issue 06 2020 01 13 Copyright Huawei Technologies Co Ltd 271 Figure 6 36 Removing butterfly nuts from the low liquid level detector For downflow units Remove the captive screws on the low liquid level detector fastener using a Phillips screwdriver and pull out the fastener upwards ...

Page 280: ...ser Manual 6 System Operation and Maintenance Issue 06 2020 01 13 Copyright Huawei Technologies Co Ltd 272 Figure 6 37 Removing screws from the low liquid level detector Step 5 Turn the captive screws and take out the low liquid level detector as shown in Figure 6 38 ...

Page 281: ...oling Product User Manual 6 System Operation and Maintenance Issue 06 2020 01 13 Copyright Huawei Technologies Co Ltd 273 Figure 6 38 Removing a low liquid level detector Step 6 Install a new low liquid level detector by performing Step 5 to Step 1 End ...

Page 282: ...nt temperature and humidity changes You can choose to display the curves showing data changes of recent one hour one day seven days or 30 days Procedure Step 1 On the home screen tap T H Curve Figure 7 1 is displayed Figure 7 1 T H curve screen The temperature curve upper and the humidity curve lower are displayed on the same screen The abscissa shows time The temperature set point is the midpoint...

Page 283: ...emperatures from temp set point 3 C to temp set point 3 C at least and from temp set point 30 C to temp set point 30 C at most You can view the humidity from humidity set point 5 to humidity set point 5 at least and from humidity set point 50 to humidity set point 50 at most Specific humidity fluctuation range displayed varies according to different models of smart cooling products End 7 1 2 Query...

Page 284: ...ons are consistent Procedure Step 1 On the home screen select About Step 2 On the About screen tap Version Info or E label The Version Info screen displays version details of the display board control board and temperature and humidity collection board The E label screen displays electronic labels of the entire system control board display board and temperature and humidity collection board When s...

Page 285: ... Tap the icon in the status bar and tap Off to silence the buzzer After the buzzer is silenced the icon changes to End 7 1 7 How Can I Handle Active Alarms Procedure Step 1 Tap or choose Alarms Query Act Alarms on the home screen to enter the active alarms screen Active alarms are displayed in chronological order The latest generated alarm is displayed in the uppermost row If active alarms exist t...

Page 286: ...an be cleared manually You need to tap Clear to clear the alarm after the fault is rectified The alarm clearance type automatic or manual varies with smart cooling products Some of the alarms can either be cleared automatically or manually Perform operations as required Step 3 Tap Diagnostic Mode to view the diagnosis report Rectify the faults following instructions in the diagnosis report Figure ...

Page 287: ...rms and affects device maintenance Procedure Step 1 On the home screen choose Alarms Delete Hist Alarms Step 2 Tap Confirm to delete all historical alarms After alarms are deleted the operation is recorded in logs End 7 1 9 Deleting Logs Context Logs can be deleted in a one click manner To delete logs log in as the admin user If you perform this operation all logs will be deleted and device mainte...

Page 288: ...rformance Maint screen Step 2 Tap Clear of a specific performance parameter to clear its runtime End 7 1 11 Calibrating a Sensor Context Calibrate a sensor if the displayed temperature or humidity on the sensor deviates from the actual value For example if the return air temperature measured by other temperature detection devices at the return air detection point is 20 C while the value measured b...

Page 289: ...age can be entered over the screen Calibrating the screen by DIP switch The display board works normally the deviation between the touching point and the responding point is unfavorably big or the screen does not respond when being tapped You can calibrate the screen by DIP switch only when the system enters Quick Settings page after the first power on or when the system is on the home screen Touc...

Page 290: ...libration will start automatically 10s later is displayed c Wait for 10 seconds or tap Confirm Figure 7 7 is displayed Tap the screen When Figure 7 8 is displayed the adjustment is complete d Flip toggle switch 1 for the display to ON and others to the opposite position After the DIP switch is calibrated flip toggle switch 1 to ON and others to the opposite position You need to manually operate th...

Page 291: ...ser Manual 7 FAQ Issue 06 2020 01 13 Copyright Huawei Technologies Co Ltd 283 Figure 7 9 User Settings Step 2 Tap Password to enter the password changing screen as shown in Figure 7 10 It is recommended that the password should contain at least two types of characters ...

Page 292: ...NetCol8000 C 070 260 In room Chilled Water Smart Cooling Product User Manual 7 FAQ Issue 06 2020 01 13 Copyright Huawei Technologies Co Ltd 284 Figure 7 10 Modifying the password End ...

Page 293: ...ction describes how to set Threshold of Supply air high temperature alarm to 45 If you need to change alarm settings log in as the Admin user Be careful when configuring alarms Only professional maintenance personnel can change alarm settings Procedure Step 1 Choose Settings Alarm Settings T H Sensor on the home screen Figure 7 11 is displayed Figure 7 11 Setting alarm parameter 1 Step 2 Tap Thres...

Page 294: ...ic Mode Enter The screen for entering the diagnostic mode Components are interlocked Therefore buttons for turning on or off certain components are in gray indicating that operations of the components are not allowed To ensure system security a component may not promptly respond to operations performed on this screen For example the compressor does not respond promptly after the Off On button is t...

Page 295: ...If you have forgotten the password or need to delete system information you can restore factory settings using SW button on the main control module If you restore factory settings all system data will be restored to the state before delivery including login passwords operation logs parameter configurations alarms and performance statistics Perform this operation with caution as it may affect other...

Page 296: ...zard screen for setting parameters After the system is restored to factory settings the user password is also reset to the preset password and must be promptly modified to ensure information security and normal system running End 7 1 17 Which Parameters Are Restored to Default Values After Default Settings Are Operated After choosing Settings Restore Defaults Comfirm the following parameters are d...

Page 297: ...Exporting Data Context With the one click mode you can export active alarms historical alarms run logs and so on You are advised to use the FAT32 USB flash drive with a capacity no greater than 64 GB Format the non FAT32 USB flash drives into FAT32 ones before using them Before using a USB flash drive ensure that its data has been scanned by antivirus software and is secure Before exporting active...

Page 298: ...n the displayed dialog box Step 3 After the data is successfully exported Figure 7 15 is displayed Click Finish Figure 7 15 Screen showing that data export has succeeded Step 4 Click Maint USB Operations Remove USB to remove the USB flash drive in safe mode End 7 1 19 How to Export and Import a Configuration file Context You are advised to use the FAT32 USB flash drive with a capacity no greater t...

Page 299: ...oduct 2 Procedure Step 1 Tap Maint USB Operations Export on the screen of smart cooling product 1 to enter the Select Path screen as shown in Figure 7 16 Figure 7 16 Select path Step 2 Tap the file where the user saves current data in the Select Path dialog box and tap Next Then tap Confirm in the displayed dialog box Step 3 After the data is successfully exported Figure 7 17 is displayed Click Fi...

Page 300: ...td 292 Step 5 Tap Maint USB Operations Import Config on the screen of smart cooling product 2 as shown in Figure 7 18 Figure 7 18 Select file Step 6 Select the file that needs to be imported and tap Next as shown in Figure 7 19 Figure 7 19 Confirming the file Step 7 After you tap Confirm and Next Figure 7 20 and Figure 7 21 are displayed ...

Page 301: ... Smart Cooling Product User Manual 7 FAQ Issue 06 2020 01 13 Copyright Huawei Technologies Co Ltd 293 Figure 7 20 Data process 1 Figure 7 21 Data process 2 Step 8 After the file is imported successfully Figure 7 22 is displayed Then tap Finish ...

Page 302: ... advanced maintenance Change the preset password in your first login to the controller over SSH Except for password changes do not perform any other operations Otherwise the controller cannot work properly Except for password changes operations resulting in controller faults are beyond the warranty scope Remember the new password When Windows accesses the controller over SSH you need to use client...

Page 303: ...ng requirements Contains at least eight characters Contains at least two types of characters lowercase letter uppercase letter digit space and special character _ Be different from the user name or user name in its inverted order If a user enters incorrect passwords for five times the user s account will be locked for 10 minutes Step 3 After successful login enter su and Changeme to switch to the ...

Page 304: ...7 24 Switching to the root user Step 4 Enter passwd the password change command to change the password In the displayed window enter a new password and confirm it as shown in Figure 7 25 Figure 7 25 Changing the password The new password must meet complexity requirements When you are changing the password you can press Ctrl to stop this operation End ...

Page 305: ...ng them Ensure that the key file has been encrypted using AES128 Before using a USB flash drive ensure that its data has been scanned by antivirus software and is secure Procedure Step 1 On the home page choose Maint USB Operations Import Certificate as shown in Figure 7 26 Figure 7 26 Importing a certificate Step 2 Select Client certificate or Server certificate based on the type of the certifica...

Page 306: ...rature alarm threshold 5 C Return air low temperature alarm threshold Supply air low temperature alarm threshold 5 C Hot aisle low temperature alarm threshold Cold aisle low temperature alarm threshold 5 C Hot aisle low temperature alarm threshold Cold aisle low temperature alarm threshold 5 C Return air low temperature alarm threshold Parameters of Teamwork Settings Number of smart cooling produc...

Page 307: ...mit for dehumid start temperature demand Lower limit for dehumid close temperature demand Upper limit for dehumid start temperature demand Upper limit for dehumid close temperature demand Temperature demand for dehumidifying heating close Dehumid heating start temp demand Low temp heating close temp demand Low temp heating start temp demand 7 2 WebUI Operations 7 2 1 How to Manage WebUI Users Cont...

Page 308: ...ter Smart Cooling Product User Manual 7 FAQ Issue 06 2020 01 13 Copyright Huawei Technologies Co Ltd 300 Figure 7 27 Changing the login password 4 Input the Login password and click Submit Figure 7 28 Recertification Step 2 Add a WebUI user ...

Page 309: ... PC Install a network security certificate if a security certificate problem message is displayed when you attempt to log in to the WebUI You need to apply to an organization authorized by the customer for a network security certificate and its key with the IP address or domain name This section describes how to import the certificate and key Procedure Step 1 Log in to the WebUI as an administrato...

Page 310: ...ations for smart cooling product 1 to a PC If smart cooling product 2 needs the same parameter configurations import the configuration file to smart cooling product 2 Procedure Step 1 Log in to the smart cooling product 1 WebUI as an administrator Step 2 Choose Maintenance Configuration File Step 3 Export a configuration file 1 Optional Specify Configuration File Encryption Password Record the pas...

Page 311: ...ct Encryption Password for Export Record the password for decompressing the data package Step 4 Click Export Fault Information Step 5 Save the exported data to the PC End 7 2 6 How Can I Change the Smart Cooling Product IP Address on the WebUI Context You have obtained the IP address subnet mask and default gateway information planned for the smart cooling product Procedure Step 1 Log in to the sm...

Page 312: ...chnologies Co Ltd 304 7 2 7 How Can I View Version Information Procedure Step 1 Log in to the WebUI as an administrator Step 2 Click in the upper right corner of the home page and view the version information Step 3 Choose Maintenance Version Information and view the version information software version and BSP version End ...

Page 313: ... in accordance with local laws To prevent glycol solution from corroding pipes and the heat exchanging coil corrosion inhibitor should be mixed into the glycol solution For details about the mixing schemes consult glycol experts Check the quality of the glycol solution on a quarterly basis and evaluate the anticorrosion effects For details consult local water treatment experts Table 8 1 Glycol con...

Page 314: ...NetCol8000 C 070 260 In room Chilled Water Smart Cooling Product User Manual AAppendix Issue 06 2020 01 13 Copyright Huawei Technologies Co Ltd 306 A Appendix A 1 Electrical Conceptual Diagram ...

Page 315: ...NetCol8000 C 070 260 In room Chilled Water Smart Cooling Product User Manual AAppendix Issue 06 2020 01 13 Copyright Huawei Technologies Co Ltd 307 ...

Page 316: ...NetCol8000 C 070 260 In room Chilled Water Smart Cooling Product User Manual AAppendix Issue 06 2020 01 13 Copyright Huawei Technologies Co Ltd 308 ...

Page 317: ...NetCol8000 C 070 260 In room Chilled Water Smart Cooling Product User Manual AAppendix Issue 06 2020 01 13 Copyright Huawei Technologies Co Ltd 309 ...

Page 318: ...NetCol8000 C 070 260 In room Chilled Water Smart Cooling Product User Manual AAppendix Issue 06 2020 01 13 Copyright Huawei Technologies Co Ltd 310 ...

Page 319: ...NetCol8000 C 070 260 In room Chilled Water Smart Cooling Product User Manual AAppendix Issue 06 2020 01 13 Copyright Huawei Technologies Co Ltd 311 ...

Page 320: ...NetCol8000 C 070 260 In room Chilled Water Smart Cooling Product User Manual AAppendix Issue 06 2020 01 13 Copyright Huawei Technologies Co Ltd 312 ...

Page 321: ...NetCol8000 C 070 260 In room Chilled Water Smart Cooling Product User Manual AAppendix Issue 06 2020 01 13 Copyright Huawei Technologies Co Ltd 313 ...

Page 322: ...NetCol8000 C 070 260 In room Chilled Water Smart Cooling Product User Manual AAppendix Issue 06 2020 01 13 Copyright Huawei Technologies Co Ltd 314 ...

Page 323: ...NetCol8000 C 070 260 In room Chilled Water Smart Cooling Product User Manual AAppendix Issue 06 2020 01 13 Copyright Huawei Technologies Co Ltd 315 ...

Page 324: ...NetCol8000 C 070 260 In room Chilled Water Smart Cooling Product User Manual AAppendix Issue 06 2020 01 13 Copyright Huawei Technologies Co Ltd 316 ...

Page 325: ...oling Product User Manual AAppendix Issue 06 2020 01 13 Copyright Huawei Technologies Co Ltd 317 A 2 Acronyms and Abbreviations A ACC Advanced cooling controller C CAN Control Area Network CFD Computational Fluid Dynamics E ESN Electronic serial number ...

Page 326: ...8000 C 070 260 In room Chilled Water Smart Cooling Product User Manual AAppendix Issue 06 2020 01 13 Copyright Huawei Technologies Co Ltd 318 T TFT Thin Film Transistor P PTC Positive temperature coefficient ...

Reviews: