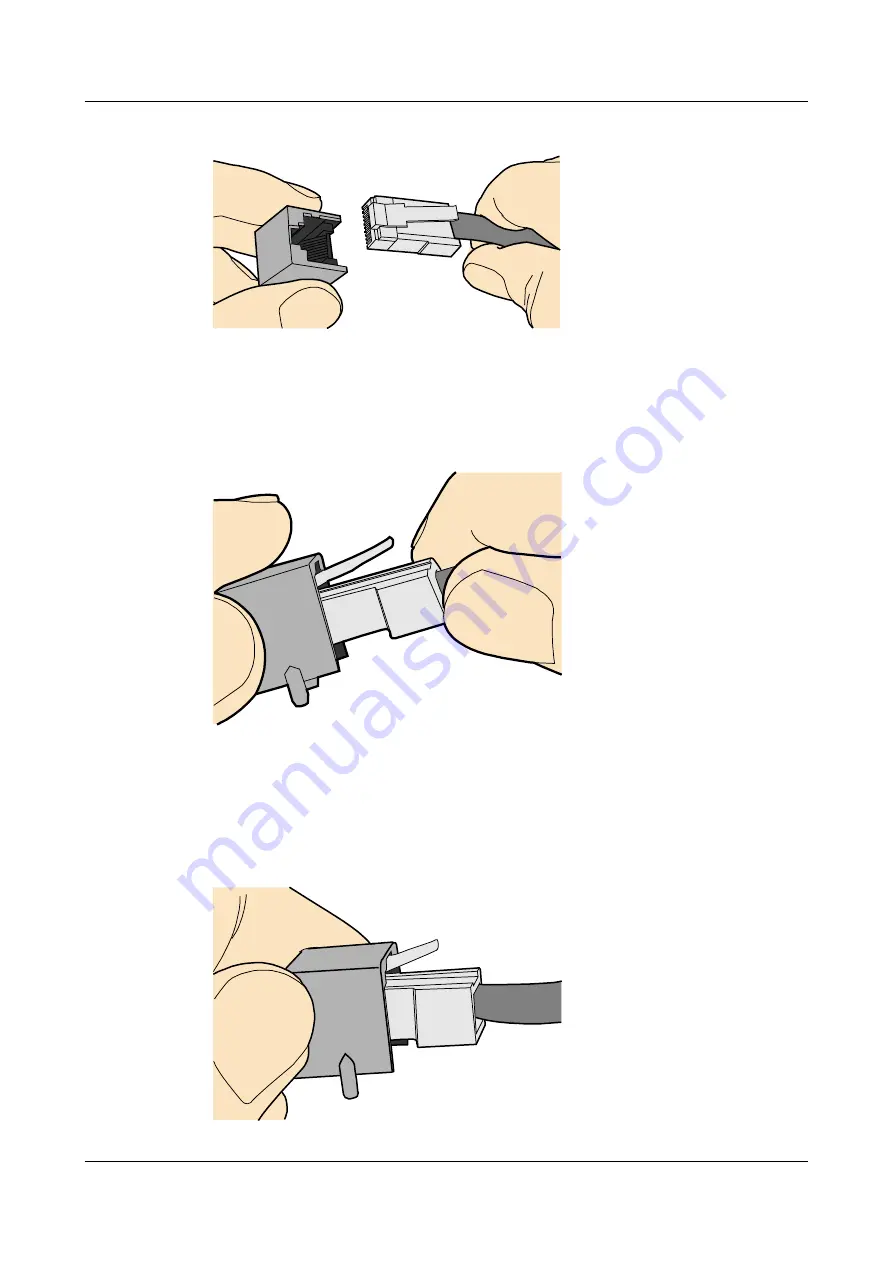
Figure 3-57
Holding the male and female connectors
Step 2
Feed the male connector into the female connector, as shown in
.
Figure 3-58
Feeding the male connector into the female connector
Step 3
A crisp click indicates that the connector is locked by the locking key. Pull the connector slightly
and ensure that it is securely connected.
shows an installed Ethernet connector.
Figure 3-59
Installed Ethernet connector
HUAWEI NetEngine80E Router
Installation Guide
3 On-site Cable Assembly and Installation
Issue 02 (2011-09-10)
Huawei Proprietary and Confidential
Copyright © Huawei Technologies Co., Ltd.
52


