TP48200A-DX12A1 Telecom Power
User Manual
4 Maintenance
Issue 07 (2019-11-15)
Copyright © Huawei Technologies Co., Ltd.
41
Performing maintenance or replacing components may interrupt power to the loads if
battery reserve is insufficient. Ensure that the switches for primary loads are in the ON
position and do not turn off the battery switch and the AC input switch at the same time.
Obtain prior written consent from the customer if load disconnection is required.
Do not perform maintenance on rainy days. Otherwise, rain water can enter the system and
damage devices and components.
4.4.1 Replacing a Rectifier
Prerequisites
Protective gloves and the cabinet door key are available.
The new rectifier is intact.
To prevent burns, exercise caution when removing a rectifier because the rectifier may be hot
as a result of continuous operation.
Procedure
Step 1
Wear protective gloves.
Step 2
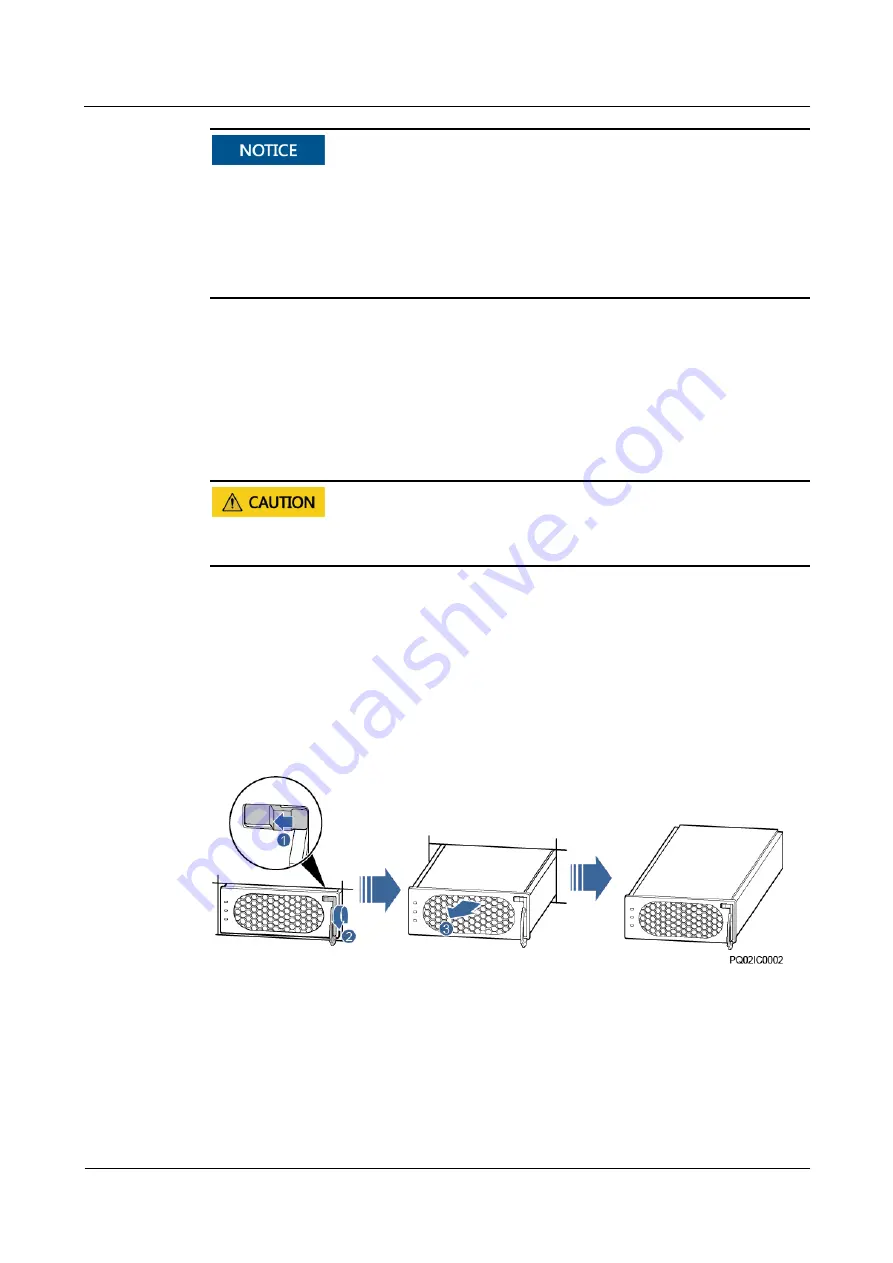
Push the locking latch on the right side of the panel towards the left.
Step 3
Gently draw the handle outwards, and then remove the rectifier from the subrack, as shown in
Figure 4-1.
Figure 4-1
Removing a rectifier
Step 4
Push the locking latch on the new rectifier towards the left, and pull out the handle.
Step 5
Place the new rectifier at the entry of the correct slot.
Step 6
Gently slide the rectifier into the slot along the guide rails until it is engaged. Close the handle,
and push the locking latch towards the right to lock the handle, as shown in Figure 4-2.


