Step 6
Insert a new LPU into the chassis.
1.
Take out a new LPU from the ESD bag.
NOTICE
– Pull out the LPU slowly and smoothly to prevent it from hitting neighboring boards
and affecting running boards.
– Touching parts on the LPU when swapping it may damage the LPU.
2.
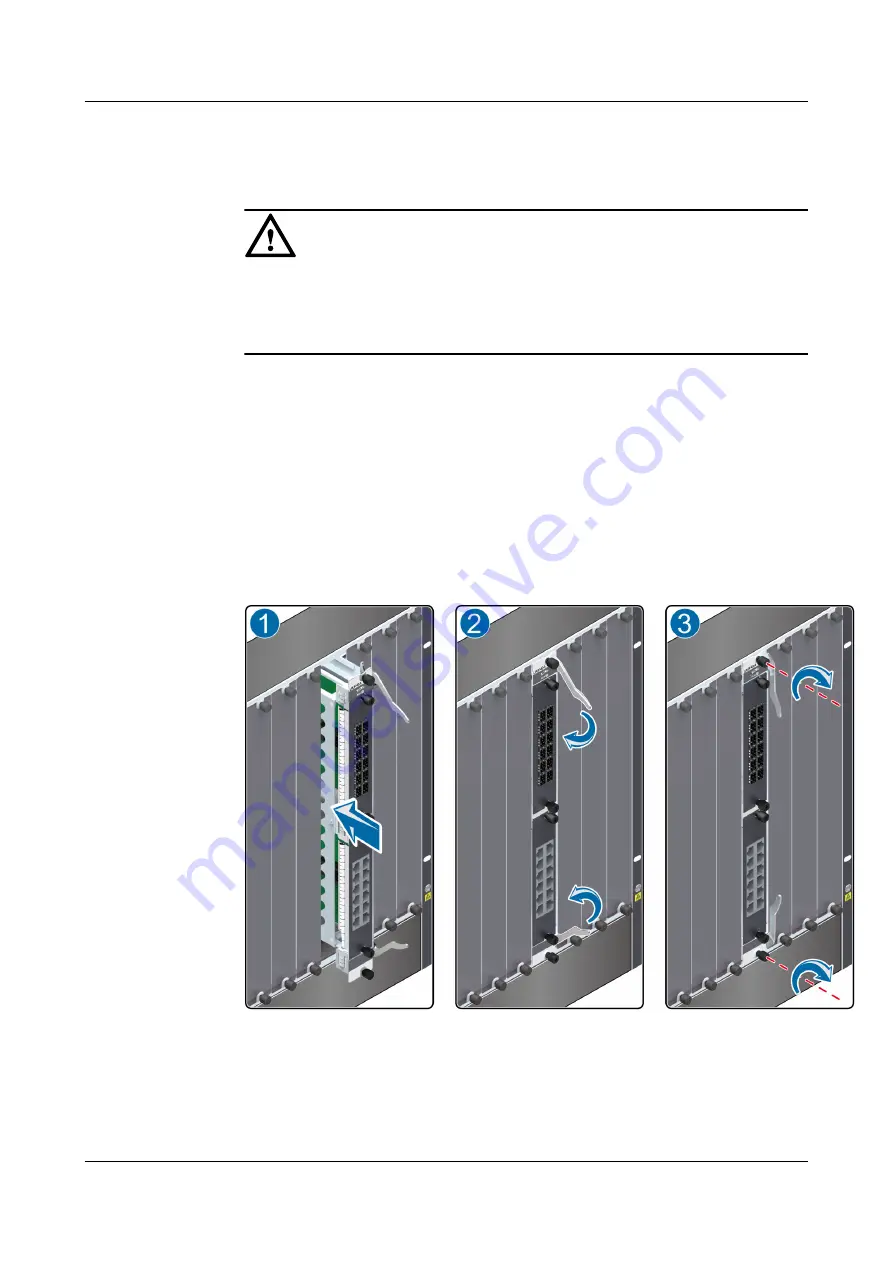
Support the lower edge of the new LPU with one hand and hold the panel with the other
hand. Then, insert the new LPU smoothly into the chassis along the guide rail of the slot.
Stop sliding the LPU forward when the ejector lever on the front panel of the LPU
reaches the chassis, as shown in
3.
Turn the ejector levers on the LPU outward and upward to form a 45-degree angle, and
at the same time push the LPU into the slot. Then, turn the ejector levers inward and
downward until the panel of the LPU touches the frame, as shown in
(2).
4.
Using the Phillips screwdriver, turn the two captive screws clockwise to tighten them, as
shown in
Figure 3-8
Insert an LPU
Step 7
Connect the cables to the corresponding interfaces in the original sequence.
Step 8
Check the running status of the new LPU.
HUAWEI USG9500 Series
Hardware Guide
3 Hardware Maintenance
Issue 03 (2017-12-15)
Huawei Proprietary and Confidential
Copyright © Huawei Technologies Co., Ltd.
351


