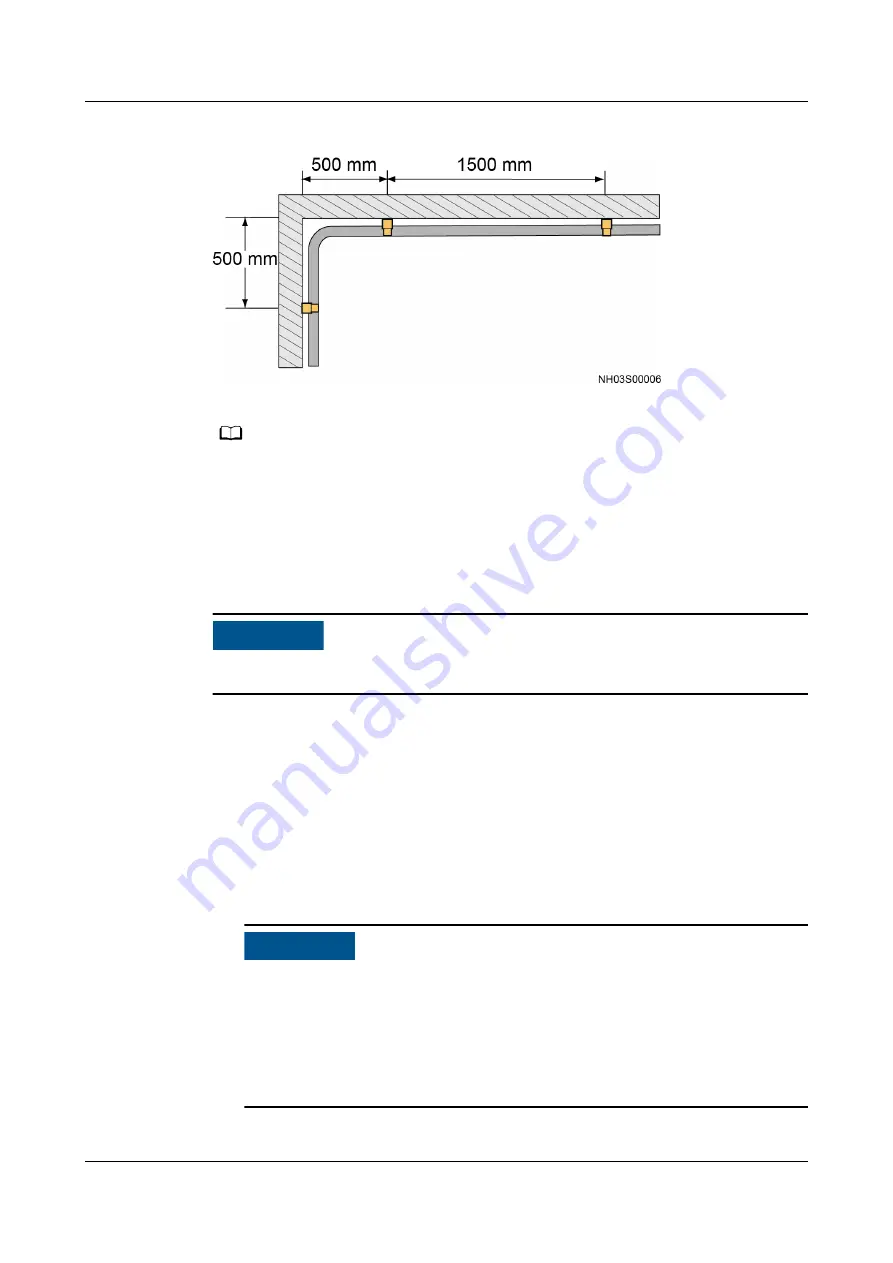
Figure 4-57 Support positions for refrigerant pipes
NO TE
Ask the site engineering personnel to prepare and install pipe supports. For details about
the pipe support requirements, see
Step 2 Route pipes inside the cabinet. For details, see
4.2.6.5.1 Laying Out Pipes Inside a
Step 3 Connect the indoor unit stop valve.
NO TICE
Connect the liquid pipe stop valve first, and then the gas pipe stop valve.
1. Remove the black plastic nut from the liquid pipe stop valve using an
adjustable wrench. Check that the PTFE washer on the stop valve and the
inner protruding surface of the active connector nut are free of impurities and
scratches. Clean up impurities using alcohol or a wet cloth. For any scratch,
contact Huawei technical support for replacement.
2. Hold the copper pipe after the pipe nut with one hand and keep the pipe nut
and the stop valve screw thread on the same center line. Secure the pipe nut
to the stop valve with the other hand and tighten the nut using a torque
wrench, as shown in
NO TICE
– Tighten the liquid pipe stop valve using a 27# torque wrench to a torque
of 35-37 N·m. Tighten the gas pipe stop valve using a 36# torque wrench
to a torque of 50-52 N·m.
– When tightening a stop valve using a torque wrench, secure the hex nut of
the active connector at the welded copper pipe to prevent the copper pipe
from turning and further deforming as the stop valve is being tightened.
FusionModule800 Smart Small Data Center
User Manual
4 Installation Guide
Issue 01 (2021-02-05)
Copyright © Huawei Technologies Co., Ltd.
137


