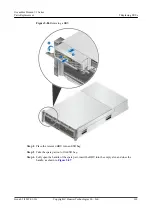
2.
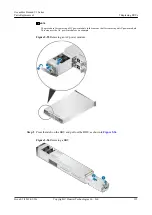
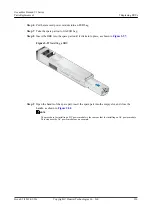
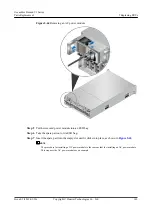
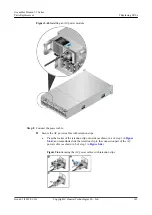
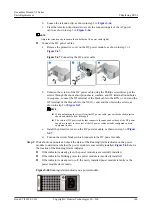
Loosen the retention clip, as shown in step 2 in
.
3.
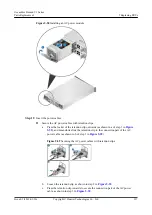
Press the retention clip inwards to secure the connection part of the AC power cable, as
shown in step 3 in
.
NOTE
Adjust the retention clip to ensure that it holds the AC power cable tightly.
Step 9
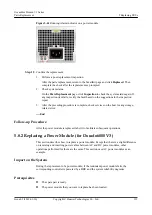
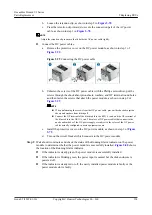
Wait about one minute and check the status of the Running/Alarm indicator on the power
module to determine whether the power module is successfully installed.
the location of the Running/Alarm indicator.
l
If the indicator is steady green, the power module is successfully installed.
l
If the indicator is blinking green, the power module is incorrectly installed.
l
If the indicator is steady red or off, the newly installed power module is faulty or the
power module slot is faulty.
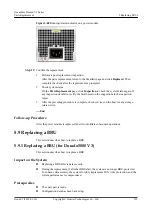
Figure 5-73
Running/Alarm indicator on a power module
Step 10
Confirm the replacement.
1.
Perform a post-replacement inspection.
After the parts replacement, return to the SmartKit page and click
Replaced
. Then
complete the check after the replacement as prompted.
2.
Check system status.
On the
Parts Replacement
page, click
Inspection
to check the system status again. If
any inspection item fails, rectify the fault based on the suggestions in the inspection
report.
3.
After the preceding procedure is complete, check services on the host for any storage-
related error.
----End
Follow-up Procedure
After the power module is replaced, label it to facilitate subsequent operations.
5.8.4 Replacing a Power Module (for Disk Enclosure)
This section describes how to replace a power module. Except that there is a slight difference
on removing and inserting power cables between AC and DC power modules, other
operations performed for them are the same. This section uses AC power modules as an
example.
OceanStor Dorado V3 Series
Parts Replacement
5 Replacing FRUs
Issue 05 (2019-01-30)
Copyright © Huawei Technologies Co., Ltd.
149

