Pub. 42004-565B
TempSense Model TS100
Page
3
of 6
P:\Standard IOMs - Current Release\42004 Instr. Manuals\42004-565B.docx
03/21
Wall Mount
Mount the TempSense TS100 to a wall as
follows (see Figure 5):
1.
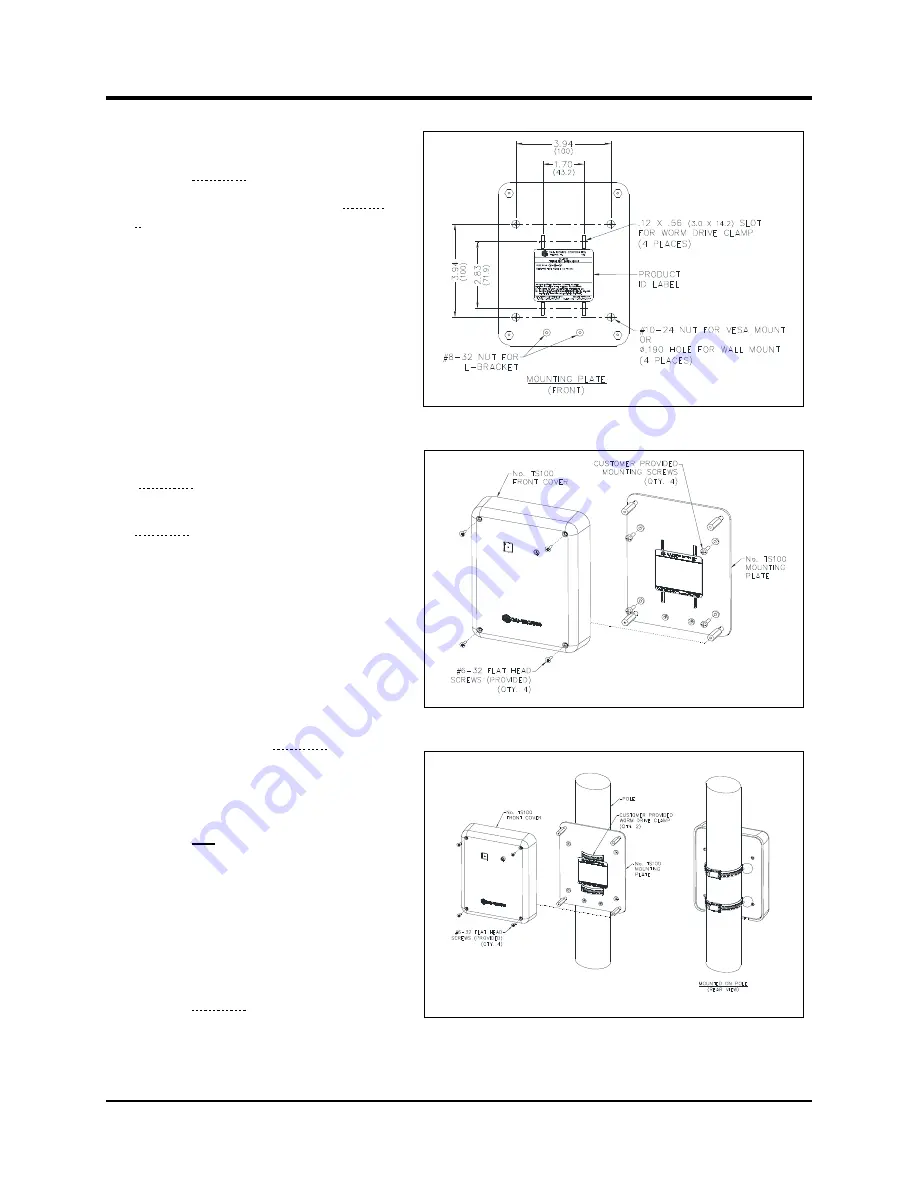
Secure the mounting plate (see Figure
4) to a flat surface using (
customer
supplied
) hardware.
Use the four VESA mount holes to
secure the mounting plate to the wall.
No. 8 screws fit through the 0.190-inch
threaded VESA mounting holes.
2.
Secure the TS100 to the mounting
plate using the four included #6-32
screws.
Pole Mount
Mount the TempSense TS100 to a pole
(see Figure 6) as follows:
1.
Secure the TS100 mounting plate (see
Figure 4) to a pole using (
customer
supplied
) worm-drive clamps
2.
Secure the TS100 to the mounting
plate using the four included #6-32
screws.
VESA Mount
Attach a VESA (video electronics
standards association) mount to the
mounting plate with the included #10-24
screws and washers (see Figure 4).
N
OTE
:
The TS100 includes four #10-24 ×
0.38-inch long screws to attach a
customer supplied VESA mount.
Do
not
use any screws other than
the included #10-24 screws to
attach the VESA mount to the
TS100’s mounting plate.
Stand Mount
Mount the TS100 to a tripod or
microphone stand using the included L-
bracket (see Figure 7).
1.
Secure the mounting plate to the
TS100 using four #6-32 screws.
Figure 4. Mounting Plate Detail
Figure 5. Wall-Mount Detail
Figure 6. Pole-Mount Detail

