-
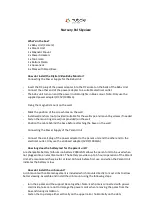
Unscrew the knob then open the top clamp and bottom clamp, Install the clamps onto the
supporting pole
-
Place the bottom clamp below and securely against the lower rail, the stand base is spring
loaded. Push the lower pole slightly downward before closing the bottom clamp and
securing with knob. This is to allow the lower clamp to exert clamping pressure on the lower
rail
-
Position the top clam to either the top rail or slats. Close and secure the top clamp with the
knob. Ensure the pole stands straight, is securely mounted, and the clamps are tight. The
pole should not move when moderate pressure is applied in any direction
-
Install the flexible gooseneck extension into the top post. The gooseneck will click and lock
into place when properly inserted
-
Holding the Power adapter plug up, insert the camera unit into the housing at the end of the
flexible gooseneck extension, make sure the camera is magnetically secured in the
gooseneck. Connect the power adapter plug to the camera unit power socket
-
Insert the DC plug into the power socket at the bottom of the Crib mount and connect the
power adapter to an electrical outlet
-
Power on the camera unit to view the image on the parent unit. Adjust the flexible
gooseneck and select the best zoom (1x or 2x) on the parent unit for optimal viewing of the
crib
For questions, warranty, support or service related to the product please contact us the following
ways:
-
Telephone:
-
+44 (0) 844 5579677 (UK only)
-
Monday to Friday 8.00am – 8.00pm
-
Saturday 8.30am – 2.00pm
-
Sunday - Closed
-
Calls cost 7p per minute plus the telephone company’s access charge.
-
Calls from mobile phones may vary and be significantly higher.
-
Alternatively visit our “support section” on the website to get in touch free of charge via email
or live chat service.


