EN - ENGLISH – 01/2020
Translation of original instructions
8
EN
Reproduction is prohibited
07
MOUNTING - INSTALLATION
Accessories you will need which are not included with the winch:
•
Gloves for handling the cable and hook safety strap.
•
Anchoring sling/chain.
•
Blanket to throw over the cable to absorb the energy if the cable breaks.
1. The winch is designed with a standard bolt pattern for this class of winch. Many winch
mounting kits use this bolt pattern for common vehicles and mounting plates. If you wish to use
a mounting plate, ensure that it is mounted on a flat surface so that the motor, drum and
gearbox housing are correctly aligned. Correct alignment of the winch will ensure uniform
distribution of a rated load.
2. Begin by assembling the roller fairlead and the mounting plate using 2 screws M12 X 30, a lock
washer and make the tightening. Ensure that the screws are inserted through the mounting plate
from the inside and through the roller fairlead. This will ensure that there is enough space for the
winch to be placed on the plate.
3. Assemble the winch on the mounting plate by pulling and turning the clutch switch to the
"DISENGAGE" position. Pull a few centimetres of cable from the drum and pass the cable loop
through the opening at the front of the mounting plate and through the roller fairlead. You may
now attach the winch to the mounting plate using the remaining screws M12 x 35 and the lock
washer.
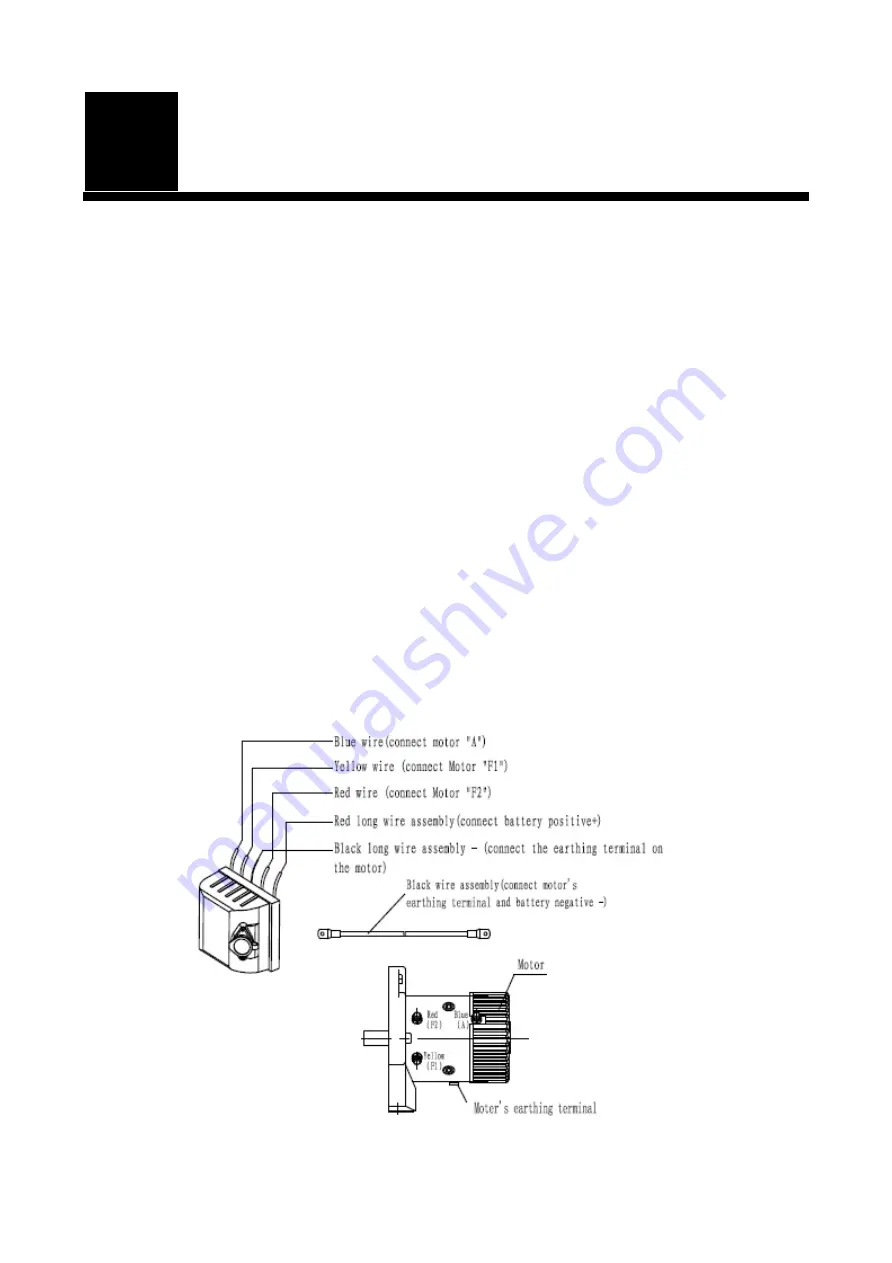
4. Connect the battery and the motor cables as shown in the diagram below.


