background image

 10/16

INSTRUCTIONS ON ASSEMBLY

Prior to installation, carefully select and check the location where you will in-

stall the swing. Please make sure that the swing carrier is adequately stable. 

Please also take into account that swinging produces centrifugal forces that 

can put a lot of strain on the swing carrier. Please consult an expert (statics 

expert, architect, carpenter) and ask how much load your swing carrier can to-

lerate.Suspension connectors shall be of a design that will prevent unintentional 

disconnection. After removing the product from its packaging, please check it 

for completeness. Follow the assembly figures on pages 3-7 during the set-up 

phase.

USAGE INSTRUCTIONS

HANGING DEVICE AND ADJUSTMENT

The clearance between the points from which you plan to hang the swing must 

be at least as wide as the width of the seat of swing + 100 mm. The clearance 

between the swing seat and the ground can be adjusted variably to fit any suita-

ble installation location since the swing includes 2 length adjustable straps (9). 

Both straps are divided into two individual belts with one each terminal K and 

one hand loop H. The length of each individual belt 9a and 9b can be adjusted 

infinitely. To raise the swing (i.e. shorten the belt), keep terminal K pressed down 

while you pull hand loop H down (Fig. 8b). To lower the swing (lengthen the belt), 

keep terminal K pressed down while you keep hand loop H evenly controlled 

and allow it to slide to the top (Fig. 8c). While you extend and shorten the belts, 

always make sure that the two on the front and the two in the rear are of the 

same length after the adjustment. Unequal belt lengths will result in uncontrol-

led pendular swing movements, which may cause injuries! While adjusting the 

swing, make certain nobody is sitting on the swing. Adjust the swing in such a 

manner that the person swinging cannot touch the ground with the tips of her/

his toes. If you are not certain that the fit is perfect, perform a few light-handed 

test swings.

ADJUSTING THE SEAT

While you are adjusting the seat, make absolutely certain nobody is sitting on 

the swing. To adjust the seat angle, press the button on the side of both joints 

(5) simultaneously (Fig. 8d). While keeping both buttons pressed down, careful-

ly pull up the joint or carefully press it in the direction of the ground until the seat 

is in the desired position. The movement of the joint also adjusts the location of 

the seat. When done, please make sure that the buttons pop out of the joint 

again and that the joint has locked firmly into its position. To protect the seat 

cover (7) and the neck cushion (8), you will have to remove them after every use 

of the swing. To do this, loosen all hook and loop fasteners from the swing frame 

and store the padding as described in section Maintenance and Storage.

USE WITH HUDORA SWING SET STANDS

If you are using the swing in conjunction with the HUDORA Playground item no. 

64019), you will have to remove both individual swings and nest swing Holly-

wood must be hung from the two exterior hooks. Nest swing Hollywood may 

also be installed with the nest swing set 120 (item no. 64023).

MAINTENANCE AND STORAGE

Use a dry or damp cloth only to clean the product; do not use special cleaning 

agents! Check the product for damage or traces of wear and tear before and 

after each use. Do not make any structural changes. For your own safety, please 

use original spare parts only. These can be sourced from HUDORA. If parts be-

come damaged or if sharp edges or corners should develop, the product may not 

be used any more. If in any doubt, please contact our service team (http://www.

hudora.de/service/). Store the product in a safe place where it is protected from 

the elements, cannot be damaged, and cannot injure anyone. 

You should also replace all the plastic parts after a maximum of 5 years to pre-

vent a possible failure of these parts. The seat padding (7) and neck pillow (8) 

should be removed after every use and should be stored in a dark place. Please 

observe the following washing and cleaning directions for the seat padding and 

neck pillow:

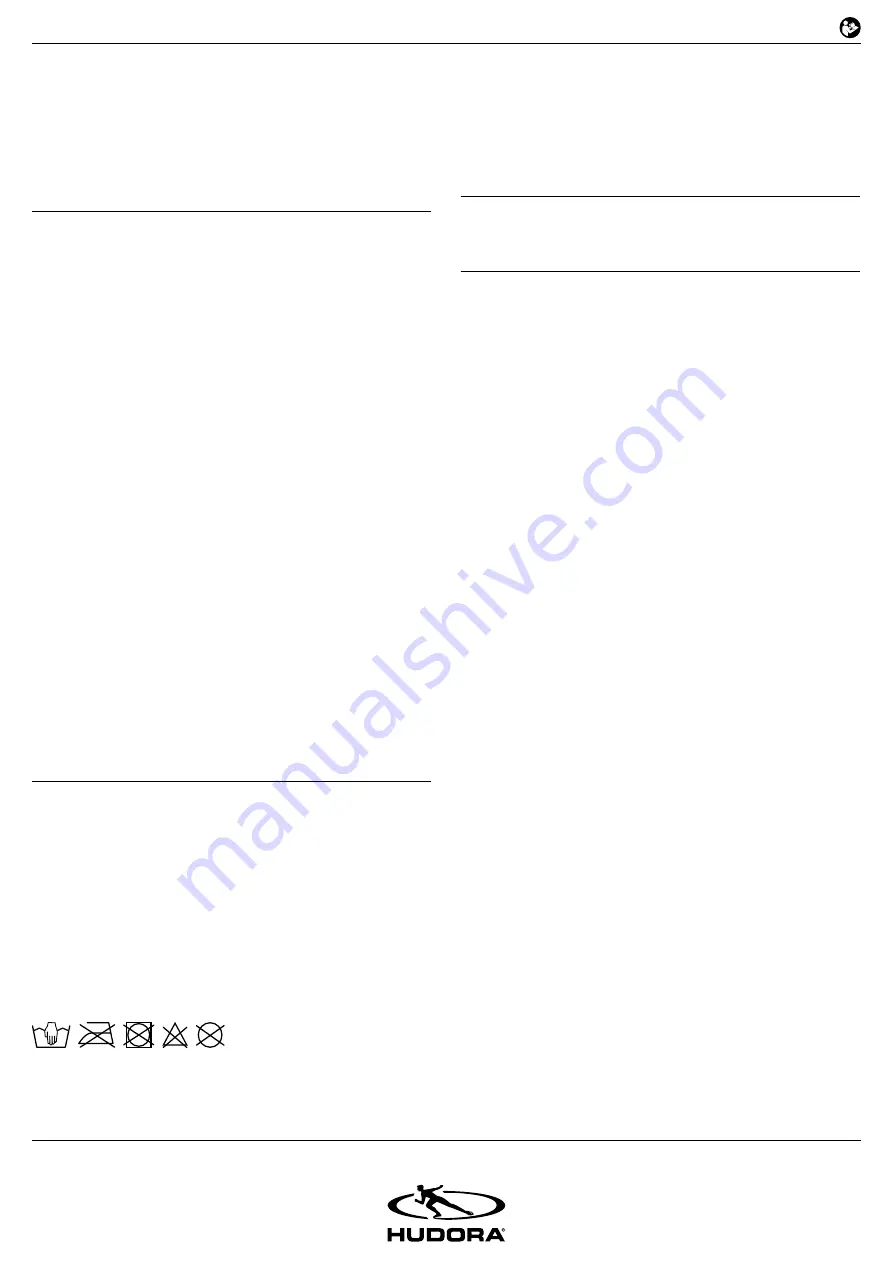
Hand wash only! Do not iron! Do not tumble dry! Do not bleach! Do not dry clean!

All images are examples of the design.

Check the product for damage or traces of wear and tear before and after each 

use.

We also recommend before each use: 

•  to check for the firm sitting of nuts and bolts, tighten if necessary 

•  to lubricate moving parts in order to minimize wear.

•  to check all covers of screws and sharp edges and replace if necessary 

•  to replace defective parts according to the manufacturer‘s instructions

•   to check swing seats, chains, ropes and other means of attachments for evi-

dence of deterioration

DISPOSAL ADVICE

At the end of the product’s life, please dispose of it at an appropriate collection 

point in your area. Local waste management companies will be able to answer 

your questions on this.

SERVICE

We make every effort to deliver faultless products. If faults do arise however, we 

put just as much effort into rectifying them. You can find numerous information 

on the product, replacement parts, solutions to problems and lost assembly 

manuals at http://www.hudora.de/service/.

Summary of Contents for Hollywood 72165

Page 1: ...42897 Remscheid I Germany www hudora de DE IT FR EN ES NL AUFBAU UND GEBRAUCHSANLEITUNG INSTRUCTIONS ON ASSEMBLY AND USE ISTRUZIONI PER IL MONTAGGIO E PER L USO INSTRUCCIONES DE MONTAJE Y DE USO INSTRUCTIONS DE MONTAGE ET MODE D EMPLOI MONTAGE EN GEBRUIKSHANDLEIDING ...

Page 2: ...2 16 TEILELISTE PARTLIST LISTA DEI PEZZI LISTA DE PIEZAS LISTE DES PIECES DETACHEES ONDERDELENLIJST 1 4 2 3 5 6 7 8 9 10 13 4 x 2 x 2 x 1 x 1 x 1 x 2 x 4 x 4 x 9b 9a 11 12 2 x 1 x ...

Page 3: ...ga to con il perno a snodo 5 e dovrà guardare verso la parte centrale dell altalena ES Los agujeros para tornillos en los extremos de los tubos del marco 1 y 4 tienen dife rentes diámetros El extremo con el diáme tro de agujero más grande debe unirse en el próximo paso con la articulación giratoria 5 y queda mirando hacia el centro del co lumpio FR Les trous de vis aux extrémités des tubes de cadr...

Page 4: ...li estremi con le viti utilizzando la brugola Verificare che tutte le viti siano ben serrate ES Utilice la herramienta adjunta 12 para soltar la unión roscada en la articulación giratoria 5 Para la unión de los tubos del marco 1 y 4 con la articulación giratoria lo mejor es colocar la misma en una posici ón inclinada ángulo en punta Después de haber introducido el extre mo del tubo del marco en la...

Page 5: ...5 16 5 4 x ...

Page 6: ...6 16 6 7 4 x ...

Page 7: ...osteriore delle cinghie di sospensione individuali 9b Figg 8 8a ES Fije respectivamente 2 de las asideras 11 a cada uno de los cinturones delanteros de las cintas de correa 9a y 2 a los cinturones traseros de las cintas de correa 9b fig 8 8a FR Attachez chacune des 2 poignées 11 aux sangles individuelles des bandes de sangles avant 9a et 2 autres aux sangles individuelles arrières des bandes de sa...

Page 8: ... auftreten die auch den Schaukelträger stark beanspruchen können Lassen Sie sich von einem Fachmann Statiker Architekt Zimmermann beraten und fragen Sie ihn nach der Belastbarkeit des Schaukelträgers Aufhängungsverbindungen müssen so gestaltet sein dass sie nicht unbeabsichtigt getrennt werden können Nachdem Sie das Produkt aus der Verpackung genommen haben überprüfen Sie dieses bitte auf Vollstän...

Page 9: ...we have all you need and more at http www hudora de CONTENTS 1 x Nest swing cf part list on page 2 1 x These instructions Other parts which may be included with the delivery in some circumstances are not required SAFETY INSTRUCTION WARNING Only for domestic use WARNING To be used under the direct supervision of an adult WARNING Not suitable for children under 36 months Danger of falling WARNING No...

Page 10: ...ut of the joint again and that the joint has locked firmly into its position To protect the seat cover 7 and the neck cushion 8 you will have to remove them after every use of the swing To do this loosen all hook and loop fasteners from the swing frame and store the padding as described in section Maintenance and Storage USE WITH HUDORA SWING SET STANDS If you are using the swing in conjunction wi...

Page 11: ...vi consigliare da un esperto ingegnere calcolatore architetto carpentiere e chiedetegli della capacità portante del supporto dell altalena I raccordi della sospensione devono essere realizzati in modo che non possano essere staccati involontariamente Dopo aver estratto il prodotto dall imballaggio verificarne la completezza Per il montaggio fare riferimento alle illustrazioni alle pagine 3 7 CONDI...

Page 12: ...or nuestro website http www hudora de CONTENIDO 1 x Columpio de nido vea lista de piezas en pág 2 1 x Estas instrucciones Las otras piezas contenidas en el envío no son relevantes para el montaje y el uso INDICACIONES DE SEGURIDAD ADVERTENCIA Solo para uso doméstico ADVERTENCIA Utilícese bajo la vigilancia directa de un adulto ADVERTENCIA No conviene para niños menores de 36 meses Peligro de caída...

Page 13: ... sobresalir de la articulación giratoria y que esta esté encajada fija Para proteger el acolchado del asiento 7 y el cojín 8 se los debe desmontar después de cada uso del columpio se lo debe desmontar Para ello suelte todos los cierres adhesivos del marco y guarde el acolchado del asiento y el cojín como se describe en mante nimiento y almacenamiento USO CON MARCOS PARA COLUMPIOS HUDORA En el uso ...

Page 14: ...s centrifuges qui sont également susceptibles de solliciter fortement le support de la balançoire Demandez conseil à un spécialiste staticien architecte char pentier et demandez lui la charge admissible du support de la balançoire Les connecteurs de suspension doivent être conçus de manière à empêcher toute déconnection involontaire Après avoir enlevé le produit de l emballage veuil lez vérifier q...

Page 15: ...de montage of verdere informatie over het pro duct wenst vindt u onder http www hudora de INHOUD 1 x Nestschommel zie onderdelenlijst op pagina 2 1 x Deze gebruiksaanwijzing Verdere meegeleverde onderdelen en items zijn niet relevant voor de montage of het gebruik VEILIGHEIDSINFORMATIE WAARSCHUWING Uitsluitend voor huishoudelijk gebruik WAARSCHUWING Gebruiken onder direct toezicht van een volwasse...

Page 16: ...ide na elk gebruik van de schommel worden gedemonteerd Maak hiervoor alle klitten band van het kader los en sla de zitbekleding en de nekkussens op zoals be schreven onder Onderhoud en Opslag GEBRUIK MET HUDORA SCHOMMELS Bij gebruik met een HUDORA speelplaats Art nr 64019 moeten de twee indi viduele schommels worden verwijdert en de nestschommel Hollywood moet aan beide buitenste haken worden opge...

Reviews: