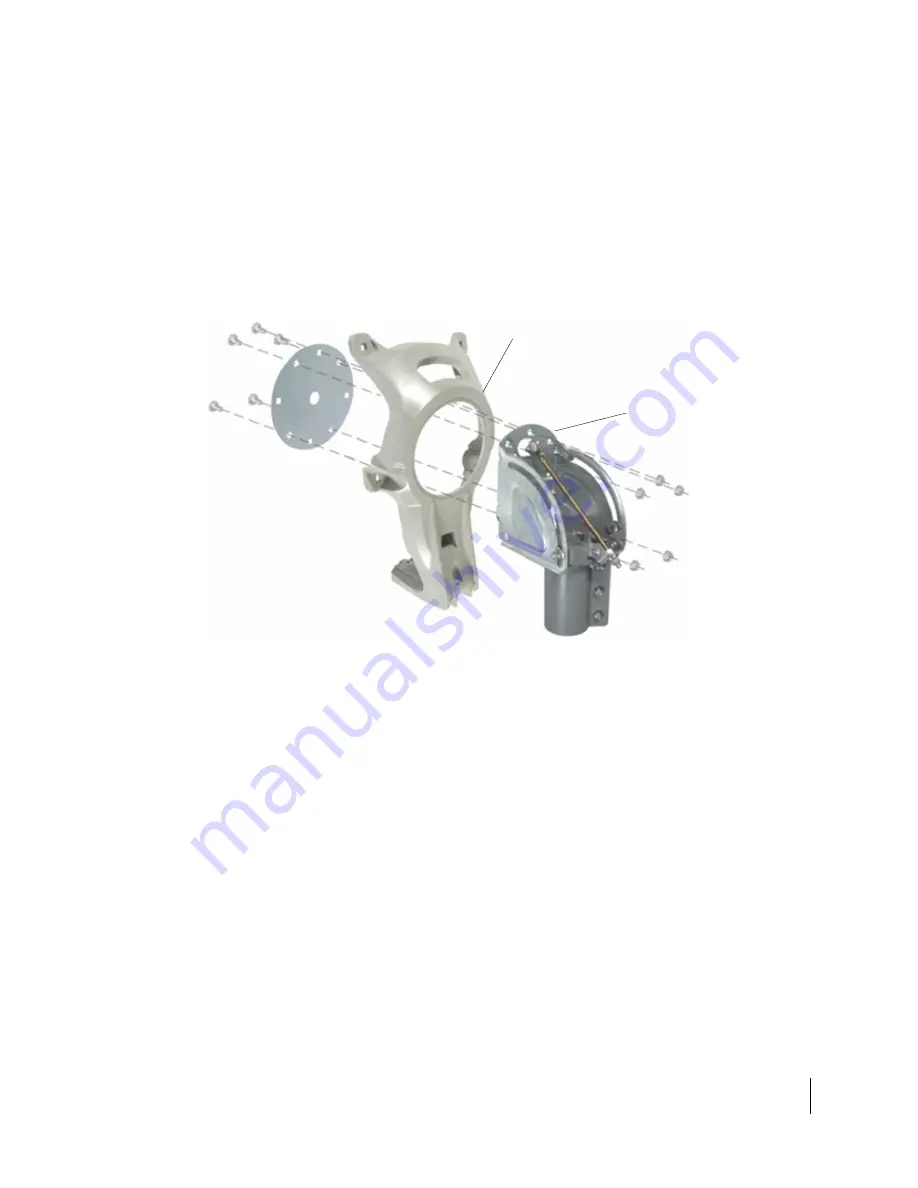
Installing the reflector bracket and tilt plate
Attach the tilt plate and reflector bracket to the Az/El mount, as shown in
Figure 8
.
1.
Place the reflector bracket against the face of the Az/El mount. Make sure
that the Az/El mount fits inside the lip of the reflector support, then place the
tilt plate over the round opening in the reflector bracket.
2.
Rotate the tilt plate so that the five holes line up with the corresponding holes
in the Az/El mount.
Note:
The tilt plate contains additional holes that will
not
line up with holes
in the Az/El mount.
Figure 8: Attaching the reflector bracket and tilt plate
3.
Insert five carriage bolts through the tilt plate and into the corresponding
holes in the Az/El mount.
4.
From the opposite side of the reflector bracket, place a hex nut on each bolt
and tighten the nuts lightly, only until snug. The reflector bracket should
rotate freely between the Az/El mount and the tilt plate.
When the reflector bracket is correctly attached to the Az/El mount, you can
see the tilt scale numbers above the tilt pointer, as shown in
Figure 9
on
page 26. In the figure, the tilt is set to
0
.
The Az/El tilt scale can place the tilt or rotation of the antenna to either a
positive or negative position, based on coordinates, and must be set on each
installation according to specifications.
Tilt scale
Ensure the tilt scale faces
the Az/El mount.
Align pointer (˄) with
zero on tilt scale.
5 bolts
(Some holes are
not used.)
Tilt plate
Reflector bracket
Az/El mount
Chapter 3 • Installing the antenna and radio
1039384-0001 Revision C
25


