background image

Chapter 2 • System Control Center

18

1037073-0001 Revision E

page to view status details and restore previous operating 
parameters.

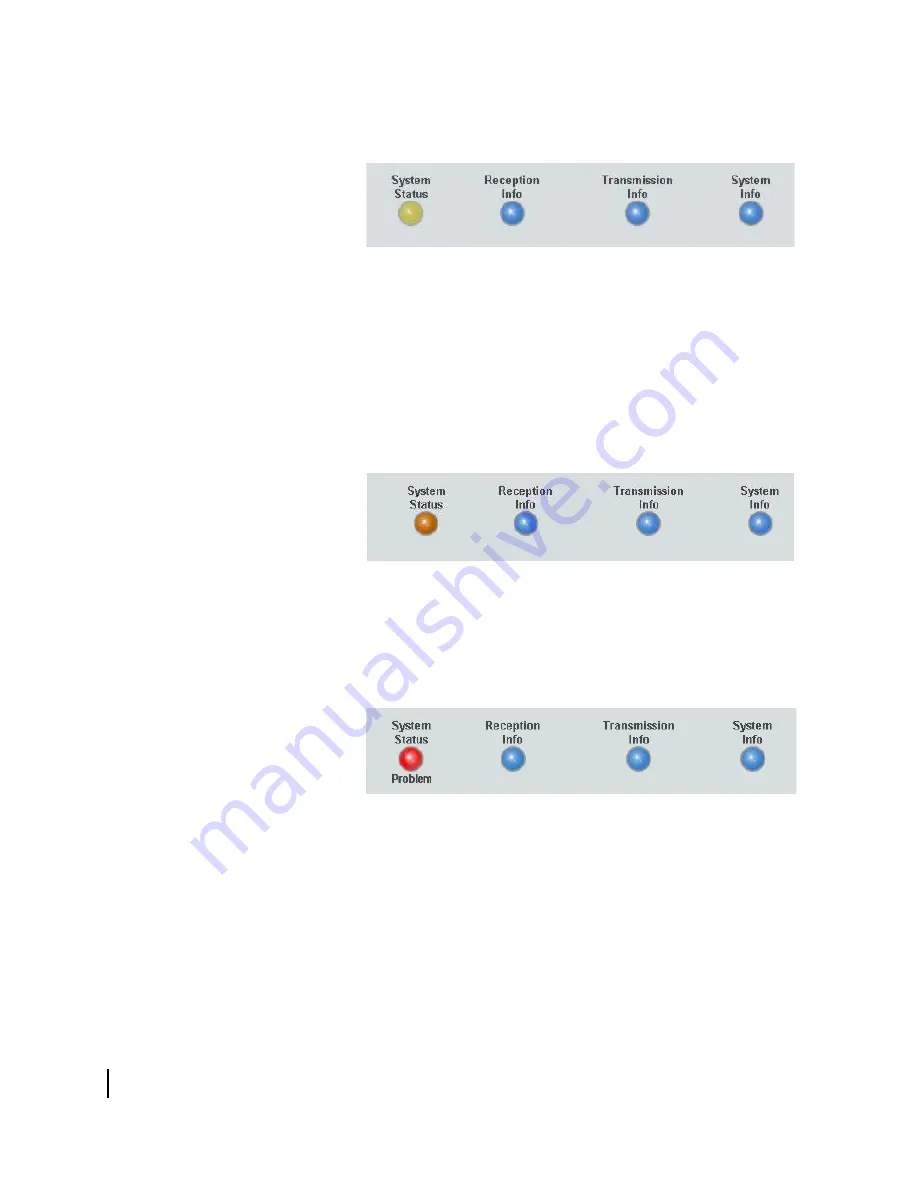
– If the button is orange, as shown in Figure 15, the remote 

terminal has exceeded the Fair Access Policy (FAP) 
threshold (only applicable for HN7000S). Each HughesNet 
service plan has an established download threshold. 
Subscribers who exceed that threshold will experience 
reduced download speeds for approximately 24 hours. 
Click the indicator to access the System Status page to 
view details 

– If the button is red and 

Problem

 appears below it, as 

shown in Figure 16, there is a problem with satellite 
connectivity. Click the button to access the System Status 
page to view problem details.

Reception Info


provides access to the Reception Info page, 

which displays terminal receive data. For more information, 
see 

Reception Info page

 on page 23.

Transmission Info


provides access to the Transmission Info 

page, which displays terminal transmit data. For more 
information, see 

Transmission Info page

 on page 24.

System Info


provides access to the System Info page, which 

displays system information such as the terminal IP address, 

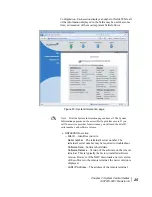
Figure 14: System Status degraded

Figure 15: Fair Access Policy in effect

Figure 16: System Status button showing a problem

Summary of Contents for HN7000S

Page 1: ...1037073 0001 Revision E February 19 2008 HN System Remote Terminal User Guide Models HN7000S HN7700S ...

Page 2: ...work Systems LLC makes no warranty of any kind with regard to this material including but not limited to the implied warranties of merchantability and fitness for a particular purpose Trademarks Hughes Hughes Network Systems and HughesNet are trademarks of Hughes Network Systems LLC All other trademarks are the property of their respective owners Revision record Revision Date of issue Scope A July...

Page 3: ...if necessary Types of warnings used in this manual This section introduces the various types of warnings used in this guide to alert you to possible safety hazards WARNING Indicates a potentially hazardous situation which if not avoided could result in death or serious injury CAUTION Indicates a potentially hazardous situation which if not avoided may result in minor or moderate injury CAUTION Ind...

Page 4: ... Important safety information iv 1037073 0001 Revision E ...

Page 5: ...e 4 HN7000S overview 5 HN7700S overview 6 HN7700S enterprise features 6 VADB 7 Optional protection module 8 Using the HN7700S with serial devices 8 Dual Ethernet ports 9 Ethernet port configurations 9 Port forwarding 9 Using the pedestal base 10 Attaching the base 10 Operating precautions 10 Power cycling the terminal 12 Preventive maintenance 12 Chapter 2 System Control Center 13 Overview 13 Acce...

Page 6: ...ghesNet Tools using the CD 34 Installing HughesNet Tools by downloading software from the Hughes site 34 Launching HughesNet Tools 34 HughesNet Tools home page 35 I Have a Technical Problem 36 Support Library 36 Helpful Tools 36 Chapter 4 Remote terminal LEDs 37 Front panel LEDs 37 Startup LED test 38 Normal operation 38 Fatal error indication 39 Power LED flashing 39 Weather and signal strength 3...

Page 7: ...he Power LED 58 Checking the LAN LED 58 Problems when other devices are connected to the terminal 60 Transmit or Transmit WAN LED is off 60 Receive or Recieve PPP IP LED is off 60 System LED is off 61 Troubleshooting other problems 62 Hot cable connector 62 Slow transmission speed or intermittent operation 63 Troubleshooting VADB 63 Appendix A Typical Operating System Settings 65 Determining if DH...

Page 8: ...onditions for Canada 100 Repairs in Canada 100 Electromagnetic compatibility EMI 101 FCC Part 15 101 Canada Class B warning 102 R TTE EU 102 Telecommunications standards 102 IPoS 102 FCC Part 68 102 Ringer equivalence number REN 103 Discontinuance of service 103 Telephone Company changes 103 Repairs in the United States 104 Canada equipment attachment limitations 104 Acronyms and abbreviations 107...

Page 9: ... Entering the name of the shortcut 16 13 Buttons to System Control Center pages 17 14 System Status degraded 18 15 Fair Access Policy in effect 18 16 System Status button showing a problem 18 17 System Status page 21 18 Reception Information page 23 19 Transmission Information page 24 20 System Information page 25 21 Problem Troubleshooting page 27 22 Problem diagnosis help 28 23 Detail Problem St...

Page 10: ... 69 49 Entering the preferred DNS server address 70 50 Network and Dialup Connections 71 52 TCP IP Properties 72 51 Local Area Connections 72 53 Entering the preferred DNS server address 73 54 Network and Dialup Connections 74 55 Local Area Connections 74 56 Local Area Connection Properties 75 57 TCP IP Properties 76 58 Network dialog with Configuration tab 77 59 TCP IP Properties 78 60 Entering t...

Page 11: ... 73 Gateway tab Windows 98SE and Me 90 74 Mac Systems Preferences menu 91 75 Mac Network screen 91 76 Select Manually from the Configure drop down list 92 77 Mac System Preferences menu 93 78 Mac Network screen 93 79 Select DHCP from the Configure drop down menu 94 Appendix B 80 Site with remote terminal and wireless LAN 96 81 Site with remote terminal and wired Ethernet LAN 97 Appendix C 82 IPoS ...

Page 12: ... Figures xii 1037073 0001 Revision E ...

Page 13: ... Tables 1037073 0001 Revision E xiii Tables Chapter 4 1 Remote terminal front panel LED operation 38 Appendix C 2 HN7000S and HN7700S standards compliance 99 ...

Page 14: ... Tables xiv 1037073 0001 Revision E ...

Page 15: ...d remote terminal designed for Internet access for consumers and Small Office Home Office SOHO entrepreneurs The HN7700S is an enterprise class broadband communications solution used by business customers This manual is intended for users in the United States and Canada and in other international countries Certain information may vary depending on the user s location This manual identifies such di...

Page 16: ...B MAC 150MB A functioning 10 100 BaseT Ethernet interface installed on at least one computer Contact information If you experience problems with your Hughes remote terminal first try the solutions offered in Troubleshooting on page 41 If that fails use the contact information here If you need operational warranty or repair support your contact information depends on where you purchased your remote...

Page 17: ...2 For terminals purchased from a U S value added reseller If you purchased this product from one of our value added reseller VARs do not contact Hughes Contact your VAR according to the procedure supplied by them for technical support They are trained to help you with any technical problem For international users If you need product service warranty support or repair service please contact your cu...

Page 18: ...y Figure 1 Remote terminal s role in the system architecture Antenna Satellite Remote terminal Mac or PC Internet d i g i t a l TM d i g i t a l TM VAXst at i on 3100 Inroute Outroute Network Operations Center NOC T0174005 Note You can connect multiple home computers and laptops to a single Internet connection at no additional cost To do this you need home networking equipment which is not include...

Page 19: ...r computer to access the Internet You will also be able to operate a local area network LAN after you configure your computers with network interface cards NICs connect them with Ethernet cable or through a wireless base station and configure your computer s operating system network properties The terminal has a System Control Center SCC that provides access to important system information such as...

Page 20: ...ommunications solution for enterprise customers These features are introduced below and then described in more detail in the following sections VADB The HN7700S remote terminal includes an internal modem that supports the Virtual Private Network Automatic Dial Backup VADB feature VADB enables the HN7700S to send and receive data over a terrestrial phone line if the satellite link between the termi...

Page 21: ...N to receive specific Transmission Control Protocol TCP and User Datagram Protocol UDP traffic from the Internet VADB To support the VADB feature an RJ 11 telephone cable connects the HN7700S to a phone jack In some countries a converter may be required to connect the cable to the phone jack Figure 4 shows an example of a VADB connection If the satellite link between the HN7700S and the Hughes Net...

Page 22: ...he use of this optional protection module For installation instructions for the optional VADB protection module contact your service provider Using the HN7700S with serial devices The HN7700S remote terminal has one DCE DTE RS 232 serial port that supports any type of serial device Common serial devices that may be connected to the HN7700S include Point of Sale POS devices Credit card readers Auto...

Page 23: ...p to four serial devices Hubs Routers Switches Ethernet port configurations The Ethernet ports support the following configurations Dual port single subnet Only one Ethernet port is configured with an IP address at the NOC which means the terminal supports one subnet Dual port independent subnet Each Ethernet port is configured with a separate IP address at the NOC which means the terminal support...

Page 24: ...position with the pedestal base or in a horizontal position without the pedestal base when mounted in a ventilated rack Attaching the base During troubleshooting procedures you may be asked by your service provider to remove the pedestal base After troubleshooting you must reattach the pedestal base To attach the pedestal base to the terminal 1 Position the terminal and base as shown in Figure 7 2...

Page 25: ...the back of the terminal while it is powered on Doing so could damage the plug s pins and cause a short in the system If your terminal uses an AC DC power supply whether in line or a wall unit a surge protector is recommended When power needs to be removed from a terminal that uses an AC DC power supply always unplug the AC power cord from the power source wall outlet power strip or surge protecto...

Page 26: ...serviceable parts Opening or tampering with the remote terminal voids its warranty CAUTION This User Guide contains some procedures that instruct you to restart the remote terminal using the Restart function in the System Control Center When so instructed do not power cycle the remote terminal Doing so will destroy valuable data used for troubleshooting CAUTION When this User Guide instructs you t...

Page 27: ...30 Help page on page 31 Overview The System Control Center is a set of screens and links that allows you to monitor and optimize the performance of your remote terminal and Internet browsing It provides access to important system information configuration parameters documentation and help topics The System Control Center software is embedded in the HN7000S terminal You access it through your Web b...

Page 28: ...Figure 8 If there is no System Control Center shortcut and entering www systemcontrolcenter com does not work 1 Type 192 168 0 1 in the browser s address bar 2 Press ENTER The System Control Center home page should appear If it does not see Cannot access the System Control Center on page 55 Creating a shortcut to the System Control Center You can create a Windows shortcut on your computer desktop ...

Page 29: ...he computer desktop Alternate method for creating the shortcut An alternate method for creating a shortcut to the System Control Center follows 1 Place your cursor on the computer desktop 2 Right click and select New Shortcut as shown in Figure 10 Figure 9 Icon for creating a shortcut Drag icon to the desktop Figure 10 Creating a shortcut to the System Control Center ...

Page 30: ...er in the field on the Select a Title for the Program window as shown in Figure 12 6 Click Finish to save the shortcut to your desktop Figure 11 Entering the URL in the Create Shortcut window Figure 12 Entering the name of the shortcut Note You can also add the System Control Center to your browser s Favorites or Bookmark list refer to your browser s documentation for instructions ...

Page 31: ...b Acceleration or virus activity Orange indicates the Fair Access Policy FAP has been exceeded Below is a description of the these four buttons System Status provides access to the System Status page The System Status page displays general system status information such as signal strength and commissioning status For more information see System status page on page 21 If the button is green and OK ...

Page 32: ...is red and Problem appears below it as shown in Figure 16 there is a problem with satellite connectivity Click the button to access the System Status page to view problem details Reception Info provides access to the Reception Info page which displays terminal receive data For more information see Reception Info page on page 23 Transmission Info provides access to the Transmission Info page which ...

Page 33: ...or more information see Transmission Info page on page 24 Diagnostic Utilities The Connectivity Test link provides access to the Connectivity Test page which can be used to test the connection between your terminal and the Network Operations Center NOC For more information see Confirming NOC connectivity on page 50 The Problem Troubleshooting link provides access to first level troubleshooting pro...

Page 34: ...eractive tools From this portal you can click the HughesNet Customer Care link to access a wide variety of support resources For example you can check online usage test satellite speed find troubleshooting scripts manage passwords access email check your account and service plan information and more The specific portal information and features you can access are determined by the service plan you ...

Page 35: ...isplays corresponding help information Transmit Status Indicates whether the transmit data path is operational Clicking the status message displays corresponding help information Software Download Status Indicates whether remote terminal software and configuration is current Service Status Indicates whether the remote terminal is commissioned TCP Acceleration Status Indicates whether Transmission ...

Page 36: ...old The FAP indication may display one of the following three status messages YES FAP threshold was exceeded and restrictions are in effect NO FAP threshold was not exceeded No restrictions in effect UKNOWN No FAP indication received This field is present only if the FAP option is enabled VADB Connection Status Click the Detail link to access information about the VADB connection This field is pre...

Page 37: ... corrupted Any number greater than zero indicates a problem except when adverse weather conditions are present Frames may be corrupted in adverse weather conditions or if there is a problem with the receive cable or the antenna assembly Bad Key Frames Indicates the percentage of received frames that could not be decrypted successfully All data received over the satellite is encrypted Any number gr...

Page 38: ...o the satellite Number of Failed Transmissions Reports the number of frames that could not be sent A continuously increasing value indicates a problem with transmitting However if a low non increasing value is displayed and the system is functioning there is no reason for concern You do not need to troubleshoot or contact your service provider Number of Packets submitted for transmission Indicates...

Page 39: ...eshoot Software Date Software build date Software Release Version of the software on the remote terminal This is typically the factory installed software version However if the NOC downloads a newer version of the software to the remote terminal the newer version is displayed LAN1 IP Address The address of the remote terminal Figure 20 System Information page Note Print the System Information page...

Page 40: ...to a higher or lower frequency band for different types of LNBs Router Address IP address of the primary router at the NOC used to route data sent by the remote terminal Transmit Radio Info section Transmit Radio Wattage Wattage of the transmit radio This field may list the transmit radio part number if it was selected during the commissioning process instead of the wattage Software Configuration ...

Page 41: ...em Control Center s Problem Troubleshooting page shown in Figure 21 provides access to troubleshooting procedures for some common user problems This page provides access to a drop down menu containing a list of common problems from which the user can select To display the Troubleshooting page click Problem Troubleshooting on the System Control Center home page then select the appropriate problem a...

Page 42: ...ce as shown in Figure 22 Detailed Problem Statistics page The Detailed Problem Statistics page allows you to view statistics for a selected problem for a specific hourly time frame You select the problem and time frame from drop down lists to view the statistics needed as shown in Figure 23 Figure 24 on page 29 shows a sample of the generated statistics Figure 22 Problem diagnosis help ...

Page 43: ...r 1037073 0001 Revision E 29 Connectivity Test page The Connectivity Test page has a link that can be used to test the HN7000S connectivity to the NOC Figure 23 Detail Problem Statistics selection Figure 24 Statistics report sample ...

Page 44: ...Configuration Page Figure 25 is available only on the HN7700S terminal and is present only if Port Forwarding has been enabled and made visible on your terminal by the NOC This page allows you to define rules for allowing TCP and User Datagram Protocol UDP traffic on the Internet to access servers on your network Note This feature is not available for the HN7000S terminal Figure 25 Port Forwarding...

Page 45: ... Click Add Rule on the Port Forwarding Configuration page See Figure 25 5 Enter the appropriate values in the following fields Rule ID Server IP Address Server port and Global port See Figure 26 6 Click the Protocol Type drop down menu and select the appropriate protocol 7 Click Save Rule 8 Repeat steps 1 through 7 to define additional rules Help page The System Control Center Help page Figure 27 ...

Page 46: ... a utility that enhances browsing performance by setting certain computer parameters to optimize communication performance for a satellite link Follow these steps to download and install the utility 1 Open a Web browser on a computer connected to the HN7000S 2 Navigate to the System Control Center home page as instructed in Accessing the System Control Center on page 14 3 In the Help section click...

Page 47: ...re CD is included in the shipping container when you receive your HN7000S terminal However early models did not include this CD The technician who installs installed your terminal uses the Software Activation CD to automatically check your computer to make sure it meets certain requirements such as sufficient memory operating system version and Internet Explorer version Do you have HughesNet Tools...

Page 48: ...e computer s CD drive 2 Follow the on screen instructions The CD automatically installs HughesNet Tools Installing HughesNet Tools by downloading software from the Hughes site 1 Launch Internet Explorer and go to customercare myhughesnet com 2 Under HughesNet Tools and Security click Introduction to HughesNet Tools 3 Click For information on downloading from the Internet Click Here 4 Follow the in...

Page 49: ...home page includes links to specific tools as illustrated in Figure 30 When you click one of these links the link launches the selected tool or utility or takes you to an information site Several of the tools run automatic tests when you click the link Each link is described following Figure 30 Figure 29 HughesNet Tools system tray icon Windows system tray HughesNet icon enlarged Figure 30 HughesN...

Page 50: ...ection If the test fails the tool suggests options for solving the problem Support Library The Support Library area includes one link Browse All Support Documents This link opens the Support Library page and contains two links as shown in Figure 31 Helpful Tools The Helpful Tools area includes one link Update HughesNet Tools This link checks for updates to HughesNet Tools Figure 31 Support Library...

Page 51: ...chapter describes the following LEDs Front panel LEDs on page 37 Ethernet port LEDs on page 40 Front panel LEDs The remote terminal has five front panel LED indicators as shown in Figure 32 This section explains what it means when the LEDs are on off blinking or flashing On means the LED is continuously lit Blinking means the LED is usually on but intermittently turns off briefly Flashing means th...

Page 52: ...ription LAN On The terminal is connected to the computer s Ethernet card Blinking The terminal is transmitting and or receiving data Transmit or Transmit WAN On OK Blinking mostly on Transmitting data Blinking mostly off The terminal is ranging measuring the distance to the satellite to calibrate transmit timing and transmit power Off Condition preventing transmission Receive or Recieve PPP IP On ...

Page 53: ...th signal strength If the interference is strong enough the remote terminal may stop receiving signals from the satellite and stop transmitting If this happens the Transmit HN7000S or Transmit WAN HN7700S and Receive HN7000S or Receive PPP IP HN7700S and LEDs both turn off Antenna reception may be degraded by heavy rain or snow or by a buildup of moisture snow or ice on the antenna Similar conditi...

Page 54: ...range LEDs on each port indicate link status and Ethernet mode as explained in Figure 33 HN7700S Ethernet port configurations The Ethernet ports support the following configurations Dual port single subnet Only one Ethernet port is configured with an IP address at the NOC which means the terminal supports one subnet Dual port independent subnet Each Ethernet port is configured with a separate IP a...

Page 55: ...start the remote terminal using the Restart function in the System Control Center When so instructed do not power cycle the remote terminal Doing so will destroy valuable data used for troubleshooting CAUTION When this User Guide instructs you to power cycle the remote terminal you should remove and then re apply power If the terminal uses an AC DC power supply disconnect the AC power cord from th...

Page 56: ...You should try this link before calling your service provider 1 On the System Control Center page click Problem Troubleshooting as shown in Figure 34 The problem troubleshooting page displays 2 The Problem Troubleshooting page contains two drop down lists Click the drop down list arrow next to the topic box to display a list of topics Click the appropriate topic as shown as shown in Figure 35 Figu...

Page 57: ... 0001 Revision E 43 3 Select the appropriate problem 4 Click the down arrow for the time box to display a list of time intervals Select the appropriate timeas shown in Figure 36 Figure 35 Select problem list Figure 36 Select time list ...

Page 58: ...mmissioned on page 45 Confirming receive signal on page 46 Confirming transmit signal on page 47 Confirming that TCP acceleration is operational on page 48 Confirming that Web acceleration is operational on page 49 Confirming NOC connectivity on page 50 Confirming Internet connectivity on page 53 Checking for viruses and firewall issues on page 54 These procedures are described in the sections tha...

Page 59: ...er s address bar try typing 192 168 0 1 instead then press ENTER If that doesn t work see Cannot access the System Control Center on page 55 Confirming that the terminal is commissioned Follow these steps to confirm the terminal is commissioned 1 At the System Control Center click the System Info link The System Information page appears See Figure 38 2 Observe the value in the Site ID field If the...

Page 60: ...he Reception Info link The Reception Information page appears See Figure 39 2 Observe the receive Rx code in the Receive Status field If Receiver operational RxCode 5 appears in the Receive Status field the terminal is receiving signals properly Proceed to Confirming transmit signal on page 47 If any other code appears the terminal is not receiving signals properly Click the code which is a link a...

Page 61: ...pears See Figure 40 2 In the Transmit Status field check the transmit Tx code If Transmitter ready TxCode 8 appears in the Transmit Status field the terminal is transmitting signals properly Proceed to the Confirming that TCP acceleration is operational on page 48 If any other code appears the terminal is not transmitting signals properly Click the code which is a link and follow the troubleshooti...

Page 62: ...ration Status row If the message says Operational TCP Acceleration is enabled Proceed to Confirming that Web acceleration is operational on page 49 If the message says Not Operational TCP Acceleration is disabled Perform the following steps a Check that receiving and transmitting are working If they are not troubleshoot them as per the previous two sections b If receiving and transmitting are work...

Page 63: ...ng performance 1 At the System Control Center click the System Status link The System Status page appears See Figure 41 2 Check the message in the Web Acceleration Status row If the message says Operational Web Acceleration is enabled and the System Status link is green Proceed to Confirming NOC connectivity on page 50 If the message says Not Operational Web Acceleration is disabled and the System...

Page 64: ...ration status again If it is operational but you still cannot access the Internet proceed to Confirming NOC connectivity on page 50 If Web Acceleration is still not operational after power cycling contact your service provider for assistance Confirming NOC connectivity Use the Connectivity Test link to check connectivity to the Hughes Network Operations Center NOC CAUTION Do not power cycle the te...

Page 65: ...articular IP address exists and can accept requests You can use ping to make sure a device you are trying to reach is operating Ping sends a packet to a designated address and waits for a response You can use ping on a Windows or MacIntosh computer a At the System Control Center click the System Info link The System Information page appears b Record the router address listed in the Satellite secti...

Page 66: ...l sent packets were received as in Figure 43 If the ping fails the ping results show that packets were lost as in Figure 44 and timeout messages may also appear If pinging the router address succeeds but you still cannot access the Internet skip to Confirming Internet connectivity on page 53 If pinging the router address fails and DHCP is disabled on the terminal the default gateway address is pro...

Page 67: ...power cord from the power source If the terminal is connected to a DC power source unplug the DC input cable from the terminal s power supply b Wait 30 sec c Plug the power cord back into the power source If the power source is DC plug the input cable back into the power supply If you still can t access the Internet call your service provider Confirming Internet connectivity Loss of Internet conne...

Page 68: ...vary slightly based on your computer s operating system but they may be used as a guideline 1 On the Windows task bar click Start Run 2 Type command in the Run window 3 Click OK 4 Type ipconfig all at the command prompt and press ENTER 5 Locate the DNS addresses in the DNS Servers field Verify that 66 82 4 8 appears in this field 6 Close the Command window If the DNS address is correct contact you...

Page 69: ...n a web browser 4 Type www systemcontrolcenter com in the browser s address bar 5 Press ENTER 6 If the System Control Center has not opened type 192 168 0 1 in the browser s address bar 7 Press ENTER Terminal is connected to an Ethernet device If your terminal is connected to an Ethernet device such as a router or a wireless base station follow these steps 1 Disconnect the Ethernet cable from the ...

Page 70: ...ions SAT IN SAT OUT DC IN LAN DEBUG Ethernet AC power cord Ethernet cable Receive cable Power supply DC power cord Transmit cable T0174003 Computer CAUTION The transmit and receive cable connectors must be securely tightened Power down the terminal by removing the AC or DC power from the source do not remove the power cord from the terminal This could shock you and or damage the terminal Make sure...

Page 71: ...g If all LEDs are flashing simultaneously this is an indication that the terminal s firmware is corrupted A terminal in this state cannot be recovered Contact your service provider All LEDs are off If all the LEDs are off the power connections may not be secure or the power source may be faulty Refer to Figure 45 and follow these steps 1 Make sure the DC power cord is securely connected to the DC ...

Page 72: ...puter s Ethernet port 2 If the LAN LED is still off power cycle the terminal Unplug the power cord from the power source If the terminal is connected to a DC power source unplug the DC input cable from the terminal s power supply Wait 30 sec Plug the power cord back into the power source If the power source is DC plug the input cable back into the power supply 3 If the LAN LED is still off check t...

Page 73: ... power cord from the power source If the terminal is connected to a DC power source unplug the DC input cable from the terminal s power supply Wait 30 sec Plug the power cord back into the power source If the power source is DC plug the input cable back into the power supply 5 If the LAN LED is still off follow this step only if the remote terminal is connected to a hub router or other network dev...

Page 74: ...WAN LED is off on page 60 Receive or Recieve PPP IP LED is off on page 60 System LED is off on page 61 Transmit or Transmit WAN LED is off If the remote terminal is not operating normally and the transmit WAN LED is off follow these steps 1 Check all cable connections and tighten any connections that seem loose See the Caution statement that follows Figure 45 on page 56 2 If the LED is still off c...

Page 75: ...tact your service provider System LED is off If the System LED is off but the Transmit or Transmit Wan and the Receive or Receive PPP IP LEDs are on there may be a problem at the NOC Follow these steps 1 Wait 15 minutes If there is a problem at the NOC it will soon be corrected and the System LED will turn on You can then resume normal operation Note The remote terminal may operate correctly when ...

Page 76: ...e connector feels hot it may be because the connector is loose or defective Troubleshoot this problem as follows 1 Remove power from the terminal by unplugging the power supply s AC power cord from the surge protector or AC outlet 2 Allow the cable connector to cool for at least 5 min 3 Make sure the connector feels cool 4 Make sure the cable connector is finger tight with no play See the Caution ...

Page 77: ...minal b Verify the power cord is securely connected to the power source c If the power cord is connected to a surge protector verify the surge protector is connected to a wall outlet and turned on 2 Verify the phone cable is securely attached to the TEL LINE port on the HN7700S and the wall telephone jack 3 Connect an analog telephone to the wall telephone jack Dial the VADB access number used by ...

Page 78: ...Chapter 5 Troubleshooting 64 1037073 0001 Revision E ...

Page 79: ...rminal before configuring the operating system settings on the computer connected to the terminal 1 Open a Web browser on your computer 2 Type www systemcontrolcenter com or 192 168 0 1 in the browser s address bar and press ENTER 3 Click System Info on the System Control Center home page 4 Observe the value in the DHCP field If Disabled appears in the field you must manually configure the compute...

Page 80: ...y other computer connected to the terminal You can obtain the entire list of available addresses for use with your terminal from the Frequently Asked Questions section of the System Control Center Subnet Mask This is the subnet mask assigned to your terminal It is available on the System Information page of the System Control Center You would also have written this on the Quick Start Guide during ...

Page 81: ...rs appears A Local Area Connection icon must be listed under LAN or High Speed Internet If not the network is not installed correctly Note If your terminal will be connected to a router you must configure the router with the static IP address Refer to the instructions included with your router to configure it You must then enable the Dynamic Host Control Protocol DHCP on all PCs connected to the r...

Page 82: ...nal and select Properties See Figure 47 4 Ensure the Client for Microsoft Networks and Internet Protocol TCP IP are installed and checked If NetBEUI is installed uninstall it Note If the Local Area Connection icon appears with a red X then check your connections The red X must not be present in order to successfully configure your operating system s settings Figure 47 Local Area Connections ...

Page 83: ...roperties being careful not to uncheck the check box See Figure 48 6 In the General tab select Use the following IP address Enter an appropriate IP address from the range of available IP addresses and the appropriate Subnet Mask for your network in the fields provided Enter the IP address of Figure 48 TCP IP Properties ...

Page 84: ... 8 Restart the computer even if Windows does not prompt you to do so This ensures the network settings are automatically reset Windows XP 1 Open the Control Panel by selecting Start Settings Control Panel and double click the Network and Dial up Connections icon See Figure 50 Figure 49 Entering the preferred DNS server address Note If the Control Panel is in category view select Network and Intern...

Page 85: ...not installed correctly 3 Right click the Local Area Connection icon that represents the Network adapter that connects the computer to the terminal and select Properties See Figure 51 Figure 50 Network and Dialup Connections Note If the Local Area Connection icon appears with a red X then check your connections The red X must not be present in order to successfully configure your operating system ...

Page 86: ...nt for Microsoft Networks and Internet Protocol TCP IP are installed and checked If NetBEUI is installed uninstall it 5 Select Internet Protocol TCP IP and select Properties being careful not to uncheck the check box See Figure 52 Figure 51 Local Area Connections Figure 52 TCP IP Properties ...

Page 87: ...ubnet Mask for your network in the fields provided Enter the IP address of the terminal for the Default Gateway Enter 66 82 4 8 in the Preferred DNS server field See Figure 53 7 Select OK to close the open dialog boxes and finish the configuration 8 Restart the computer even if Windows does not prompt you to do so This ensures the network settings are automatically reset Figure 53 Entering the pre...

Page 88: ...00 1 Select Start Settings Control Panel 2 Select the Network and Dialup Connections icon See Figure 54 3 Right click the Local Area Connection that connects to the terminal and select Properties See Figure 55 Figure 54 Network and Dialup Connections Figure 55 Local Area Connections ...

Page 89: ...ed uninstall it 5 Select Internet Protocol TCP IP being careful not to uncheck it and then select Properties See Figure 56 6 In the General tab select Use the following IP address Enter an appropriate IP Address from the range of available IP addresses 7 Enter 255 255 255 0 for the subnet mask 8 Enter the terminal IP address as the Default Gateway Figure 56 Local Area Connection Properties ...

Page 90: ...on E 9 Enter 66 82 4 8 for the Preferred DNS server field See Figure 57 10 Select OK to save and close Internet Protocol TCP IP Properties 11 Select Close again to save and close Local Area Connection Properties 12 Reboot the PC if necessary Figure 57 TCP IP Properties ...

Page 91: ... box opens to the Configuration tab See Figure 58 3 Select the TCP IP protocol bound to the NIC connected to the remote terminal and select Properties In Figure 58 it is TCP IP Intel R Pro 100VE Network Connection Your system may display different NIC information The TCP IP Properties box opens to the IP Address tab See Figure 59 Figure 58 Network dialog with Configuration tab ...

Page 92: ...ddress Enter an appropriate IP address from the range of available IP addresses Refer to page 66 for more information on how to view available IP addresses 5 Enter the appropriate subnet mask in the Subnet Mask field Refer to page 66 for more information on subnet masks Figure 59 TCP IP Properties ...

Page 93: ... the following settings a Make sure Enable DNS is selected b The Domain Name should be direcpc com c Under DNS Server Search Order you should see 66 82 4 8 If you do not type it in the box and select Add 9 Select OK when finished to close the TCP IP Properties box 10 Select OK again to close the Network dialog box 11 In the window that appears select Yes to restart the computer Figure 60 Entering ...

Page 94: ...list of network adapters appears as shown in Figure 61 The Local Area Connection NIC Card must appear under the LAN or High Speed Internet heading If it does not the network is not installed correctly 2 Right click the Local Area Connection NIC Card icon that represents the terminal network connection then click Figure 61 Network Connections Windows Vista Note If a red X appears next to the Local ...

Page 95: ...ocol TCP IP are installed and checked as shown in the figure If NetBEUI is installed uninstall it 4 Highlight the appropriate Internet Protocol TCP IP connection Be careful not to uncheck the checkbox Note Depending on your security settings a popup User Account Control message may appear requesting that you confirm the action before proceeding Click Continue to proceed Figure 62 Local Area Connec...

Page 96: ...configuration 8 Restart the computer even if Windows does not require you to do so This ensures that the network settings are automatically reset Windows XP 1 From the Windows desktop select Start Settings Control Panel Double click the Network and Dialup Connections icon A list of network adapters appears as shown in Figure 64 The Local Area Connection icon must appear under the LAN or Figure 63 ...

Page 97: ...tly 2 Right click the Local Area Connection icon that represents the Network adapter connecting the computer to the Satellite Gateway and select Properties Figure 64 Network Connections Windows XP Note If a red X appears next to the Local Area Connection icon check your connections You cannot successfully configure your system if the red X is present ...

Page 98: ...installed and checked as shown in Figure 65 If NetBEUI is installed uninstall it 4 Highlight Internet Protocol TCP IP Be careful not to uncheck the check box 5 Click Properties The Internet Protocol Properties dialog appears as shown in Figure 66 Figure 65 Local Area Connection Properties Windows XP Figure 66 Internet Protocol Properties Windows XP ...

Page 99: ... to do so This ensures that the network settings are automatically reset Windows 2000 1 From the Windows desktop select Start Settings Control Panel and double click Network and Dial up Connections A list of network connections appears as shown in Figure 67 The Local Area Connection icon must appear on the page If it does not the network is not installed correctly 2 Right click the Local Area Conn...

Page 100: ...s Properties window appears as shown in Figure 68 3 Ensure that Client for Microsoft Networks and Internet Protocol TCP IP are installed and checked If NetBEUI is installed uninstall it 4 Select Internet Protocol TCP IP Be careful not to uncheck the check box Figure 68 Local Area Connection Properties Windows 2000 ...

Page 101: ... that both Obtain an IP Address Automatically and Obtain DNS Server Address Automatically are selected If not select them 7 Click OK to close the dialog boxes and finish the configuration 8 Restart the computer even if Windows does not require you to do so This ensures that the network settings are automatically reset Figure 69 Internet Protocol Properties Windows 2000 ...

Page 102: ...the Windows desktop select Start Settings Control Panel then double click Network See Figure 70 A list of network components appears as shown in Figure 71 Figure 70 Control Panel Windows 98SE and Me Note On computers running on Windows Me choose View All Control Panel Options to see the Network icon ...

Page 103: ...Revision E 89 2 Select the TCP IP entry associated with the Network Interface Card NIC then click Properties The TCP IP Properties window appears as shown in Figure 72 Figure 71 Network window Windows 98SE and Me Figure 72 TCP IP Properties Windows 98SE and Me ...

Page 104: ...for the TCP IP properties 7 Click OK to close the list of network components Windows may request the installation CD ROM to complete updating the TCP IP settings 8 Restart the computer even if Windows does not require you to do so This ensures that the network settings are automatically reset Configuring a Macintosh for a static IP address Follow the steps below to configure a terminal with a stat...

Page 105: ...tings 1037073 0001 Revision E 91 2 Select the Network icon which is circled in Figure 74 The Network screen shown in Figure 75 appears 3 Make sure the TCP IP tab is selected Figure 74 Mac Systems Preferences menu Figure 75 Mac Network screen ...

Page 106: ... field Do not use the numbers in the examples which are for illustrative purposes only 7 Select the Apply Now button The Mac is now configured Configuring a Macintosh to support a DHCP enabled terminal Follow the steps below to configure a terminal with DHCP enabled on a Macintosh system 1 Select System Preferences from the Mac interface The Systems Preference menu appears Figure 76 Select Manuall...

Page 107: ...tings 1037073 0001 Revision E 93 2 Select the Network icon which is circled in Figure 77 The Network screen shown in Figure 78 appears 3 Make sure the TCP IP tab is selected Figure 77 Mac System Preferences menu Figure 78 Mac Network screen ...

Page 108: ...4 1037073 0001 Revision E 4 Select the Configure drop down list See Figure 79 5 Select Using DHCP Notice the IP Address field grays out 6 Select the Apply Now button The Mac is now configured Figure 79 Select DHCP from the Configure drop down menu ...

Page 109: ...ation Install and configure a NIC also called an adapter in each computer you want to connect to the network The NICs must be set to auto negotiate Refer to the manufacturer s installation instructions If using a wired network connect the computers to the Ethernet hub with Ethernet cable Note Connect multiple home computers and laptops to a single Internet connection at no additional cost Home net...

Page 110: ... in the building that the signal can reach and thus can easily be moved around If there are multiple PCs on your LAN configure the base station for use with an IP address Refer to the documentation that came with your base station for instructions explaining how to configure it Configure all of the PCs on the LAN to communicate with the base station Wireless signals do not penetrate metal or water...

Page 111: ...es or play computer games you may wish to install a 100Mbps Ethernet hub Some hubs enable the network to use both speeds A sample Ethernet LAN is shown in Figure 81 Cat5 Category 5 Ethernet cable is the minimum recommended and supports Fast Ethernet 100Mbps If you think that the network or devices on the network may use the recently developed Gigabit Ethernet 1Gbps in the future consider installin...

Page 112: ... RJ 45 jacks installed at the ends is usually available in lengths of no more than 50 ft If the cable length exceeds 50 ft use a kit to install the RG 45 jacks at both ends of the cable This is called terminating the cable The kits are available at some electronic supply or home supply stores If you do not feel comfortable installing Ethernet cable yourself contact a professional installer ...

Page 113: ...y standards UL60950 1 for the United States CAN CSA C22 2 No 60950 1 for Canada See additional information below EN60950 1 for the European Union Electromagnetic Interference EMI standards FCC Part 15 for the United States See additional information below ICES 003 for Canada Electromagnetic compatibility EMC standards EN301 489 12 for the European Union Telecommunications standards TIA IPoS See ad...

Page 114: ...s the company s inside wiring associated with a single line individual service may be extended by means of a certified connector assembly telephone extension cord The customer should be aware that compliance with the above conditions may not prevent degradation of service in some situations Repairs in Canada Repairs to certified equipment should be made by an authorized Canadian maintenance facili...

Page 115: ...f the FCC Rules Operation is subject to the following two conditions 1 this device may not cause harmful interference and 2 this device must accept any interference received including interference that may cause undesired operation Responsible Party s name Hughes Network Systems LLC Address 11717 Exploration Lane Germantown MD 20876 Telephone 1 866 347 3292 Trade Name HUGHES Type of Equipment Two ...

Page 116: ...s Revision A in May 2006 FCC Part 68 This section applies to the HN7700S remote terminal only Standards to which Conformity is declared FCC Part 68 Part 68 Compliance This equipment Two Way Hughes System Model Number HN7700S complies with Part 68 of the FCC rules and requirements adopted by the ACTA On the rear panel of this equipment is a label that contains among other information the product Pa...

Page 117: ...imal point e g 00 is a REN of 0 0 For earlier products the REN is separately shown on the label Discontinuance of service This section applies to the HN7700S remote terminal only If the Two Way Hughes System causes harm to the telephone network the Telephone Company will notify you in advance that temporary discontinuance of service may be required But if advance notice isn t practical the Telepho...

Page 118: ...e Company Connection to Party Line Service is subject to state tariffs Contact the state public utility commission public service commission or corporate commission for information Canada equipment attachment limitations The Industry Canada label identifies certified equipment This certification means that the equipment meets certain telecommunications network protective operational and safety req...

Page 119: ...ommunications Company The equipment must also be installed using an acceptable method of connection In some cases the company s inside wiring associated with a single line individual service may be extended by means of a certified connector assembly telephone extension cord The customer should be aware that compliance with the above conditions might not prevent degradation of service in some situa...

Page 120: ...Appendix C Conformance with standards and directives 106 1037073 0001 Revision E ...

Page 121: ...tions Commission H HTTP HyperText Transfer Protocol https Secure http site I IP Internet Protocol IPoS IP over Satellite standard L LAN Local area network LED Light emitting diode N NAT Network address translation NIC Network interface card NOC Network Operations Center P PC Personal computer POS Point of sale device PSTN Public switched telephone network R R TTE Radio Equipment and Telecommunicat...

Page 122: ... Acronyms and abbreviations 108 1037073 0001 Revision E VADB Virtual private network dial backup VAR Value added reseller VPN Virtual private network ...

Page 123: ... 5 97 terminating ends of 98 Ethernet ports 7 9 configurations 9 40 LEDs 9 supported devices 9 F Fair Access Policy definition 18 threshold 18 Fatal error indication 57 FCC information 101 Features HN7700S remote terminal 6 Firewalls 54 Front panel LEDs 37 H HN7000S description 5 LEDs 37 maintenance 10 PC and MAC system requirements 2 troubleshooting 41 HN7700S description 6 Ethernet ports 40 Hugh...

Page 124: ... sale device 8 Port forwarding 7 9 30 defining rules 31 Ports 9 Power troubleshooting 63 Power supply checking for correct type 39 Powering down the terminal 12 Preventive maintenance 12 R Reception Info page 23 Remote terminal how it works 3 Repairs Canada 100 United States 104 Ringer equivalence number 103 S Safety information 10 standards Canada 100 Serial appliance 7 8 Serial appliances 7 Seri...

Page 125: ...error indication 57 firewalls 54 hot cable connector 62 Internet connectivity 53 NOC connectivity 50 power 63 slow speed 63 System Control Center 44 using LEDs for troubleshooting 56 viruses 54 with other devices connected to terminal 60 V VADB 7 connections 7 description 6 optional protection module 8 troubleshooting 63 Viruses 54 W Weather effects 39 Web acceleration 49 Wireless base station 5 6...

Page 126: ... Index 112 1037073 0001 Revision E ...

Reviews: