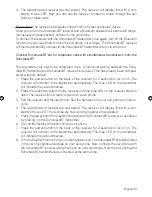
The blue indicator LED starts flashing for 5 seconds after plugging the power supply into
the outlet. The transmitter and receiver are already linked by default. If an active linked re-
ceiver is present, the indicator LED is lit constantly and the system is connected and ready
to use.
If there is no active linked receiver, the transmitter automatically goes into pairing mode:
The indicator LED blinks rapidly for 3½ minutes. During this time, the transmitter can be
found and paired to any type of Bluetooth receiver (mobile phone, streamer, hearing aids).
If no receiver is paired within this time, the indicator LED shuts off and the transmitter enters
standby mode.
The transmitter can be called out of standby mode at any time by pressing the pair button.
The process described above is then repeated.
Setup
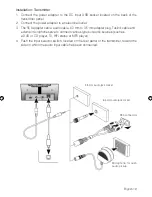
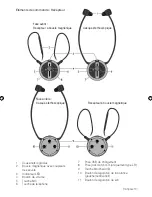
1. Activate the audio source connected to the transmitter, on (e. g. TV or HiFi stereo set).
2. Press the receiver’s power button for two seconds to switch it on. The indicator LED on
the receiver will flash blue.
3. Plug in the power supply connected to the transmitter or, if the transmitter is already
connected, the transmitter will find the receiver automatically.
4. The indicator LEDs on the transmitter and receiver will now be constantly lit in blue, this
indicates a functioning connection. Adjust the volume as desired (green slider up or
down) and put on the headset.
5. The receiver‘s indicator LED will start to flash slowly if the battery runs low. In this case,
recharge the receiver.
6. Switch off the receiver after use by pressing the power button for 2 seconds.
The receiver also switches off automatically when placed in the charging bay of the
transmitter.
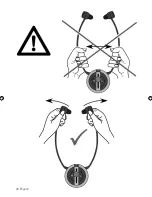
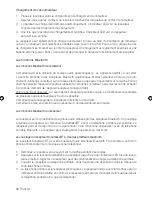
The loop receiver (Type LR) features a 3.5 mm audio jack on the side, which enables you to
connect a regular set of earphones (not included). The loop can be opened: To do so, pull
the safety coupling apart.
Insert the included bracket into the holes provided on the transmitter. The bracket is used
to easily store the loop cable.
Notes
Please make sure that the integrated battery is fully charged before its first use. Charge the
receiver for about 5 hours.
English 21
SonumaxxBT_DE-EN-FR-NL-ES.indd 21
31.08.2017 11:08:27
Summary of Contents for sonumaxx BT
Page 6: ...6 Deutsch ...
Page 15: ...Deutsch 15 ...
Page 20: ...20 English ...
Page 29: ...English 29 ...
Page 34: ...34 Français ...
Page 46: ...46 Nederlands ...
Page 55: ...Nederlands 55 ...
Page 60: ...60 Español ...
Page 69: ...Español 69 ...
Page 70: ......
Page 71: ......


