background image

Flat cover

5

118

Body

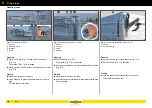
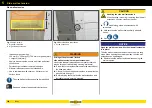
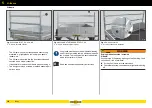
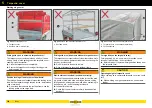
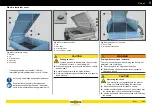
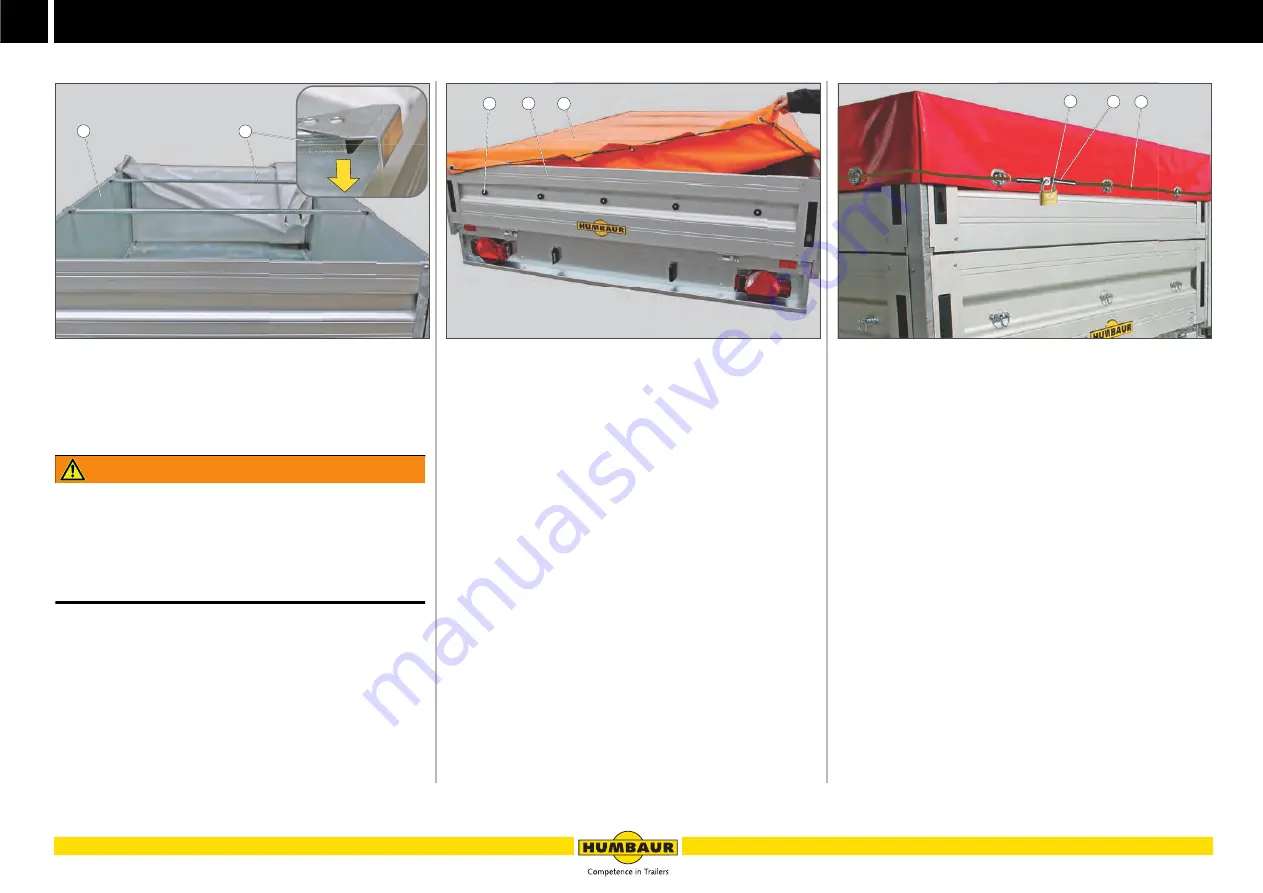
Positioning lateral bracing

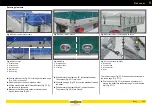
Fig. 58 

Lateral bracing positioned

1

Side drop side

2

Lateral bracing

WARNING

Driving with the lateral bracing inserted - without a flat 
cover!

The lateral bracing could be thrown off while driving and hit 
people – risk of accident!

Remove the lateral bracing before driving without a flat 

cover.

Slot the lateral bracing (Fig. 58 /2) onto the side drop 
sides (Fig. 58 /1).

Position the lateral bracing at equal distances at a 90° 
angle to the side drop sides.

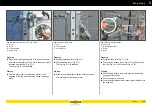
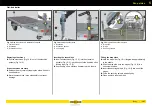
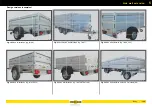
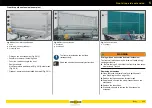
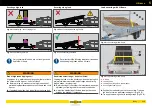
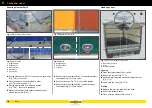
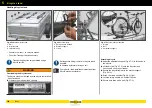
Handling the flat cover

Fig. 59 

Pulling on flat cover

1

Securing element

2

Drop side

3

Flat cover

Attachment

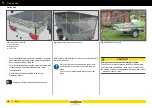
Tension the flat cover (Fig. 59 /3) with the underside 
facing downwards on the drop sides (Fig. 59 /2).

Please make sure that the flat cover is not excessively 
stressed by the load.

Secure the flat cover with securing elements (Fig. 59 /1).

Removal

Unlock the securing elements (Fig. 59 /1) on the flat 
cover.

Pull the flat cover from the rear to the front.

Stow the flat cover without creasing it as far as possible 
when not using it.
The flat cover must be clean and dry.

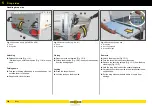
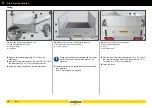
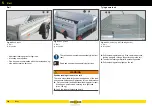
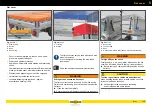
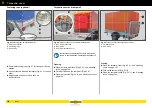
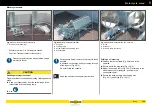
Fastening / duty rope (optional)

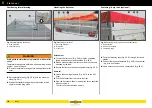
Fig. 60 

Fastening / duty rope lock as anti-theft device

1

Shackle lock

2

Rope end fastener

3

Fastening rope

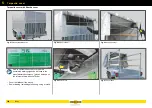
Feed the fastening rope (Fig. 60 /3) through all closed 
staples.

Connect the rope end fasteners (Fig. 60 /2) to each other 
- e.g. with a carabiner.

Use a secure lock such as a shackle lock (Fig. 60 /1).

A - 033  

1

2

A - 037  

1

2

3

A - 029  

1

2

3

Summary of Contents for 1000 Series

Page 1: ...GENERAL CAR Program PART 1 OPERATING MANUAL humbaur com 1000 8400 SERIES EN ...

Page 2: ...____________________________________________ Type abbreviation ____________________________________________ Numberplate __________________________________________________ VIN Your dealer Name ___________________________________________ Address ___________________________________________ Tel _______________________________________________ E mail ___________________________________________ Trailer c...

Page 3: ...of birth Address Street House no City Telephone Date from to Owner 2 First name Last name Date of birth Address Street House no City Telephone Date from to Owner 3 First name Last name Date of birth Address Street House no City Telephone Date from to ...

Page 4: ..._________________________ ______________________________________________ ______________________________________________ ______________________________________________ ______________________________________________ ______________________________________________ ______________________________________________ ______________________________________________ _____________________________________________...

Page 5: ...entation is part of the product and should be kept in the towing vehicle for reference purposes at all times Key details for the handling operation and the requisite care and maintenance of the trailer are referred to in this operating instruction manual and errors can only be avoided and trouble free operation guaranteed if you are familiar with them Errors excepted The manufacturer Humbaur GmbH ...

Page 6: ...ading Correct load distribution Securing against rolling away parking 4 Chassis from page 73 Operating the chassis Supports coupling overrun brake 5 Body from page 101 Operating the body Drop sides bodies Load securing elements 6 Electrical system from page 133 Lighting system Plug connections configuration Interior lighting Power supply external 7 Testing care and maintenance from page 143 Mainta...

Page 7: ...tain 169 Environmental pollution Toxins 182 Explanation of warning signs Important pictograms 14 Personal protective equipment 13 Signal words 12 F Flat cover 115 Side wall extensions 116 Front drop side extension 111 G General information 19 General inspection safety check 144 Greases 160 Gross weight mass 46 H Hand brake Parking brake 59 Handling Body 101 Chassis 73 Height adjustable drawbar HV ...

Page 8: ... danger for tippers 11 in the body area 11 in the chassis area 11 Spare wheel 153 Steam cleaner 176 T Tarpaulin cover roofbow 119 Edscha cover 126 Sliding tarpaulin 125 Technical data 22 Main dimensions 23 Testing care and maintenance 143 Text signs 12 Tie down options 49 Tie down points 50 Tightening torques Screw connections 146 Toolbox 97 Towing connection 87 Traffic signs 14 Trailer load towin...

Page 9: ...1 7 Safety ...

Page 10: ...ing instructions licensing papers etc Driving with a properly secured load The driver of the towing vehicle is responsible for securing the load and the equipment for load securing Driving while complying with the max permissible top speed by law as well as a suitable speed for bad road or weather conditions Loading and unloading in a secured area or with additional safeguarding measures suitable ...

Page 11: ...ible wear of parts or breakage of safety relevant components and accessories Operating the trailer when it is damaged which can cause danger on public roads and could also lead to personal injury Passing on the trailer without handing over the operating manual or providing an explanation of the known residual risks Maintenance of safety relevant components such as brakes drawbar hydraulic system e...

Page 12: ...n Wood grain and irregularities are normal for this natural material and can appear on the surface Colour changes are also possible as a result of UV irradiation and weathering effects A manufacturing tolerance is specified for the thickness of the wooden components used Claims will not be accepted for deviations within the tolerance As the trailers are not generally insulated temperature fluctuat...

Page 13: ...nt Inadequate cleaning of the cargo bed after every use For trailers which can be tipped lowered Standing under an unsecured cargo bed Jerky braking during tipping lowering process Driving with a tipped raised cargo bed Tipping the cargo bed without adequately observing the area at the rear side Tipping out the load too close to a slope or excavation pit Standing on a tipped moving cargo bed Tippi...

Page 14: ...s on to other users or to the support staff as well Text sign You will find the following symbol in front of the text in the manual arrow Call to action line List 1 number List of components Warning signs used The following warning signs may be used in this operating manual and on the product Pay attention to these warning signs and in this case act with particular care Warning about danger points...

Page 15: ...ibed in this manual Important note Note and comply with to ensure safe use Read instructions for use beforehand Wash hands thoroughly Disconnect from the mains before working on components which conduct voltage Ensure air circulation Carry out work in 2 man operation Mandatory signs Keep to these prohibitions Climbing up prohibited Reaching in prohibited Contact touching prohibited Standing on sur...

Page 16: ...r disposal of old oil Do not dispose of old oil in the environment Proper disposal of old tyres Do not dispose of old tyres in the environment Immediately rinse eyes with plenty of water Seek medical advice Traffic signs regarding heights Pay attention to the following important traffic signs on height limits on public roads Max vehicle height This height may not be exceeded Caution Height limit a...

Page 17: ...an lead to accidents resulting in personal injury Incorrect operation can make you injure yourself and other people Read the operating manual carefully and completely Pay attention to all the safety advice and warning labels on the product itself and warning notices throughout the documentation Comply with the steps for handling VORSICHT CAUTION Nichteinhaltung der Stützlast Unfallgefahr Schlinger...

Page 18: ...ailer too high load accessories could be ripped off when driving through tunnels under bridges through underpasses etc risk of an accident Before driving off make sure that the max total height is not exceeded Before driving into a tunnel an underpass or towards a bridge pay attention to the traffic signs with the max permissible vehicle height WARNING Objects on the trailer body Objects such as b...

Page 19: ... to the lighting CAUTION Driving without the safety cable arrester cable attached In the event of the trailer becoming detached or if the coupling fails the trailer will not be braked caught Connect the safety cable arrester cable to the towing vehicle Pay attention to the national regulations on this During loading unloading WARNING Inadequate lighting When loading unloading the lighting on the t...

Page 20: ...ll down People could be knocked crushed Secure the trailer against falling over Tie the trailer to a solid wall WARNING Trapped in the box body Risk of suffocation due to lack of oxygen Before locking closed bodies make sure that no people animals are inside them Open windows hoods when spending time inside Where applicable check that cooling units heaters etc are switched off Pay attention to the...

Page 21: ...2 19 General information ...

Page 22: ...h hand brake lever brake linkage etc 8 Electric plug parking socket 9 Front drop side 10 Front retro reflector white reflector or side light 11 Stanchion 12 Side retro reflector orange reflector 13 Wheel shock absorbers 15 Wheel chock 16 Wheel tyre 17 Mud guards with splashguard if applicable 18 Drop side side 19 Cargo bed 20 Rear drop side 21 Lashing point tie down bracket tie down ring 22 Drop s...

Page 23: ... approval Special trailers and trailers with special equipment can be tested and licensed individually by notified testing authorities e g TÜV SGS Confirmation of compliance Humbaur GmbH hereby attests to the company s compliance with all relevant EU directives for the registration and safe use of car trailers up to 3 5 to You may request an EC declaration of conformity for vehicle bodies accordin...

Page 24: ...nt Commercial name Name and address of the manufacturer s representative if any Vehicle identification number WHDK2741BJ0856322 e1 2007 46 0044 07 conforms in all respects to the type described in approval 0 1 0 2 0 2 1 0 4 0 5 0 6 0 9 0 10 can be permanently registered in Member States having right left hand traffic and using metric imperial units for the speedometer 09 01 18 Place Date Signature...

Page 25: ...rameters D S drawbar load max Page 4 Various additional information 52 Comment on 35 wheel tyre combination other possible wheel tyre combinations Main dimensions Fig 13 Example Side view Fig 14 Example Top view Explanation of information The main dimensions can be found on the COC paper on page 2 under the heading Main dimensions 4 wheel base middle coupling middle 1st axle 4 1 spacing between th...

Page 26: ...e g Switzerland 2 VIN The existence of the engraved VIN and the type plate should be checked when accepting the trailer Check and make sure that the VIN matches that in the vehicle papers VIN Fig 19 Example STEELY 1 VIN engraved 2 Type plate steel plate Fig 20 Example STARTRAILER 1 VIN engraved 2 Type plate sticker The engraved VIN will weather over time The VIN must remain legible over the entire...

Page 27: ...d Ball head coupling Fig 26 Example Engraving AL KO ball hitch Drawbar Fig 27 Example Lashing rail Accessories Fig 28 Example Cable winch 1 Manufacturer make 2 Type The components installed have their win manufacturer plate with registration data The identification of components must remain legible over the entire service life of the trailer The identification may not be removed or hidden by paint...

Page 28: ...heel spare wheel holder Fig 32 Spare wheel holder with without spare wheel Toolbox Fig 33 on the drawbar on side of chassis Anti snaking coupling ASK Fig 34 Example AL KO Winterhoff Coupling protection Fig 35 Soft dock impact protection Support on drawbar Fig 36 Support wheel automatic support wheel Support on chassis Fig 37 Prop stand Telescopic crank support I 054 I 054 I 016 I 013 I 014 I 0 I 0...

Page 29: ...g lock safety compact lock Lashing material Fig 41 Lashing belt set car lashing set Lashing points Fig 42 Tie down lashing ring Fig 43 Tie down brackets retractable Hydraulic system cable winch Fig 44 Hydraulic system manual electric cable winch Loading ramps Fig 45 Grid ramp wall Fig 46 Drive up ramp rails I 019 I I 030 I 030 I 032 I 021 I 025 I 026 I 035 I 033 I 034 ...

Page 30: ...ith roofbow Fig 49 Steel mesh wash H frame Fig 50 Rail 4 sides 2 sides Fig 51 Drop side 500 mm side extension 350 mm Fig 52 Side extension 350 mm Fig 53 Bicycle carrier wood aluminium cover with rail Fig 54 Steel mesh extension Fig 55 Motorcycle stand motorcycle loading ramp I 037 I 037 I 038 I 039 I 040 I 041 I 041 I 042 I 042 I 044 I 045 ...

Page 31: ...3 29 Operation ...

Page 32: ...y tied down secured The permissible gross weight and the axle loads must be complied with Comply with the load securing guidelines pursuant to VDI 2700 DANGER Driving with a faulty not roadworthy trailer A trailer with defects or which is directly increases the risk of an accident The trailer could come unhitched or the load could be lost brakes could fail tyres could burst etc risk of personal in...

Page 33: ...owed away safely Wheel chocks have been removed and stowed away safely Load weight is evenly correctly distributed and secured against sliding around tied down Tyres are filled to the correct tyre pressure do not show any damage and have sufficient profile Lights side lights are working undamaged Anti theft device has been removed and stowed away safely Tarpaulin cover net has been tensioned corre...

Page 34: ...t of your car trailer coupling through underlining Before connecting up your trailer for the first time make sure that the car trailer coupling has been aligned with the ball head coupling Height of both couplings Design of the car trailer coupling Electrical connection plug 7 or 13 pin Fig 4 Coupling height increase 1 Coupling height increase 50 mm 2 V shaped draw bar WARNING Trailer at an angle ...

Page 35: ...te of the ball head on your car trailer coupling The ball head should not show any visible grooves and should not fall below a minimum diameter see Ball coupling on page 161 WARNING Driving with a worn ball head coupling The trailer could come uncoupled while driving could start skidding and tip over risk of an accident Do not drive with a worn dirty ball head coupling Before setting off make sure...

Page 36: ... 5 Barrier Coupling without safety catch Pull the handle Fig 9 2 all the way up The ball head coupling is open Place the spherical cup Fig 8 3 on the ball head Fig 8 4 If there is sufficient drawbar load then the ball head coupling will click into place by itself If there is little drawbar load e g tandem trailer Press the ball head coupling down manually until it clicks into place The green cylin...

Page 37: ... Release the arrester cable from the ball head coupling Release the electric plug from the car socket Unlock the handle Fig 12 1 in barrier If applicable lower the support wheel support Press the safety catch Fig 12 2 on the handle all the way in Pull the handle all the way up The coupling is open Lift the spherical cup Fig 12 3 off the ball head Fig 12 4 of the towing vehicle Fig 13 Example uncou...

Page 38: ...ings minimise a swerve pitching movement snaking of the trailer when cornering driving over pot holes They have a damping property due to friction linings Safety couplings are primarily used on horse trailers or when transporting sensitive goods To use a safety coupling the requirements of the ball head coupling on your car must be adhered to Fig 15 The swivel range is the same as for a normal bal...

Page 39: ...isplay is in the posi tive green area Have a worn faulty safety coupling replaced in a specialist workshop 4 B 112 1 3 2 5 B 111 1 Die Sicherheitskupplung mit Spurstabilisierung Montage und Betriebsanleitung The safety coupling with tracking stabiliser Assembly and operating instructions La tête d attelage de sécurité avec stabilisateur de parallélisme Instruction de montage et d utilisation De ve...

Page 40: ...i zontal ground not on a slope Also use wheel chocks Fig 21 Trailer coupled WARNING Loading beyond the cargo bed drop sides Trailers which are loaded beyond the cargo bed drop sides pose an increased risk of accidents potential danger The turning radius of the trailer increases when driving cornering risk of accidents Comply with the statutory regulations according to Section 22 of the StVO German...

Page 41: ...ough the front with the front drop side lowered reduces the swivel range when driving around bends accident risk Before driving off check that the restricted swivel range will allow your towing vehicle to drive around bends Adjust the distribution of the load towards the centre between the drawbar if necessary If necessary remove the front drop side Avoid reversing with the front drop side lowered...

Page 42: ... side when unlocking the drop sides tail gate not directly in front of them Fig 27 Danger zone on a tipper WARNING Unloading a tipper trailer When tipping people could be struck by a sliding load and be crushed or hit Keep people away from the open drop side during the tipping process When tipping stand on the opposite side to the opened drop side Tip the load in a controlled manner WARNING Tipped...

Page 43: ...on the signs Fig 29 Stepping on tipped cargo bed 1 Loading bridge tipped WARNING Stepping on tipped cargo bed When stepping onto a tipped cargo bed during the loading unloading process it could tip unexpectedly and you could fall Use Only step onto a tipped cargo bed for example when driving on construction machinery a motorcycle Slowly step back of the tipped cargo bed at the rear Keep persons ou...

Page 44: ...e Push drive the motorcycle on carefully Have a second person help you if necessary Fig 32 Example 1 on tipper trailer 1 Motorcycle stand 2 Tailgate WARNING Loading a motorcycle onto a tipper trailer The weight transfer will cause the trailer to top forwards risk of crushing falling Use Only load unload a tipper trailer when it is coupled to the towing vehicle Drive slowly onto the cargo bed Fig 3...

Page 45: ... double doors could unexpectedly swing shut in a gust of wind risk of being knocked crushed Before loading or unloading secure the double doors with door stops Hold onto the double doors in strong winds gusts of wind Fig 36 Trailer which can be lowered with tail gate 1 Tailgate 2 Piston retainer gas strut secured WARNING Operate the tailgate When the tailgate is opened the trailer could tip back r...

Page 46: ...nd may snap when placed under load People could be hit or crushed by the cable and or the load Only use cable winches if undamaged and in perfect condition Have the cable winch regularly serviced and repair it immediately if it is faulty Position the cable winch frame Fig 37 2 Open or remove the front drop side as required Wind up the cable after use Secure the cable to the ring with a hook Switch...

Page 47: ... data is provided on the type plate Fig 43 Example 2 Adjustable cable winch 1 Cable winch frame 2 Cable winch 3 Cable tow Fig 44 Example Operating instructions from manufacturer You will find how to operate the electric cable winch in the manufacturer s documentation Position the cable winch Fig 45 Example 2 Cable winch with remote control 1 Remote control drive Open or remove the front drop side ...

Page 48: ...egative inadequate drawbar load or exceeding the max permissible drawbar load can cause accidents The trailer could start snaking tip over come uncoupled accident risk Distribute the load weight evenly on the cargo bed avoid single point loading Distribute the load so that no negative drawbar load is created or respectively that the max permissible drawbar load is complied with Never exceed the ma...

Page 49: ...ward the rear of the car is lowered overloading rear axle and frame The tow hook on the trailer is overloaded Maximum permissible drawbar load is exceeded Poor road holding reduced ground contact Braking effect is reduced poor Limited ability to steer poor road handling Incorrect load distribution Fig 50 Load too far back at rear of trailer Heavy weight of load positioned too far towards the rear ...

Page 50: ...vre a bump in the road a gust of wind Friction values Material pairs Tensioning forces Fig 54 Forces to be secured against sliding Securing to the front in event of emergency stop 0 8 or 80 of weight force friction force e g 0 3 e g 500 kg x 0 8g 0 3 250 daN Securing to the side to the rear when taking evasive action starting off taking corners 0 5 or 50 of weight force friction force e g 0 3 e g ...

Page 51: ...ure if necessary re tighten it Pay attention to national regulations on load securing If applicable pay attention to special transport and securing regulations for specific goods If applicable fit more lashing points Secure the load positively or non positively respectively 1 positively whole cargo bed filled through shape of the load so it can s slide 2 non positively by lashing down using lashin...

Page 52: ...force max 400 daN kg 1 Tie down bracket 2 Drop wall profile 3 Cargo bed floor plate Fig 57 Tie down brackets which can be recessed Tie down force max 800 daN kg 1 Tie down bracket 2 V lashing rail 3 Cargo bed floor plate Fig 58 Recessed tie down points optional Version 1 Tie down force max 200 daN kg Version 2 Tie down force max 400 daN kg 1 Tie ring 2 Trough recess 3 Cargo bed floor plate Fig 59 ...

Page 53: ...strap Bandwidth 35 mm with link strap Breaking load 1000 daN with short fixed end and integrated simple claw hooks 1 x high viz vest yellow 1x work glove Lashing strap set 753 00002 packaged in a transparent plastic case 395 x 295 x 106 mm consisting of 4 xlashing strap Bandwidth 35 mm length 5000mm Break load 1000 daN with integrated claw hook 8x PU edge protection slit 35 mm Fig 62 Application e...

Page 54: ...attached Fig 65 1 Use anti slip underlay Fig 65 2 or weight distributing material such as a pallet Pay attention to the operating instructions forces specified for the lashing materials used Fig 66 Example Load securing bulk goods 1 Material cones gravel sand ballast wood chips As specified in the directive VDI 2700 then bulk goods only need to be covered if they could fall out while driving or co...

Page 55: ...refully on inclines when the trailer is loaded drive more slowly apply brakes Do not exceed the maximum speed permitted outside of built up areas highways motorways main roads dual carriageways In Germany this means max 80 km h or 100 km h respectively Side wind which suddenly appears e g on bridges when overtaking when changing terrain can cause your car and trailer to start snaking Slowly reduce...

Page 56: ...g when reversing then the trailer support wheel drawbar could collide with the car material damage When turning corners turning around reversing do not steer too sharply pay attention to the area behind you The turning circle of your trailer depends on many factors Length of trailer length of drawbar support wheel attached to side For long trailers and turntable trailers the turning circle is larg...

Page 57: ...onal Use the handle Fig 72 1 on the overrun device for manual manoeuvring Use Preparation If applicable lower the support wheel Close the tail gate drop sides etc Remove the wheel chocks Manoeuvring Hold the coupling handle Fig 71 3 and the drawbar Fig 71 2 Slightly lift the drawbar Please note that the underride guard Fig 71 1 does not touch the floor Push the trailer in the desired direction Ens...

Page 58: ...s not impede the traffic on the road Make sure that when parking in a public area the lights retro reflectors number plate are not covered If applicable use parking warning signs front back of trailer pay attention to section 17 of the StVO German Road Traffic Act on this Fig 74 Trailer braked secured 1 Metal locking shoe anti theft device 2 Electrical plug 3 Hand brake lever 4 Jockey wheel Uncoup...

Page 59: ...ocks on slopes gradients and when uncoupled Fig 77 Example 2 Wheel chocks horizontal at side 1 Wheel chock 2 Chassis under trailer body WARNING Unsecured wheel chocks Unsecured wheel chocks could fall off while driving risk of accidents Make sure that the wheel chocks are secured in the brackets before driving off Check the holders for damage at regular intervals Fig 78 Example 3 Wheel chocks vert...

Page 60: ...he same time Remove the wheel chock from the holder Fig 81 Wheel chocks positioned 1 Wheel chock Place the complete surface of the wheel chocks Fig 81 1 under the wheels Consider the direction of inclination of the trailer e g on a slope Fig 82 Secure the wheel chock driving position 1 Notch lug 2 Lever Position the wheel chock in the holder Fig 80 3 Notches must be aligned to match up with lugs F...

Page 61: ...rking brake with toothed segments the hand brake lever needs to be applied to the last tooth and needs to be released to the first tooth WARNING Driving with the hand brake applied not completely released The brake shoes could block the wheels Risk of snaking accidents The brakes get hot Make sure that the hand brake is completely released before driving off Fig 85 Example 2 Hand brake released ma...

Page 62: ...1 Hand brake lever at bottom Push the hand brake lever Fig 87 1 beyond the ratchet point completely downwards towards the coupling Fig 88 Applying parking brake 1 Hand brake lever 2 Jockey wheel in parking position Wind down the jockey wheel Fig 88 2 until it reaches the floor Pull the hand brake lever Fig 88 1 all the way up so that the brake is fully applied Push the trailer back slightly The sp...

Page 63: ...r Fig 90 2 slightly upwards while at the same time pressing the release button Fig 90 1 Guide the hand brake lever all the way down towards the coupling The gearing is released by the locking mechanism Fig 90 3 The hand brake lever Fig 91 1 rests on the overrun device Fig 91 2 Fig 92 Applying parking brake 1 Hand brake lever 2 Brake applied Pull the hand brake lever Fig 92 1 as far up as possible ...

Page 64: ...e e g a ring Fig 93 2 Fig 94 Trailer unbraked on drawbar support 1 Retention strap 2 Drawbar support 3 Jockey wheel raised CAUTION Parking trailer on drawbar You could crush your feet hands under the drawbar support Use Keep your feet away from the danger zone when lowering the drawbar Carefully support your trailer on the drawbar support Before parking it make sure that the coupling is not damage...

Page 65: ...r on the drawbar support Fig 96 1 The inclined position helps prevent the cargo bed roof becoming waterlogged or ice forming Place the wheel chocks Fig 96 2 under the wheels Carefully wind the electric cable around the drawbar Insert the electric plug into the parking socket Protect the trailer from the weather by using a cover e g tarpaulin Fig 97 1 and cover hood Fig 97 5 Occasionally remove any...

Page 66: ...NOTICE Snow ice on the roof The roof surface can be damaged if the snow ice load is too high Park the trailer tilted forwards so that standing water and possible ice formation on the roof can be prevented Use a stable access aid e g a step ladder when clearing the roof Regularly clear the roof Fig 100 1 the cover tarpaulin Fig 101 1 and the cargo bed Fig 99 1 of any foreign bodies or snow ice wate...

Page 67: ...3 65 Operation Trailer safety ...

Page 68: ...e manufacturer of the trailer coupling on the car The car coupling as a mechanical coupling device must be state of the art Directive ECE R55 The manufacturers of brackets must include attachment points for secondary couplings arrester safety cable or provide devices which ensure that the trailer comes to a standstill in the event that it comes uncoupled DANGER Driving with arrester safety cable i...

Page 69: ...ont When mounting the universal clamping device item 700 00986 Fig 5 1 pay attention to the installation instructions Before mounting the universal clamping device make sure that there is sufficient space on the coupling Check that the component can be securely clamped there are several positioning variants After installation make sure that the required swivel range is available for the trailer co...

Page 70: ...When first connecting up the trailer make sure that the arrester cable can easily be attached to your car coupling in a ring or a separate clamping device Fig 5 If necessary attach a snap hook according to DIN 5299 to the arrester cable You can use the snap hook to clip the arrester cable directly onto the ring on the car coupling or the clamping device respectively Ball head coupling braked Fig 1...

Page 71: ...the required swivel range for the ball head coupling is ensured Fig 13 Trailer uncoupled 1 Arrester cable tensioned in loop 2 Support bracket Accident simulation If the trailer become detached while driving then it is caught by the arrester cable Fig 13 1 so that the trailer can t roll away out of control The trailer is supported on the support bracket Fig 13 2 and is dragged behind the car Do not...

Page 72: ...s ensured Ensure that the spring hook Fig 15 2 is closed Fig 16 Trailer uncoupled 1 Safety cable tensioned in loop 2 Hand brake is applied Accident simulation If the trailer become detached while driving then it is braked by the hand brake Fig 16 2 being applied by the safety cable Fig 16 1 so that the trailer can t roll away out of control The safety cable breaks the brake is actuated the trailer...

Page 73: ...at the spring hook Fig 18 2 is closed Fig 19 Trailer uncoupled 1 Safety cable tensioned in loop 2 Hand brake is applied 3 Support bracket Accident simulation If the trailer become detached while driving then it is braked by the hand brake Fig 19 2 being applied by the safety cable Fig 19 1 so that the trailer can t roll away out of control The safety cable breaks the brake is actuated the trailer ...

Page 74: ...f necessary ask the manufacturer of the car coupling to confirm this Fig 21 Example Safety cable attached with snap hook 1 Ball trailer coupling 2 Ring on the front 3 Snap hook attached Press in the snap fastener Fig 20 1 on the snap hook Hook the snap hook Fig 21 3 onto the ring Fig 21 2 The snap fastener closes automatically once it has been released The snap hook is closed Make sure that the sa...

Page 75: ...4 73 Chassis ...

Page 76: ...the cylinder Fig 1 2 is not required Swivel jockey wheel Attached to the side of the drawbar Can be pivoted horizontally e g for load through function Retrospective installation only in designated attachment points Fig 2 Jockey wheel manual to raise 1 Jockey wheel on side of drawbar Fig 3 Jockey wheel manual to raise 1 Jockey wheel in centre Read and observe the assembly instructions Fig 4 Example...

Page 77: ...idents Before setting off make sure that the jockey wheel does not block the brake linkage CAUTION Cranking up raising the jockey wheel when the trailer is uncoupled Drawbar could fall down and you can crush your hands feet under the drawbar Only crank up raise the jockey wheel when the trailer is coupled to towing vehicle Keep your feet away from the drawbar when cranking it up or raising it CAUT...

Page 78: ...rew the T handle Fig 11 2 while holding the cylinder Fig 11 1 tight Lower the cylinder so that the clamp Fig 11 3 can be locked in place Turn the T handle until it is tight Cranking up raising Fig 12 Position for driving 1 Crank handle 2 Cylinder 3 Clamp 4 T handle 5 Rotation lock Crank the jockey wheel all the way up so that the hub of the rotation lock Fig 12 5 is inserted into the groove on the...

Page 79: ...le 2 Automatic jockey wheel 3 Brake linkage Crank the automatic jockey wheel Fig 15 2 sideways past the brake linkage Fig 15 3 down to the ground The jockey wheel is completely folded out and locked in place see Fig 13 Winding up Fig 16 Position for driving 1 Crank handle 2 Brake linkage 3 Locking slide 4 End stop Crank the automatic jockey wheel up Make sure that the brake linkage Fig 16 2 is not...

Page 80: ...ket 4 Jockey wheel Crank the jockey wheel Fig 18 4 up Position the crank Fig 18 1 into folded in position Pull on the latch Fig 18 3 while pivoting the jockey wheel into a horizontal position The jockey wheel is aligned in parallel to the draw tube Pivoting into support position Fig 19 Operating the jockey wheel 1 Crank handle 2 Cylinder 3 Bracket Pull on the bracket Fig 19 3 while pivoting the cy...

Page 81: ...orts against falling down WARNING Parking the trailer with supports on uneven soft ground If on a slope the supports could sink in break off while loading unloading Place the trailer on solid level ground If the ground is soft e g gravel sand place firm supports under the support legs WARNING Loss of stability when driving onto the trailer A redistribution of weight caused by driving onto the trai...

Page 82: ...essary crank up the support legs slightly Insert the plug pins and secure with the bracket lock Shortening Unlock the adjustable support Adjust the adjustable support all the way up so that it can be locked in place in the last drill hole Insert the plug pins and secure with the bracket lock Height adjustment folding supports Fig 24 Folding supports height adjustment 1 R clip 2 Plug pins 3 Hole 4 ...

Page 83: ... your trailer may tip Before loading unloading check that the T handle is tightened Lowering Fig 26 Lowering prop stands 1 Prop stand 2 T handle Unscrew the T handle Fig 26 2 While doing so hold the prop stand Fig 26 1 on the handle Lower the prop stands Turn the T handle until it is tight Raising Fig 27 Raising driving position 1 Weld spot Unscrew the T handle Fig 26 2 Hold the handle and pull up...

Page 84: ...ld be overloaded during operation which could lead to the mechanics becoming faulty Do not raise the trailer with supports Remove the crank handle from the crank handle holder Fig 29 1 Insert the crank handle Fig 30 2 into the crank base Fig 30 1 Wind until the adjustable support Fig 30 3 reaches the ground Raising Fig 31 Position for driving 1 Adjustable support NOTICE Uneven support of the trail...

Page 85: ...k handle base 2 Support 3 Crank handle 4 Adjustable support 5 Plug pins Pull out the plug pin Fig 33 5 Swivel down the support Fig 33 2 Insert the plug pin in from above Insert the crank handle Fig 33 3 into the crank base Fig 33 1 Wind down the adjustable support Fig 33 4 Stow the crank handle and secure it Swivelling up Fig 34 Swivelling up support 1 Plug pins 2 Adjustable support 3 Support Wind...

Page 86: ...le support Press the bracket lock Fig 36 1 out of the plug pin Pull out the plug pin Fig 36 2 Swivel down the support Fig 35 2 Insert the plug pins in from above and secure with the bracket lock Wind down the adjustable support Fig 36 4 Swivelling up Fig 37 Position for driving 1 Adjustable support 2 Support 3 Plug pins 4 Crank handle Wind up the adjustable support Fig 37 1 all the way up with the...

Page 87: ...angle of 45 Lowering Fig 39 Crank down the telescopic crank support 1 Crank handle base 2 Crank handle 3 Adjustable support The trailer must be level The corner legs need to take the load evenly Insert the crank handle Fig 39 2 into the crank base Fig 39 1 Wind until the adjustable support Fig 39 3 reaches the ground Pull out the crank handle and stow it away Raising Fig 40 Telescopic crank suppor...

Page 88: ... when operating the folding supports Only operate the folding supports when the drop sides are closed and secured Folding down Fig 42 Folding down folding support 1 Adjustable support 2 Spring latch Pull the spring bolt Fig 42 2 The adjustable support Fig 42 1 folds down automatically Release the spring latch The adjustable support locks in place itself Check the locking Swivelling up Fig 43 Foldi...

Page 89: ...gain WARNING T handle not secured The height of the HV drawbar can adjust itself The trailer could come uncoupled risk of accident Secure the T handle with the R clip CAUTION Adjusting the HV drawbar You could pinch crush hands fingers in the adjustment mechanism Adjust the HV drawbar with the handle NOTICE Fixed position HV drawbar If the adjustment mechanism is not used for a long time the compo...

Page 90: ...g Grip the handle with both hands Fig 47 1 and adjust the HV drawbar to the height of the towing vehicle coupling The gearing Fig 47 2 is undone Fig 48 Hold in place and secure 1 R clip 2 Hole 3 Toggle locking switch Turn the T handle until it is tight Fig 48 3 If necessary help with a rubber mallet The drill hole Fig 48 2 for the R clip Fig 48 1 needs to be freely accessible Insert the R clip int...

Page 91: ...ill increase the slide bearing frictional forces This results in a reduction in the braking effect Comply with the specified drawbar load Changing the towing connection Fig 51 Towing connection 1 Nut 2 Ball head coupling 3 Lashing rail 4 Through bore 5 Towing ring 6 Mounting bolt The towing connection can be replaced on an HV drawbar There is the option of mounting a ball head coupling or a DIN to...

Page 92: ...ailer straight with an extended train Where possible park the trailer so that at least twice the towing vehicle length is available in front of the trailer for coupling Fig 53 Turntable function 1 Front axle 2 Turntable Fig 54 Turntable function with roofbow frame 1 Articulated drawbar 2 Rotation point drawbar The turntable can be built with various trailer bodies With drop sides as an open box Wi...

Page 93: ...Duo Matic for brake storage 2 Electrical plug 3 Towing ring D40 mm 4 Height adjustment device 5 Hand brake for turntable Fig 61 Folding up drawbar 1 Hand brake 2 Drawbar Straighten the drawbar Fig 61 2 wheels are parallel to the side drop walls Apply the handbrake Fig 61 1 The turntable is tight Raise the drawbar watch out for the cables hoses wind up if necessary The height adjustment device Fig ...

Page 94: ...of the danger zone Keep an eye on the danger zone when tipping back If it malfunctions immediately stop the process WARNING Lines are under pressure The hydraulic line is under pressure when it is uncoupled The oil can escape under high pressure and cut people shred skin Before uncoupling check that the lines are not under pressure and the towing vehicle has been switched off Use CAUTION Driving w...

Page 95: ...der tension Pay attention to label on the trailer Electric pump with emergency hand pump Fig 66 Electric pump with emergency hand pump 1 Supply battery 2 Pump lever 3 Hand button 4 Insertion opening 5 Hydraulic oil container 6 Emergency hand pump 7 Hydraulic connection Used for example with HTK 3 5 t Allows loading bridge to be quickly and easily tipped F 060 2 1 3 4 5 F 063 1 2 4 5 3 F 061 1 2 3 ...

Page 96: ...g 67 Example 1 Steel mesh ramp wall Fig 68 Example 2 Ramp wall Fig 69 Example 3 Loading ramps steel Fig 70 Example 4 Loading ramp Fig 71 Example 5 Loading ramp aluminium Fig 72 Example 6 Ramp door F 064 F 065 F 066 F 066 F 067 F 06 F 068 F 069 F 069 ...

Page 97: ...at the maximum carrying capacity is not exceeded by the load vehicle to be loaded Do not drive with a deformed ramp replace any faulty ramps immediately Fig 73 Safety during operation 1 Supports 2 Loading ramp 3 Edge of cargo bed Requirements Supports Fig 73 1 are positioned to provide support stability is ensured Ramps e g track ramps drive up ramps Fig 73 2 are positioned at the track width of t...

Page 98: ... 3 over the track ramps Hook the rubber band into the hook with the ring Fig 75 Example HA Allrounder track ramps secured 1 Loading ramp 2 Wing nut Position the track ramps Fig 75 1 against the inside of the drop sides Secure the loading ramps with the wing nuts Fig 75 2 Fig 76 Example HT drive up ramps secured 1 Drive up ramps 2 Ramp slot cover Insert the drive up ramps Fig 76 1 into the ramp slo...

Page 99: ...ted Read and observe the assembly instructions CAUTION Driving with unsecured toolbox The lid could come open and tools could be catapulted out risk of accident Close the toolbox before driving off CAUTION Overloaded toolbox The holder could break risk of accident Observe the maximum load specified NOTICE Placing components on the toolbox Placing weight on the toolbox can cause it to deform or bre...

Page 100: ...and press them down until they click into place Lock the lid for example with a shackle lock Fig 80 1 Operating the toolbox model 2 Fig 81 Using the toolbox 1 Lock cylinder 2 Lock 3 Cover 4 Lid Opening Fold the cover Fig 81 3 off the lock cylinder Fig 81 1 If required use a key to open the locks Fig 81 2 Open the locks by turning Fold down the lid Fig 81 4 When opening the lid make sure that nothi...

Page 101: ... and checks required see Tyres wheels on page 150 WARNING Worn tyre profile incorrect tyre pressure The tyres could burst while driving accident risk The braking distance increases risk of snaking Regularly check the tyres Check the tyre pressure profile depth and condition of the tyres see maintenance table WARNING Loose wheel nuts The trailer may start to snake tip over be uncoupled from the tow...

Page 102: ...ler Read and observe the assembly instructions Find out beforehand whether and how a spare wheel can be mounted on your trailer see Carrying a spare wheel on page 153 Pay attention to the additional weight of the spare wheel Regular maintenance and checks required see Check tyre condition on page 152 Fig 87 Spare wheel covered 1 Spare wheel cover The cover made of plastic black is available for wh...

Page 103: ...5 101 Body ...

Page 104: ...n be fixed fold down removable or swivel mounted Comply with when handling If the trailer is loaded then relief the pressure from the load if applicable before unlocking the drop sides Stand next to the drop side before releasing the locks Release the locks one after the other and hold the drop side there must not be any pressure from the load Driving with unlocked unsecured drop sides is not perm...

Page 105: ...e could touch the floor risk of accident Remove the rear drop side when driving with a load projecting to the rear WARNING Driving as flat bed with stanchions inserted The stanchions could be thrown off while driving and hit people risk of accident Remove all drop sides before starting to drive Remove all stanchions before starting to drive Fig 4 Crushing zone 1 Lock 2 Drop side 3 Stanchion CAUTIO...

Page 106: ...to place Fig 6 Tension lock HU HUK HT HTK 1 Handle 2 Tongue 3 Strap 4 Bracket Opening Pull the handle Fig 6 1 The bracket Fig 6 4 is released Swing open the bracket so that it is released by the latch Fig 6 3 Closing Place the bracket over the latch Use a flat hand to press the handle towards the drop side until it engages Fig 7 Covered lock STARTRAILER HA HT 1 Handle 2 Access opening Opening Put ...

Page 107: ...3 Locking lever Opening Engage the locking latch Fig 9 2 Pull the locking lever Fig 9 3 The lug Fig 9 1 is released Closing Press in the locking lever with the flat of your hand The locking latch latches into place Fig 10 Ramp wall connection 1 Snap lock 2 Quick release lever 3 Eyelet 4 Hook Opening Press the snap lock Fig 10 1 in Pull the quick release lever Fig 10 2 open and take the ring Fig 10...

Page 108: ...ed Fig 12 1 Fold up the drop side Fig 12 2 keep your hands away from the closing edges Locking Press the drop side shut Lock the locks on the drop side Fig 13 Removing the drop side 1 Drop side 2 Securing split pin 3 Drop side hinge Removal Unlock the drop side Fig 13 1 Fold the drop side to a horizontal position Remove the securing split pin Fig 13 2 from the drop side hinge Fig 13 3 Hold the dro...

Page 109: ...cket 3 Locking lug Inserting the stanchions Insert all stanchions Fig 15 1 into the stanchion pockets Fig 15 2 pay attention to the direction of the locking lugs Fig 15 3 If necessary use a soft face hammer to drive them in Fig 16 Drop sides mounted secured 1 Drop side 2 Hinge 3 Securing split pin Fitting the drop sides Hold the drop side Fig 16 1 lengthwise approximately in the middle Slide the d...

Page 110: ...e wall extensions corner post extensions may be thrown off while driving causing accidents Screw the corner post extensions into the stanchions of the base drop sides Close all locks on the base drop sides side wall exten sions before driving off Before driving check that all side wall extensions and lamellar plugs are securely mounted CAUTION Handling the side wall extensions When handling mounti...

Page 111: ... Fig 20 Side wall extension e g for STEELY Fig 21 Double side wall extension e g for HT Fig 22 Side wall extension e g for STARTRAILER Fig 23 Side wall extension e g for HA 500 Fig 24 Side wall extension divided in 2 turntable HD A 082 A 085 A 085 A 083 A 083 A 086 A 086 A 084 A 084 A 087 A 087 ...

Page 112: ...all extension removed 1 Side wall extension on side secured 2 Front drop side When transporting long materials the front rear wall extension and the rear drop side can be removed Comply with the safety regulations when transporting long materials See Projecting load on page 39 Fig 27 Fit rear front side wall extension 1 Rear side wall extension 2 Lock 3 Rear drop side Plug the rear front side wall...

Page 113: ...mesh The front wall extension can be fitted retrospectively Read and observe the assembly instructions Fig 30 Fixed front wall 1 Front wall WARNING Driving with an unsecured front wall extension The front wall extension may be thrown off while driving causing accidents Before driving off check that the front drop side exten sion is closed locked Removing extensions Open the locks on aluminium slot...

Page 114: ... 32 Example STARTRAILER STEELY HA 1 H frame welded version 2 part Long loads must be secured as individual loading units It is not permitted to drive with loose loads on the H frame The loads must be secured and tied down to the trailer or H frame Read and observe the assembly instructions Fig 33 H frame secured 1 Screw connection in stanchion WARNING Driving without secured screwed H frame An uns...

Page 115: ... when transporting long loads with an H frame WARNING Restricted swivel range risk of collision Loading the load over the front drop side and allowing it to project forwards reduces the swivel range when driving around bends accident risk Before driving off check that the restricted swivel range will allow your towing vehicle to drive around bends Adjust the distribution of the load towards the ce...

Page 116: ...l The rail is not suitable for positive lashing down of the load and cannot withstand any high tension forces deformation Only use the rail as an additional lashing point for posi tive and non positive load securing for a light load max 150 kg Lash the load to the lashing points Tying down load Fig 42 Rail 3 side e g HKT lowering device 1 Rail 2 Drop side Pull the lashing material e g Wire cable r...

Page 117: ...es themselves Read and observe the assembly instructions WARNING Driving with an unsecured flat cover The flat cover could come loose and fly off when driving Trailer could start snaking due to wind catching under the flat cover Close the cover completely Secure the cover all the way around before driving off Fig 45 Lock 3 1 Round ring 2 Tension rope 3 Hook 4 U bracket for side wall extension alum...

Page 118: ...s examples Fig 46 On side wall extension HA HT HD Fig 47 On side wall extension STEELY Fig 48 On steel mesh extension Fig 49 On perforated steel plate extension Fig 50 On aluminium extension Fig 51 On rail STARTRAILER HA HT A 026 A 028 A 023 A 024 A 027 A 025 ...

Page 119: ...g 55 Staples 1 Staples open 2 Staple closed 3 Flat ring Pull and rotate the staple by 90 horizontal position The staples Fig 55 1 are open Push the flat rings Fig 55 3 over the staples all around the trailer Pull and rotate the staples by 90 vertical position The staples Fig 55 2 are closed Fig 56 Corner version Tension rope with hooks Fig 57 Tension rope with hooks 1 Round ring 2 Tension rope 3 D...

Page 120: ...ension the flat cover Fig 59 3 with the underside facing downwards on the drop sides Fig 59 2 Please make sure that the flat cover is not excessively stressed by the load Secure the flat cover with securing elements Fig 59 1 Removal Unlock the securing elements Fig 59 1 on the flat cover Pull the flat cover from the rear to the front Stow the flat cover without creasing it as far as possible when ...

Page 121: ...g unloading Fastening rope secured with staples prevents unauthorised opening Privacy and weather protection Provides a barrier to prevent load being stolen Can be used as an advertising surface Various sizes and colours Fig 62 Secured with a belt elastic cable 1 Tarpaulin cover 2 Belt 3 Elastic cable The tarpaulin cover with roofbow frame can be installed retrospectively Read and observe the asse...

Page 122: ...y inserted roofbow slats Parts of the roofbow frame could be thrown out during the journey accident risk Do not drive with loose slot in slats Drive with tarpaulin cover and roofbow frame WARNING Slot in slats not inserted Inserted incorrectly The cover can be pushed inwards by the force of the wind e g gusts of wind side wind on bridges tunnels cutting through woods noise protection walls when ov...

Page 123: ...s Fig 68 1 from top to bottom Hook the snap hook Fig 68 3 into the retaining ring Fig 68 4 Fig 69 Belt secured unsecured Fig 70 Secure belt 1 Belt 2 Eyelet 3 Buckle Thread the belt Fig 70 1 from top to bottom into the rings Fig 70 2 Push the buckle Fig 70 3 through the vertical ring Fig 71 Buckle secured unsecured Fig 72 Secure buckle 1 Buckle Close the buckles Fig 72 1 A 059 1 2 A 060 1 2 3 4 A 0...

Page 124: ...g 76 Staples 1 Staples open 2 Staple closed 3 Flat ring Pull and rotate the staples by 90 horizontal position The staples Fig 76 1 are open Push the flat rings Fig 76 3 over all the staples Pull and rotate the staples by 90 vertical position The staples Fig 76 2 are closed Handling cover Fig 77 Rear wall tarpaulin cover open 1 Rear wall rolled up 2 Hook 3 Retraining strap Opening Open securing ele...

Page 125: ...do the cable ties Remove the slat from the U profiles on the posts Slot in slats in roofbow pockets Fig 79 Insert slot in slat e g HT 1 Posts 2 Slat 3 Roofbow pocket The slats are removable cross struts on the roofbow frame Insertion Lay the slat Fig 79 2 from above into the roofbow pockets Fig 79 3 of the posts Fig 79 1 Secure them against jumping out using cable ties Removal If applicable undo t...

Page 126: ...connection 2 Ramp wall 3 Rear wall tarpaulin cover Instructions for operating the ramp wall can be found in the respective operating manual part 2 Opening Open the ramp wall locks Fig 82 1 see Handling locks on page 104 Carefully fold down the ramp wall Fig 82 2 Open the rear wall Fig 82 3 see Handling cover on page 122 Fig 83 Tarpaulin cover closed driving position 1 Tarpaulin cover 2 Ramp wall C...

Page 127: ...3 see Securing element Part 2 on page 122 Fig 85 Rear wall sliding tarpaulin open 1 Tarpaulin Opening Push the tarpaulin Fig 85 1 open to the front Fig 86 Drop sides folded down 1 Slat insert 2 Drop side Release and open the drop sides Fig 86 2 Remove the slot in slats if necessary Fig 86 1 Closing Close and lock the drop sides Insert the slot in slats Close the rear wall of the tarpaulin cover Pu...

Page 128: ... associated warning signs can be found in the manufacturers documents This can be found on the Internet at www edschaTS com Cover that slides all the way up Easier loading unloading process e g using a forklift Fig 88 Open rear wall Fig 89 Unlock roof Fig 90 Slide open roof Fig 91 Cover open A 077 A A 076 A 078 A 079 A 080 A 081 ...

Page 129: ...at it does not fold down by itself Secure the gas strut with the piston retainer Have any faulty worn gas struts replaced by a special ised workshop Fig 94 Loading process from rear 1 Cover open 2 Drop side folded down WARNING Driving with cover open unlocked The cover can spring open while driving and be torn off deformed risk of accident Do not drive with the cover open half open Before driving ...

Page 130: ...Bracket support 3 Frame Retrospective fitting removal of bicycle stand possible Is attached by lateral bracing on rail Comply with read installation instructions from bicycle stand manufacturer Fig 97 Bicycle mounted secured 1 Bicycle 2 Belt 3 Adjustable support Attaching bicycle Adjust the adjustable support Fig 97 3 to fit the size of the bicycle Lift the bicycle Fig 97 1 onto the bicycle stand ...

Page 131: ...oading ramp 3 Screw connection with wing nuts 4 Contact plate Retrospective fitting removal of motorcycle stand possible Is attached on the cargo bed by screwing through with wing nuts Fig 99 3 Do not drill into the chassis Read and observe the assembly instructions Fig 100 Motorcycle stand folded out secured 1 R clip 2 Wing nut 3 Drive up ramp as rocker Folding out securing Release the contact pl...

Page 132: ...r Steely Read and observe the assembly instructions Fig 102 Example Steel mesh extension With a steel mesh attachment the cover net is attached to the cord with hooks Only use the cover net with closed drop sides trailer bodies It is not there to secure the drop sides The cover net elastic cable may not have any tears Fig 103 Application example CAUTION Driving with cover net not completely secure...

Page 133: ...that the cover net goes around the corners if necessary re tension the elastic cable Fig 105 Cover net tensioned Removal Pull the elastic cable off all the round buttons in turn Remove the cover net from the drop sides extensions Removing stowing cover net Fig 106 Stowing cover net 1 Toolbox 2 Cover net Stowing away Allow a wet cover net to dry first if applicable Fold the cover net up and stow it...

Page 134: ...Cover net 5 132 Body ...

Page 135: ...6 133 Electrical system ...

Page 136: ...accident Regularly check the contacts for foreign bodies water ingress as well as wear deformation Maintain the contacts Fig 2 3 Fig 3 3 in the plug connections with contact spray if applicable Clean dirty plug connections Have faulty torn or worn plug connections replaced by a specialist workshop Open the lid of the socket on the towing vehicle Unwind the cable from the tow bar Connect the plug F...

Page 137: ...he chassis drawbar for damage and wear Never try to repair damaged cable yourself If necessary replace missing clips cable ties Maintain the electric cabling as required with a damp cloth and silicone spray Fig 5 7 pin plug parked 1 7 pin plug 2 Parking socket plastic Fig 6 13 pin plug parked 1 13 pin plug 2 Parking socket plastic Disconnect the plug connection from the towing vehicle Plug the plu...

Page 138: ...are the following options 7 to 13 pin adapter 13 to 7 pin adapter Pay attention to the respective installation instructions for the adapter plug Have any retrospective conversion of your trailer plug connection checked by qualified specialist personnel Fig 10 Adapter from 13 to 7 1 contacts 13 pin 2 contacts 7 pin Fig 11 Conversion 13 pin socket to 7 pin socket 1 outlet 7 pin 2 inlet 13 pin Fig 12...

Page 139: ... Figure arrangement 1 Left indicator L 1 5 mm Yellow 2 Rear fog light 54g 1 5 mm Blue 3 Ground for contacts 1 7 31 2 5 mm White 4 Right indicator R 1 5 mm Green 5 Tail light right 58R 1 5 mm Brown 6 Brake lights 54 1 5 mm red 7 Tail light left 58L 1 5 mm Black 1 Socket on car 2 Plug on trailer 1 6 3 4 2 7 5 1 2 5 4 6 7 3 E 014 1 2 ...

Page 140: ... fog light 54g 1 5 mm Blue 3 Ground for contacts 1 8 31 2 5 mm White 4 Right indicator R 1 5 mm Green 5 Tail light right 58R 1 5 mm Brown 6 Brake lights 54 1 5 mm red 7 Tail light left 58L 1 5 mm Black 8 Reversing light 1 1 5 mm Grey pink 9 Continuous plus power supply only with coupling attached in the factory 4 2 5 mm Brown blue orange 10 Charge cable empty 6 2 5 mm Brown red 11 Ground for elect...

Page 141: ...446 do not normally have a cut off relay The result of this is Damage to the car starter battery or electronics as well as deep discharge of the starter battery If the charging line is connected correctly according to DIN ISO 11446 then the supply battery of the trailer that is connected via the charging line to the 13 pin socket on the towing vehicle is kept charged Please note this is primarily ...

Page 142: ...the trailer before driving off Fig 16 Lighting marking on the rear 1 Retroreflector reflector red 2 Multifunctional light left version 3 Number plate lights separate 4 Multi function light right version Check that the lights are all there all around the trailer Check them for damage and make sure that they work Replace faulty lamps retroreflectors Have faulty lamps torn brittle electric cables rep...

Page 143: ...flector white front 2 Side lights white front Fig 20 Clearance side lights at rear 1 Marker light red white top 2 Marker light red white bottom Fig 21 Side reflectors 1 Reflector white front 2 Reflector orange side Fig 22 Side marker lights at side 1 Marker light orange side E 018 1 2 E 019 1 2 E 029 1 2 E 030 1 ...

Page 144: ...nual part 2 e g Box trailers Fig 24 Power distributor box 1 Circuit breaker 2 Potential equalisation earthing Maintenance work on the power distributor box may only be carried out by a qualified electrician Portable units must be checked every 12 months to make sure that they are safe according to DIN VDE 0100 717 Switch the power supply off prior to carrying out work on the electric system Ensure...

Page 145: ...7 143 Testing care and maintenance ...

Page 146: ...tion in the operating manual Part 1 General HU General inspection SP Safety inspection Enter the implemented HU SP in the proof of inspection Section 29 sub section 12 of the StVZO German Licensing Regulations Keep the latest inspection report HU and the latest test record SP at least until the next inspection test Section 29 sub section 10 of the StVZO Keep the inspection log book as proof until ...

Page 147: ... We recommend you keep to inspection intervals of 6 months however min 1x per year The accident prevention regulations and environmental protection guidelines must be complied with when carrying out all maintenance work Damaged and non functioning trailer parts must be exchanged for original spare parts of Humbaur GmbH Fig 3 Safety components 1 Ball head coupling 2 Overrun hitch safety cable or ar...

Page 148: ...plastic ring is reduced if you use it again Replace self locking nuts after unscrewing the screw connection Check tighten the screws nuts with the tightening torques see Table 1 on page 146 Thread Strength 8 8 Strength 10 9 Tightening torque M5 5 5 Nm 8 1 Nm M6 9 6 Nm 14 Nm M8 23 Nm 34 Nm M8x1 25 Nm 37 Nm M10 46 Nm 67 Nm M10x1 25 49 Nm 71 Nm M12 79 Nm 115 Nm M12x1 5 83 Nm 120 Nm M14 125 Nm 185 Nm ...

Page 149: ...ring repair after 50 km 2000 km 5000 km 6 months 6 years Wheel bolts Re tighten after every wheel change as well X Tyres Check tyre pressure X Braking system Check the function of the overrun brake carry out braking procedure and adjust if necessary X X Wheel tyre combination Check sizes installed compared to COC paper registration certificate Part 1 X Lights Check that all lights work and are pre...

Page 150: ...les on the overrun device Clean and grease bearing sliding points of brake linkage transfer components Check that hand brake is working if necessary have gas strut replaced Check safety cable for damage and how it is routed Check thickness of pads on brake callipers X Clean tandem offset and have adjusted if required Check gaiter on overrun device for damage and replace if required Check that brak...

Page 151: ...scopic cylinder and lubricate Check electric hydraulic system remote control for damage ensure it is working X Battery Check for external damage acid leaking out Recharge a weak battery X Check charging state recharge ability and replace faulty old battery X Manufacturer signs warning labels Check they are present and legible Reorder damaged illegible signs labels and replace X Cargo bed lashing p...

Page 152: ...el 5 hole The condition of the wheels is of great importance to the road and operating safety of the trailer Among other things the size of the wheels determines the coupling height and has a direct effect on the road handling of the trailer Rule for speed 100 km h licence The tyres must not be more than 6 years old from date of manufacture These need to comply at least with the speed category L 1...

Page 153: ...ck wheel attachment 1 Wheel bolts 2 Torque wrench WARNING Wheel bolts could come undone Wheels could come undone while driving risk of accident Tighten the wheel bolts after the first 50 km and after a wheel change diagonally Regularly test that the wheels are fitted tightly using a torque wrench see maintenance table Tab 4 Tightening torques for wheel bolts On newly painted or new rims the wheel ...

Page 154: ...in bar kPa 2 in psi pounds per square inch NOTICE Driving with incorrect tyre pressure The tyres will wear disproportionately Before setting off and at the latest 14 days later check the tyre pressure on cold tyres Conversion bar psi kPa 1 psi 0 0689 bar 1 bar 14 504 psi or 100 kPa 1 kPa 0 01 bar Check the tyre pressure on all wheels on a regular basis and before long journeys You will find the co...

Page 155: ...off the trailer accident risk Tie down the spare wheel on the cargo bed On the V drawbar Fig 17 Example Spare wheel on drawbar 1 Spare wheel 2 V drawbar extended Fig 18 Attaching a spare wheel 3 Spare wheel holder 4 Screw connection in the crossbar 5 Clamp holder Regularly check the screw connections Fig 18 4 on the spare wheel holder Fig 18 3 and the clamp holder Fig 18 5 to ensure they are tight...

Page 156: ... wheel 3 Screw connection on chassis 4 Screw connection for spare wheel holder Check the screw connections Fig 24 3 for the spare wheel holder Fig 24 4 to ensure they are tight Check the spare wheel Fig 25 Check the spare wheel 1 Valve screwfit on aluminium rim 2 Valve fixed on steel rim Tyre pressure see Table 5 on page 152 Regularly check the condition of the spare wheel valve Fig 25 1 Fig 25 2 ...

Page 157: ...of wood Apply the handbrake if available Avoid being under the trailer if it is not standing firmly or if you do not have a suitable secure lifting device Keep additional helpers away from a raised trailer which is not standing firmly CAUTION Hot brakes You can burn yourself on hot brakes when changing the wheel Allow the brakes to cool off before changing a wheel Use Important information on chan...

Page 158: ...ace wheel chocks Fig 27 1 under intact wheels Fig 28 Remove spare wheel 1 Spherical collar nut size 19 spare wheel holder 2 Spare wheel Unscrew the nuts screws Fig 28 1 from the spare wheel holder While doing so hold the spare wheel Fig 28 2 tight Have a second person help you if necessary Carefully lift up the spare wheel off the wheel bolts Screw the spherical collar nuts onto the wheel bolts of...

Page 159: ...heel rim from seizing up due to rust Fig 32 Fitting spare wheel 1 Wheel bolts 2 Torque wrench Carefully place the spare wheel on the wheel hub Screw on the spare wheel using the same wheel bolts Fig 32 1 diagonally and hand tight Carefully lower the trailer Tighten the wheel bolts with a specific tightening torque see Table 4 on page 151 Remove the lifting device warning triangle toolbox etc Stow ...

Page 160: ...1 500 kg 1 800 kg zG Anh If the actual permissible gross weight zGG exceeds The calculated value then the trailer needs to be unloaded to the permitted max trailer load entered in the registration certificate Part 1 The max drawbar load S of the trailer on the coupling of the towing vehicle should be approximately utilised but may not be exceeded Speed 100 sign Fig 34 COC paper page 1 R wheel shoc...

Page 161: ... approved by the type approval authority e g TÜV DEKRA SGS Fig 37 Wheel shock absorber installed version 1 1 Angle bracket on chassis 2 Shock absorbers fitted 3 Clamping bracket two part WARNING Faulty incorrectly fitted wheel shock absorbers The possibility of a wheel shock absorber malfunctioning after installing it yourself can impair the road handling of the trailer risk of accident The connec...

Page 162: ...th lubricant Lubricants can cause reactions with your skin Only use approved lubricants Carefully clean the grease nipple before lubricating Use after working with lubricants Before lubricating Fig 40 Prepare grease nipple 1 Cap NOTICE Dirty grease nipple Dirt could get into the bearing and cause higher wear Grease nipple and grease gun could be damaged Clean grease nipples before lubricating Dirt...

Page 163: ...braked Side view 1 Oiling points 2 Lubrication sliding points Drip some standard machine oil onto the bearings and joint areas Fig 43 1 and Fig 44 1 Grease the lubrication sliding points Fig 43 2 and Fig 44 2 Automatic jockey wheel Fig 45 Automatic jockey wheels Lubrication points 1 Grease nipple 2 Sliding point 3 Bearing point wheel Lubrication of the jockey wheel should be carried out while the ...

Page 164: ...ver gas strut 2 Gear segment 3 Bearing point 4 Brake linkage The gas strut Fig 47 1 is maintenance free If it starts to fail then it needs replacing Check the brake linkage Fig 47 4 and the hand brake lever with gas strut for deformation Drip a little machine oil into the toothed segment Fig 47 2 Lubricate the bearing point Fig 47 3 with grease Activate the hand brake several times the grease will...

Page 165: ...e to ensure that all wheel brakes brake evenly All Bowden cables Fig 50 1 must be adjusted properly and must be lubricated The brake linkage holder Fig 50 6 prevents defective braking Lubricate the open brake cables Fig 50 2 Activate the hand brake several times the grease will distribute itself If necessary readjust the tandem compensation Fig 50 3 Height adjustable drawbar Fig 51 HV drawbar Lubr...

Page 166: ... 1 5 mm If the maximum diameter value of D 42 mm is exceeded then the wear bushing needs to be replaced Fig 54 Lubricate towing ring 1 Screw bolts 2 Wear bushing The towing ring screw connection needs to be tightened after approx 2000 km Please pay attention to the information provided by the towing ring manufacturer Check the towing ring for damage Lubricate the wear bushing Fig 54 2 and the roun...

Page 167: ...rawbar to the right and left Drawbar turntable trailer Fig 56 Drawbar lubrication point 1 Grease nipple mounting bolts Lubricate the mounting bolts of the drawbar at the grease nipple Fig 56 1 using a grease gun Turntable brake Fig 57 Turntable brake lubrication point 1 Gear 2 Locking mechanism 3 Lever The turntable can be fitted with a turntable brake Remove any foreign bodies from the turntable ...

Page 168: ...g 59 3 and open the clamp Fig 59 2 Remove the prop stand Lubricate the T handle screw on the thread and washer Fig 59 4 Make sure that no grease gets onto the cylinder body of the prop stand or the clamp Position the prop stand and clamp the cylinder body tight using the clamp Corner leg Fig 60 Corner legs Lubrication points 1 Square neck bearing point 2 Spindle open 3 Bearing points The open spin...

Page 169: ...in Undo the transmission device on the compensation bar Fig 62 3 undo hexagon nut lock nut Fig 62 2 Check the Bowden cable play on the axle abutment Fig 62 4 approx 5 mm The Bowden cable clearance should be as even as possible on wheels on the same axle Setting readjusting the wheel brake Fig 63 Example Drum brake ALKO 1 Stopper in inspection port for brake pad 2 Stopper in adjustment opening 3 Br...

Page 170: ... while driving Checking wear on brake pad Fig 65 Example Drum brake ALKO 1 Stopper in inspection port for brake pad Brake pads always need to be replaced in pairs per axle Remove the stopper from the inspection port Fig 65 1 Check the wear condition of the brake pad Brake callipers need to have at least 2 mm brake pad Have worn brake pads replaced by a specialist in a specialist workshop Replacing...

Page 171: ...k on electrical installations carried out by qualified specialist staff CAUTION Short circuit in the electric system People could suffer burns A short circuit could set the trailer on fire and cause damage to the towing vehicle Observe the following points before working on the electrical system Unplug all plug connections to the towing vehicle Unplug all plug connections to external power supplie...

Page 172: ...connection contacts When replacing the complete tail light please note The tail lights are available in various versions right version with without reversing light and left version as well as in horizontal vertical design Undo the screw connections Fig 69 2 and the plug connection Fig 69 3 to the tail light Insert the new tail light Fig 69 1 pay attention to version Use the threaded bolts to screw...

Page 173: ...o open 4 Bulb tubular 12V 5W 5 Cover glass cover Carefully loosen the cover glass Fig 72 1 with flat tool in the slit Fig 72 3 Replace the tubular bulb Fig 72 4 Insert the new tubular bulb Place the cover glass on the mounting plate Fig 72 2 pay attention to orientation Side light Fig 73 Side light front bulb 1 LED light compact 2 Cover glass white 3 Screw connection crosshead 4 Bulb tubular 12V 5...

Page 174: ...e Undo the screw connection Fig 75 3 Remove the light cover Fig 75 5 with the housing Replace the tubular bulb Fig 75 4 Attach the light cover and the housing with the screw connection Reversing light Fig 76 Reversing light separate 1 Light holder 2 Cover glass white 3 Screw connection crosshead 4 Bulb P21W Undo the screw connection Fig 76 3 Remove the cover glass Fig 76 2 from the housing Remove ...

Page 175: ...flector side orange 2 Reflector front white 3 Reflector rear red The reflectors are self adhesive and are used as clearance markers for the trailer Pull a faulty reflector Fig 78 1 2 3 off the surface Clean the sticking surface do not use any aggressive solvents e g ACETONE Apply a new reflector in the correct colour push on hard Please note For the adhesive to work properly the adhesive surface s...

Page 176: ...be adhered to before during cleaning Only clean your trailer at a suitable wash station Comply with local environmental regulations Make sure that the power supply has been disconnected Clean it after driving on roads which have been gritted in the winter or after transporting fertiliser or other substances which are acidic contain salt or alkali e g manure thoroughly clean your trailer with clear...

Page 177: ...tepping on the cargo bed and only access it via the designated access points Do not tread on mudguards drawbar drop sides toolbox Use Never step onto an unsecured trailer tipped cargo bed Do not step under an unsecured tipped cargo bed loading bridge NOTICE Using aggressive cleaning products The surfaces materials can be attacked by chemicals salts acids and bases Use In the first 3 months only wa...

Page 178: ...den plates and cause the plates to swell Fig 82 Cleaning cargo bed chassis Read the operating instructions for the high pressure cleaner If possible tip tilt the cargo bed so that the water can run off If required lubricate all lubrication points before cleaning until grease comes out Use When cleaning move the jet of water in a circular motion Only use high pressure cleaners which have a max pres...

Page 179: ...re of the materials surfaces Galvanised steel parts Fig 86 Galvanised surfaces Galvanised surfaces components need to oxidise to prevent rust from developing This can take several months Once the surface loses its high gloss a layer of rust protection has been formed White rust can form on galvanised surfaces promoted caused by moisture high humidity e g in road salt White rust is not a defect dam...

Page 180: ...are very robust and resistant to environmental influences In environments with a salty atmosphere e g by the sea or when transporting a wet load e g in a refrigerated box a rust film can form on the stainless steel surface Remove rust from stainless steel components using conventional stainless steel cleaner Let the stainless steel components dry out properly Wooden components Fig 89 Wooden cargo ...

Page 181: ... plates glued together with a UV resistant plastic coating PVC on each side for example walls roof on box trailers Plywood with a plastic coating is stable and easy to maintain Do not use a high pressure cleaner Clean the surfaces with water a neutral cleaning products e g plastic cleaner After cleaning the plywood surface make sure it is dried properly Sandwich panels PurFerro Fig 92 Sandwich pan...

Page 182: ... porous seals replaced Regularly maintain the seals in the winter with talcum powder Vaseline or silicone spray Fabric tension cables cords Fig 94 Elastic cable Elastic cables for tarpaulins consist of multiple rubber strands which are wrapped in a fabric hose They are subject to heavy wear during use Clean a dirty elastic cable with a wet cloth Replace a damaged torn significantly worn elastic ca...

Page 183: ...Make sure that the inscription does not come off Pay particular attention to Tarpaulins which are exposed to the weather conditions for long periods of time e g full sun could fade or get spots over time Condensation can form under tightly sealed tarpaulins due to temperature differences which can encourage mould to grow If not used for a long period of time ensure good air circulation in the trai...

Page 184: ...e recycling facility The specialists at the car vehicle recycling facility will dispose of the individual components in the proper manner Use while disassembling components Disposing of operating materials Old oil lubricants coolants and refrigerants fuel as well as batteries and rechargeable batteries are hazardous waste requiring special monitoring RISK of environmental pollution Do not dispose ...

Page 185: ...8 183 Troubleshooting guide ...

Page 186: ...to contact your local dealer They are your contractual partner and will be best able to meet your requirements That also applies if you have bought your Humbaur product online The Internet platform acts only as a broker your contractual partner is always your dealer Humbaur Service Partners can be found at www humbaur com under Dealers Service Finding a dealer service partner Guarantee and warrant...

Page 187: ...ove it further forwards Drawbar load is inadequate or negative Correct the load distribution so that there is sufficient drawbar load The trailer rattles squeaks as you drive along The load is not secured Secure the load properly The cables or hoses work loose Have faults rectified by a specialist workshop Jockey wheel is not cranked up and comes undone from the attachment points Crank the jockey ...

Page 188: ... brake linkage Brake callipers seized on the drum Have faults rectified by a specialist workshop Braking effect too weak brakes pulling to one side Brake pads worn greasy or vitrified Brake not properly adjusted Have faults rectified by a specialist workshop The handbrake effect is too weak Brake pads not yet run in Check the braking effect after a short run in time Friction losses in transmission...

Page 189: ...the ball head 430 35 mm according to DIN 74058 from the floor Components of the coupling are worn faulty Have faults rectified by a specialist workshop Fault Possible causes Remedy Drawbar coupling has too much play Drawbar coupling is worn Have the drawbar coupling replaced by a specialist workshop Ball head of the car coupling is worn Replace the car coupling min Ø 49 5 mm Bend angle has been ex...

Page 190: ... and the wheel if required Tighten the wheel nuts wheel bolts using the specified tightening torque do not use an impact wrench Have faults rectified by a specialist workshop Tyres are worn on one side Tyres are unevenly pumped up Check the tyre pressure on all tyres Fill all tyres with the specified tyre pressure Tyre is faulty losing air Replace the faulty tyre as quickly as possible A wheel sho...

Page 191: ...eplace the gas struts in pairs with new ones of the same type Gas struts dripping leaking oil Gas struts have been installed incorrectly Seals are too old become leaky Replace the gas struts in pairs with new ones of the same type Cargo bed with dampers cannot be lowered Dampers are contaminated with dirt Damping effect has reduced Clean the dampers damper pistons If necessary press the cargo bed ...

Page 192: ...3 pin or according to DIN ISO 1724 7 pin Interior lighting not working The switch has not been activated Switch on the switch which is on the light Light bulb is defective Replace the faulty bulb Plug is not plugged into car or respectively the battery is not supplying power to the trailer Connect the connecting cable to the car Driving lights on towing vehicle not switched on At least switch on s...

Page 193: ...age apparent Use the hand pump apply pressure After that turn the hand wheel of the hand pump very slowly to open it up release pressure Fault Possible causes Remedy Cylinder does not extend Supplied quantity of oil is too low Check the oil level in the oil container Top up oil if required The oil is too viscous and too cold Ensure that the oil has the requisite operating temperature and viscosity...

Page 194: ...Hydraulics 8 192 Troubleshooting guide ...

Page 195: ...9 193 Proof of inspection ...

Page 196: ...________________________________ Type _______________________________________ Handover Service Stamp Signature Date 1 000 km Inspection Stamp Signature Date 5 000 km Inspection Stamp Signature Date 10 000 km Inspection Stamp Signature Date 15 000 km Inspection Stamp Signature Date 20 000 km Inspection Stamp Signature Date 25 000 km Inspection Stamp Signature Date 30 000 km Inspection Stamp Signatu...

Page 197: ...tamp Signature Date 50 000 km Inspection Stamp Signature Date 55 000 km Inspection Stamp Signature Date 60 000 km Inspection Stamp Signature Date 65 000 km Inspection Stamp Signature Date 70 000 km Inspection Stamp Signature Date 75 000 km Inspection Stamp Signature Date 80 000 km Inspection Stamp Signature Date ...

Page 198: ..._____________ ______________________________________________ ______________________________________________ ______________________________________________ ______________________________________________ ______________________________________________ ______________________________________________ ______________________________________________ ______________________________________________ __________...

Page 199: ..._______________ ____________________________________________________ ____________________________________________________ ____________________________________________________ ____________________________________________________ ____________________________________________________ ____________________________________________________ ____________________________________________________ ...

Page 200: ...echnical modifications All dimensions are approximate values and relate to the series vehicle without accessories Printed in Germany Reprint forbidden Illustrations similar some trailers show special equipment Images Humbaur GmbH fotolia de Art no 007 00072 Status 07 2019 humbaur com ...

Reviews: