Electrical system
7
170
Testing, care and maintenance
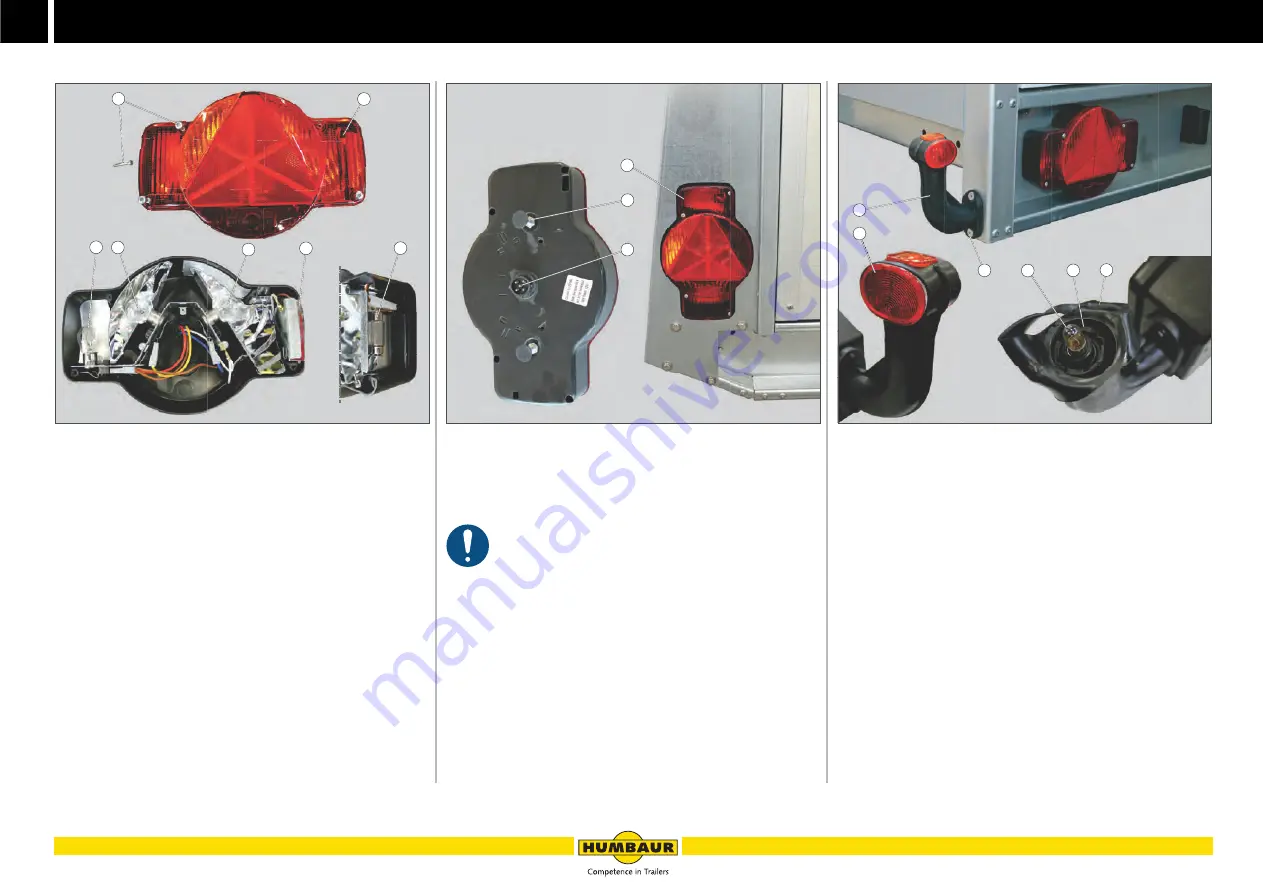
Multifunctional lighting at rear
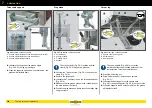
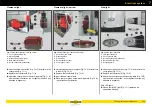
Fig. 68
Humbaur tail light (horizontal)
1
4x crosshead screws
2
Light lens (plastic)
3
Brake / tail light assembly (P21W/5W)
4
Indicator (P21W)
5
Rear fog light (P21W) - left version
Reversing light (white lens) - right version
6
Slot-in cover (plastic)
7
Number plate tubular bulb (C5W)
Undo the crosshead screws (Fig. 68 /1) and carefully
remove the light lens (Fig. 68 /2).
Replace faulty bulbs.
Screw the new bulb tightly into the socket - pay attention
to locking pins.
If required, clean the contacts - use contact spray.
Place the light lens on the housing - pay attention to seal.
Screw on the light lens - not too tight.
Replace any damaged seal / light lens if required.
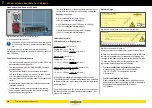
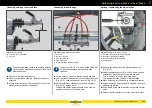
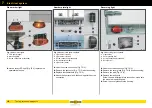
Fig. 69
Humbaur tail light (vertical)
1
Tail light (left version)
2
Threaded bolt / screw connection
3
Plug connection / contacts
When replacing the complete tail light, please note:
The tail lights are available in various versions: right
version with/ without reversing light and left version
as well as in horizontal /vertical design.
Undo the screw connections (Fig. 69 /2) and the plug
connection (Fig. 69 /3) to the tail light.
Insert the new tail light (Fig. 69 /1) pay attention to
version.
Use the threaded bolts to screw it in place.
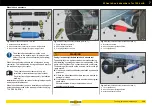
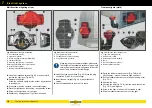
Clearance lights (stalk)
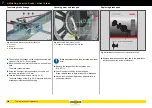
Fig. 70
Clearance light / stalk on rear
1
Light (red, orange, white)
2
Rubber arm / stalk
3
Attachment (rivets, screws)
4
Bulb
5
Screw connection / socket
6
Rubber protective cover
Spray the rubber protective cover (Fig. 70 /6) with
silicone spray - makes it easier to slide on and off.
Pull the rubber protective cover off the bulb using a tool
(Fig. 70 /1).
Unscrew the light.
Unscrew the bulb (Fig. 70 /4) from the screw connection
(Fig. 70 /5) and replace it.
Screw in the light - make sure it is screwed in tight.
Slide the rubber protective cover over the light.
W - 066
1
2
4
5
3
6
7
W - 067
1
2
3
W - 068
1
2
W - 068
3
4
6
5
Summary of Contents for 1000 Series
Page 1: ...GENERAL CAR Program PART 1 OPERATING MANUAL humbaur com 1000 8400 SERIES EN ...
Page 9: ...1 7 Safety ...
Page 21: ...2 19 General information ...
Page 31: ...3 29 Operation ...
Page 67: ...3 65 Operation Trailer safety ...
Page 75: ...4 73 Chassis ...
Page 103: ...5 101 Body ...
Page 134: ...Cover net 5 132 Body ...
Page 135: ...6 133 Electrical system ...
Page 145: ...7 143 Testing care and maintenance ...
Page 185: ...8 183 Troubleshooting guide ...
Page 194: ...Hydraulics 8 192 Troubleshooting guide ...
Page 195: ...9 193 Proof of inspection ...

