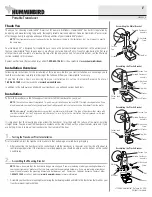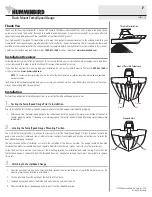
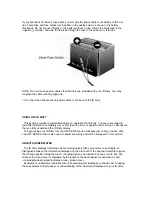

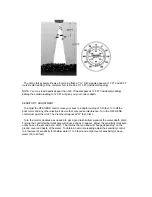

There are two main components to an ID Sixty installation: The transducer, which you will install
on the transom or inside the hull, and the ID Sixty unit, which mounts in the dash or console. The
transducer and ID Sixty communicate by means of a cable, and are powered by your boat’s 12-
volt DC battery.
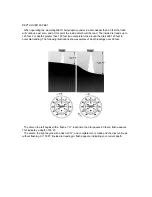
The transducer and ID Sixty use the basic principles of sonar to reveal objects beneath the
water’s surface. The ID Sixty continuously sends electronic signals to the transducer, which
converts them to ultrasonic signals that it aims toward the bottom, then immediately echoes back
to the transducer. As the transducer receives these signals, it converts them back too electronic
signals for display on the ID Sixty dial.
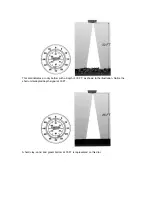
HOW THE ID SIXTY WORKS
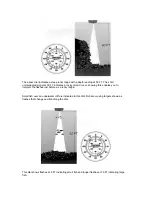
The ID Sixty uses the returned information to generate signals that are displayed on a dial. The
information is constantly updated as you travel across the water. The ID Sixty unit measures the
amount of time it takes the signal to travel from the transducer to the reflecting object and back
again. This time is then converted into feet and the number of feet to the object is indicated on the
calibrated dial with the spinning lamp. The lamp revolves around the dial once for each sixty-foot
reading.
BEFORE BEGINNING
WHAT YOU HAVE
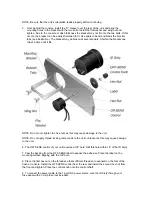
Before installing your new ID Sixty please ensure that the following parts are included in the
product box:
Item Part No.
ID Sixty depthsounder………………………………………………….N/A
Transducer with 20 foot cable………………………………………….XHS-6-24
4” power cable…………………………………………………………SAID-10
Mounting bracket……………………………………………………...400988-1
Hardware………………………………………………………………2214-2
OFF-SENS control knob………………………………………………401944-2
OFF-SENS label………………………………………………………540024-2
If any of these items are missing, please see your local Hummingbird distributor for a
replacement product or contact Hummingbird at our toll-free Customer Support Hotline, listed
inside the back cover.
If your ID Sixty came already installed on your Tracker boat, skip to Section Four, using the ID
Sixty.
WHAT YOU NEED
In addition to the parts supplied with your ID Sixty, you will need the following for installation and
operation:
•
A drill and drill bits
•
Phillips-head screwdriver
•
Ruler or measuring tape
•
Pencil or pen
•
12-volt DC power source (your boat’s battery)
•
1-amp fuse and fuse holder
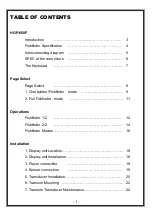
Summary of Contents for ID Sixty
Page 1: ......