INSTALLATION
7
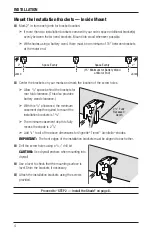
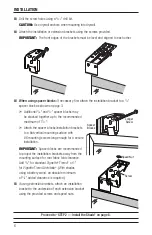
Mount the Installation Brackets — End Mount
End mount the headrail when conventional mounting techniques will not work — for example,
in an arched window.
■
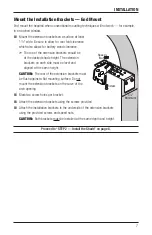
Mount the extension brackets on a surface at least
1
1
/
2
" wide. Be sure to allow for rear fold clearance,
which also allows for battery wand clearance.
➤
The top of the extension brackets should be
at the desired shade height. The extension
brackets on each side must be level and
aligned at the same height.
CAUTION:
The rear of the extension brackets must
be flush against a flat mounting surface. Do not
mount the extension brackets on the curve of the
arch opening.
■
Mark two screw holes per bracket.
■
Attach the extension brackets using the screws provided.
■
Attach the installation brackets to the underside of the extension brackets
using the provided screws and speed nuts.
CAUTION:
Both brackets must be installed at the same depth and height.
Proceed to “STEP 2 — Install the Shade” on page 8.
Speed
Nut
Screw
1
1
/
2
"
Minimum


