9
Installation Instructions
(Attaching an accessory light kit)
Electrician
Installation Manual
Majestic Everglade Ceiling Fan
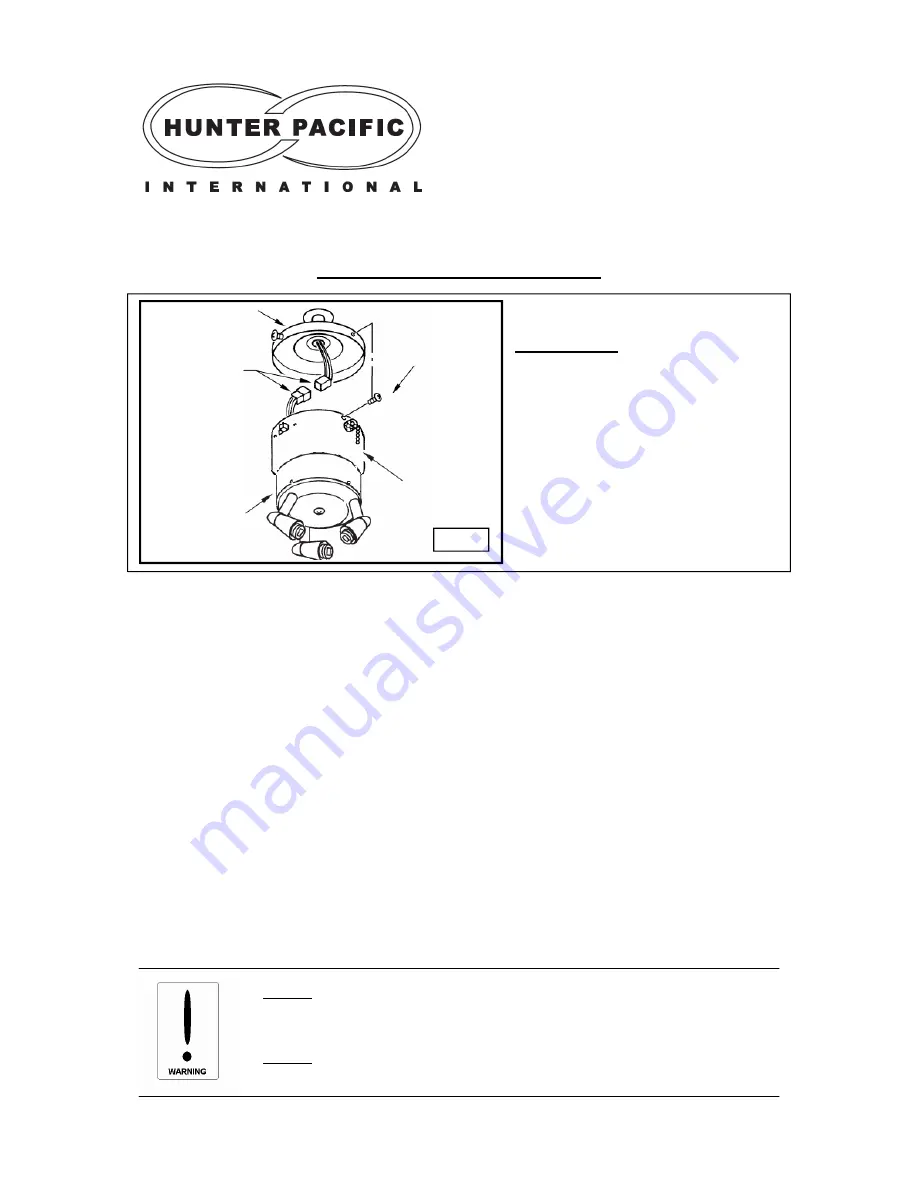
STEP 3 (Fig 12)
a)
Connect the two ends of the nine pin
plug together. Make sure the colours on
the plugs are corresponding.
b)
Secure the pull cord assembly kit (with
the light attached) to the motor housing
using the 3 pull cord assembly kit screws
provided.
c)
Attach the pull cord handle to the pull
cord chain.
Base of Motor
Housing
Nine Pin Plug
Connectors
Light Kit
Pull Cord
Assembly Kit
Screw
Pull Cord Chain
Fig. 12
Trouble Shooting Tips - Light
•
Light will not turn on -
Make sure globe has not blown and it is properly fitted
between the metal prongs. Check all light wires in the light kit, the terminal block
in the canopy cover and the wall switch has been connected together correctly.
•
Light is not corresponding to remote control -
Make sure globe has not
blown and it is properly fitted between the metal prongs. Check all light wires in
the light kit, the terminal block in the canopy cover and the wall switch has been
connected together correctly. Check dip switch settings in remote hand piece
and remote receiver are corresponding.
•
Light wires appear to be missing or too short -
Wires may be stuck in the
motor housing. Carefully pull wires out of the motor housing, careful not to strip
the wires as this may cause the fan to short.
•
Light flickers or flashes -
Check globe is secured between the metal prongs in
the light kit. Make sure you are using the globes specified.
1.
Do not
attempt to operate the fan (or optional light kit) with any wall control that is
not approved by Hunter Pacific for use with its fans. DO NOT use solid state
controllers. The use of unapproved controllers will void your warranty.
2.
Do not
mix blade sets from one fan to another as this may upset the balance of
the fan. If only one blade is damaged you are still required to replace with a new set.


