Hunter e36 • Maintenance
14.3
Waxing helps protect your boat from everyday elements.
Use a wax recommended for fiberglass (gelcoat) finishes.
Many automatic, over-the-counter waxes can be used.
Check the product label for recommended surfaces and
applications.
14.2.3 Color Fading and Yellowing
Darker colors are more prone to fading because they
absorb more of the sun’s ultraviolet rays. Whites and off-
whites will yellow, usually on the deck radii. If the finish
on your boat has started to fade or yellow, and waxing
will not restore the finish, compounding with a fine grit
compound and a low speed buffer may be necessary.
An automotive, fine grit rubbing compound will work well
in most cases.
* Follow the manufacturer’s application instructions. Do
not apply compound or wax in direct sunlight.
* Never place the buffer in such a manner that the pad
touches the ground. The pad will pick up dirt which will
cause deep scratches in the finish.
* After compounding, clean the surface with soap and
water. Apply a good coat of wax.
14.2.3 Minor Scratches
If you have light surface scratches and rubbing compound
does not remove them, wet sanding may be necessary.
** To wet sand:
* Clean the area with soap and water. During sanding,
try to keep the area free of dust and dirt.
* Use a 500 or 600 grit wet and dry sandpaper. Use a
sanding block. Sandpaper and sanding blocks can be
purchased from automotive supply stores.
* When sanding, keep the surface wet. On dry surfaces,
press a wet sponge above the sanding area. Always
keep the sanding block flat on the surface. Never use
the edge or corner. Doing so will make scratches that
rubbing compound will not remove.
* After completing wet sanding, compound the sanded
area with a fine grit rubbing compound. Use a low speed
(1200 – 2800 rpm) buffer. Several applications of rubbing
compound will have to be applied before all the scratches
are removed.
* Apply a good coat of wax.
14.2.4 Stains
You can remove stains using a cleaner specifically made
for gelcoat surfaces. Any cleaner recommended for cul-
tured marble or fiberglass tubs and sinks will work. Most
of these cleaners can be purchased at a grocery store.
If a cleaner does not remove the stain, use a fine grit
rubbing compound. By hand, apply a small amount of
the compound to the stain area. Using a cotton cloth
and medium pressure, rub the compound into the stained
area. After the stain is removed, wash the area with soap
and water and apply a good coat of wax.
14.2.5 Stainless Steel
Your Boat Hardware is made from top quality stainless
steel and with proper care and maintenance will give you
many years of service.
Mirror Finish
The mirror finish on most of your stainless hardware is
produced by a series of progressive machine and hand
polishing operations. It is this careful polishing that
makes the stainless finish so beautiful...and easier to
clean and maintain.
Recommended Cleansers
We have reviewed several general stainless cleansers/
polishers to determine their effectiveness in cleaning and
protecting your stainless steel. Even though opinions will
certainly differ our opinion is that one of the most effective
cleaning and polishing products is Collinite© # 850 Metal
Wax. To help maintain the factory finish of your stainless
steel hardware, try the recommended cleanser because
you may agree with us. A sample ‘Stainless Care Kit’ is
supplied with your boat to start you off with the recom-
mended maintenance.
Recommendations for Cleaning
• Do…Apply an even layer of the polishing compound onto
a clean soft rag and distribute over a manageable area of
the stainless surface with a soft rotational motion.
• Do…Repeat the application if some surface stains
remain until all the finish is back to the original clean
shiny finish.
• Do…Remove any excess polishing compound and pol-
Summary of Contents for e36
Page 1: ...V2 062012 Operator s Manual e 36 ...
Page 2: ......
Page 9: ...V2 062012 Introduction e 36 Chapter 1 ...
Page 14: ...Hunter e36 Introduction 1 6 Notes ...
Page 15: ...Documents Forms e 36 Chapter 2 and V2 062012 ...
Page 26: ...Hunter e36 Documents and Forms Maintenance Log Date Maintenance Performed Hourmeter 2 12 ...
Page 27: ...Hunter e36 Documents and Forms 2 13 Date Maintenance Performed Hourmeter Maintenance Log ...
Page 33: ...Hunter e36 Documents and Forms 2 19 Spare Parts List ...
Page 34: ...Hunter e36 Documents and Forms Dates of practice drills and onboard safety inspections 2 20 ...
Page 35: ...Hunter e36 Documents and Forms 2 21 My personal preferences for maintenance items safety gear ...
Page 36: ...Hunter e36 Documents and Forms Notes 2 22 ...
Page 37: ...V2 062012 Limited Warranty e 36 Chapter 3 ...
Page 38: ...This Page Intentionally Left Blank Hunter Limited Warranty 3 2 ...
Page 47: ...Boating Safety e 36 Chapter 4 V2 062012 ...
Page 65: ...Deck Hardware Hunter e36 Boating Safety 4 19 ...
Page 67: ...Hunter e36 Boating Safety 4 21 Notes ...
Page 68: ...Hunter e36 Boating Safety 4 22 Notes ...
Page 69: ...V2 062012 Fuel Systems e 36 Chapter 5 ...
Page 75: ...Fig 5 7 A Quick Fuel Filter Reference Hunter e36 Fuel Systems 5 7 ...
Page 82: ...Notes Hunter e36 Fuel Systems 5 14 ...
Page 83: ...V2 062012 Underwater Gear e 36 Chapter 6 ...
Page 92: ...Hunter e36 Underwater Gear 6 10 Notes ...
Page 93: ...V2 062012 DC Electric Systems e 36 Chapter 7 ...
Page 103: ...Hunter e36 DC Electric 7 11 7 8 BASIC DC POWER SUPPLY SYSTEM DIAGRAM ...
Page 104: ...Hunter e36 DC Electric 7 12 Notes ...
Page 106: ...Hunter e36 DC Electric 7 14 Notes ...
Page 107: ...V2 062012 AC Electric Systems e 36 Chapter 8 ...
Page 115: ...Hunter e36 AC Electric Systems 8 9 7 8 AC DC Electric Power Supply Diagram ...
Page 116: ...Hunter e36 AC Electric Systems 8 10 This Page Intentionally Left Blank ...
Page 117: ...Hunter e36 AC Electric Systems 8 11 Notes ...
Page 118: ...Hunter e36 AC Electric Systems 8 12 Notes ...
Page 119: ...V2 062012 Water Systems e 36 Chapter 9 ...
Page 126: ...Hunter e36 Water Systems 9 8 This Page Intentionally Left Blank ...
Page 128: ...Hunter e36 Water Systems 9 10 This Page Intentionally Left Blank ...
Page 129: ...Hunter e36 Water Systems 9 11 Notes ...
Page 130: ...Hunter e36 Water Systems 9 12 Notes ...
Page 131: ...V2 062012 Waste Systems e 36 Chapter 10 ...
Page 137: ...Hunter e36 Waste and Sanitation Systems 10 7 ...
Page 140: ...This Page Intentionally Left Blank Hunter e36 Waste and Sanitation Systems 10 10 ...
Page 141: ...Sump Pump Layout Grey Water Hunter e36 Waste and Sanitation Systems 10 11 ...
Page 142: ...This Page Intentionally Left Blank Hunter e36 Waste and Sanitation Systems 10 12 ...
Page 144: ...Hunter e36 Waste and Sanitation Systems 10 14 Notes ...
Page 145: ...V2 062012 Engines Transmissions e 36 Chapter 11 and ...
Page 154: ...Hunter e36 Engines and Transmissions 11 10 This Page Intentional Left Blank ...
Page 155: ...V2 062012 Sails Rigging e 36 Chapter 12 and ...
Page 162: ...Hunter e36 Sails and Rigging 12 8 Standing Rigging Details Standard ...
Page 163: ...Hunter e36 Sails and Rigging 12 9 Standing Rigging Details Furling ...
Page 164: ...Hunter e36 Sails and Rigging 12 10 Mast Upper Spreader Tip Details H A B C D E F G ...
Page 165: ...Hunter e36 Sails and Rigging 12 11 C A B D E F G H J K I Mast Lower Spreader Tip Details ...
Page 166: ...Hunter e36 Sails and Rigging 12 12 Standing Rigging Details ...
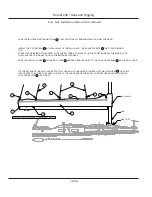
Page 170: ...Hunter e36 Sails and Rigging 12 16 Typical Boom Reefing Layout ...
Page 171: ...Hunter e36 Sails and Rigging 12 17 Rope Vang Details Standard Vang Details ...
Page 172: ...Hunter e36 Sails and Rigging 12 18 Rigid Vang Details Optional Vang Details ...
Page 175: ...Hunter e36 Sails and Rigging 12 21 JIB LINE TIES OFF ON CLEAT Jib Furling Line Layout ...
Page 176: ...Hunter e36 Sails and Rigging 12 22 Bridle Configuration ...
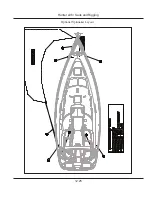
Page 179: ...Hunter e36 Sails and Rigging 12 25 Optional Spinnaker Layout ...
Page 180: ...Hunter e36 Sails and Rigging 12 26 Notes ...
Page 181: ...V2 062012 Getting Underway e 36 Chapter 13 ...
Page 188: ...Hunter e36 Getting Underway 13 8 Notes ...
Page 189: ...V2 062012 Maintenance e 36 Chapter 14 ...
Page 202: ...Notes Hunter e36 Maintenance 14 14 ...
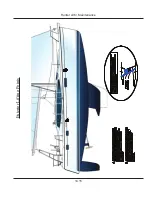
Page 203: ...Exterior Lifting Points Hunter e36 Maintenance 14 15 ...
Page 204: ...Hunter e36 Maintenance 14 16 This Page Intentionally Left Blank ...


