background image

3

4

1886

1886

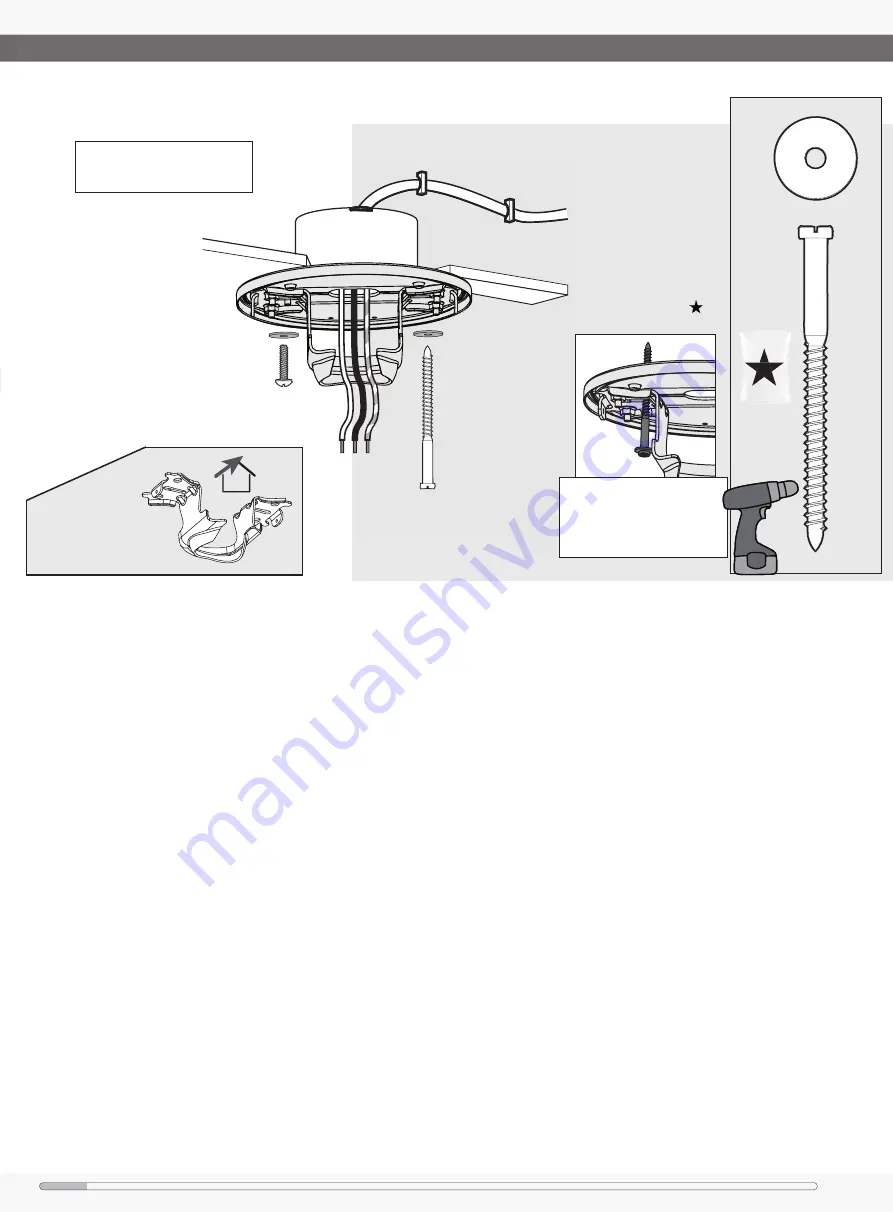
Preparing the Ceiling Bracket

Installing the Ceiling Bracket

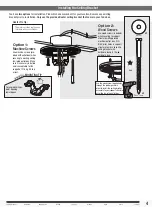
Use wood screws (included) 
when securing to support 
structure with approved 
electrical outlet box. Drill 
9/64” pilot holes in support 
structure to aid in securing 
ceiling bracket with 
hardware found in the   
hardware bag.

Use machine screws (pro-
vided with outlet box) when 
securing to existing ceiling 
fan-rated outlet box. Make 
sure it is securely installed 
and is acceptable for fan 
support of 31.8 kg (70 lbs) 
or less.

Option 2: 

Wood Screws

Option 1: 


Machine Screws

The machine screws are the ones 
that came with your outlet box. 

Hunter Pro Tip:

For angled ceilings, 
point opening 
toward peak.


     A

NGL

ED

 MOUNTING TIP

bag

Wood Screw

Washer

x2

x2

Use the wood screw to poke holes 
through the rubber gasket in 
order to install the ceiling bracket 
assembly to your support structure 
or ceiling fan-rated outlet box.

You have 

two options

 for installation. Pick which one works best for your location. Remove any existing 

bracket prior to installation. 

Only use the provided Hunter ceiling bracket that came in your fan’s box.

Check the outlet box:

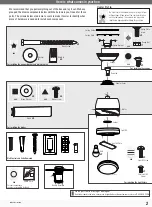
Ceiling Bracket

Downrod

Hanging Fan

Wiring

Canopy

Blades

Light

Control

Glass

Summary of Contents for Oceana

Page 1: ...Installation Manual 2019 Hunter Fan Co Model 59615 Noble Bronze 59616 Matte Silver Fan weight 2 lbs 21 2 lbs 9 6 kg Oceana PG3801 r120219...

Page 2: ...risk of personal injury do not bend the blade brackets when installing the blade brackets balancing the blades or cleaning the fan Do not insert foreign objects in between rotating fan blades Caution...

Page 3: ...acket and wiring the fan For installing the blades For installing the canopy Downrod Canopy Flange Nut Ceiling Plate Screw Ceiling Bracket Ceiling Gasket Ceiling Plate Wood Screw Wire Nut Washer bag H...

Page 4: ...wrench Hold the ceiling bracket assembly up to the outlet box and mark the screw locations To mount to support structure also mark the ceiling for drilling pilot holes x4 x4 bag Canopy Plate Screw Fla...

Page 5: ...Wood Screws Option 1 Machine Screws The machine screws are the ones that came with your outlet box Hunter Pro Tip For angled ceilings point opening toward peak ANGLED MOUNTING TIP bag Wood Screw Wash...

Page 6: ...ed setscrew so that the downrod can be inserted 3 STEP Pass all wires to one side of horizontal bar in downrod assembly Hand tighten the downrod at least 4 5 full turns until it stops Trim the wires c...

Page 7: ...t Connect the three grounding wires green green yellow stripe or bare copper coming from the ceiling downrod and hanging bracket Connect the yellow wire from the receiver to the black wire from the fa...

Page 8: ...nging Fan Wiring Canopy Blades Light Control Glass Installing the Blades Repeat x4 x8 bag Blade Screw x8 bag Blade Washer Insert the blade into the blade slot around the center screw Put the blade was...
Page 9: ...rely Feed the 9 pin plug connector coming from the bottom of the motor housing through the center hole in the light kit assembly Connect it to the plug connector found in the switch housing area of th...

Page 10: ...l Install the longer screws through the slots in the wall control into the switch box screw holes ON ON Turn Power Turning on the power 6 5 Installing the Wall Plate Install the shorter screws through...

Page 11: ...roperly installed Check to see if any of the blades are cracked If so replace all of the blades Cleaning the Fan Use soft brushes or cloths to prevent scratching Cleaning products may damage the finis...

Page 12: ...f Hunter What Does This Warranty NOT Cover Labor Excluded This warranty does not cover any costs or fees associated with the labor including electrician s fees required to install remove or replace a...

Reviews: