9
1886
1886
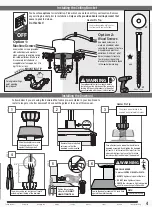
Ceiling Bracket
Downrod
Hanging Fan
Wiring
Canopy
Blades
Light
Remote
Troubleshooting
Preparing the Remote
Installing the Remote Control Cradle
Once the power
is turned on, the
the
remote must be
remote must be
paired within 60
paired within 60
seconds
seconds. Pairing
is only required
once after initial
installation.
ON
Turn P
ow
er
ON
D
ON
D
ON ECE
1 2 3 4
SET
Battery
Set
ON
D
ON ECE
1 2 3 4
ECE
ON
1 2 3 4
SET
Battery
Door
(If a light kit is installed)
ON
D
ON ECE
1 2 3 4
SET
Light
Off
Fan
Speed
Dial
Reverse
LED
(Low)
(High)
(If light kit is
installed)
+
_
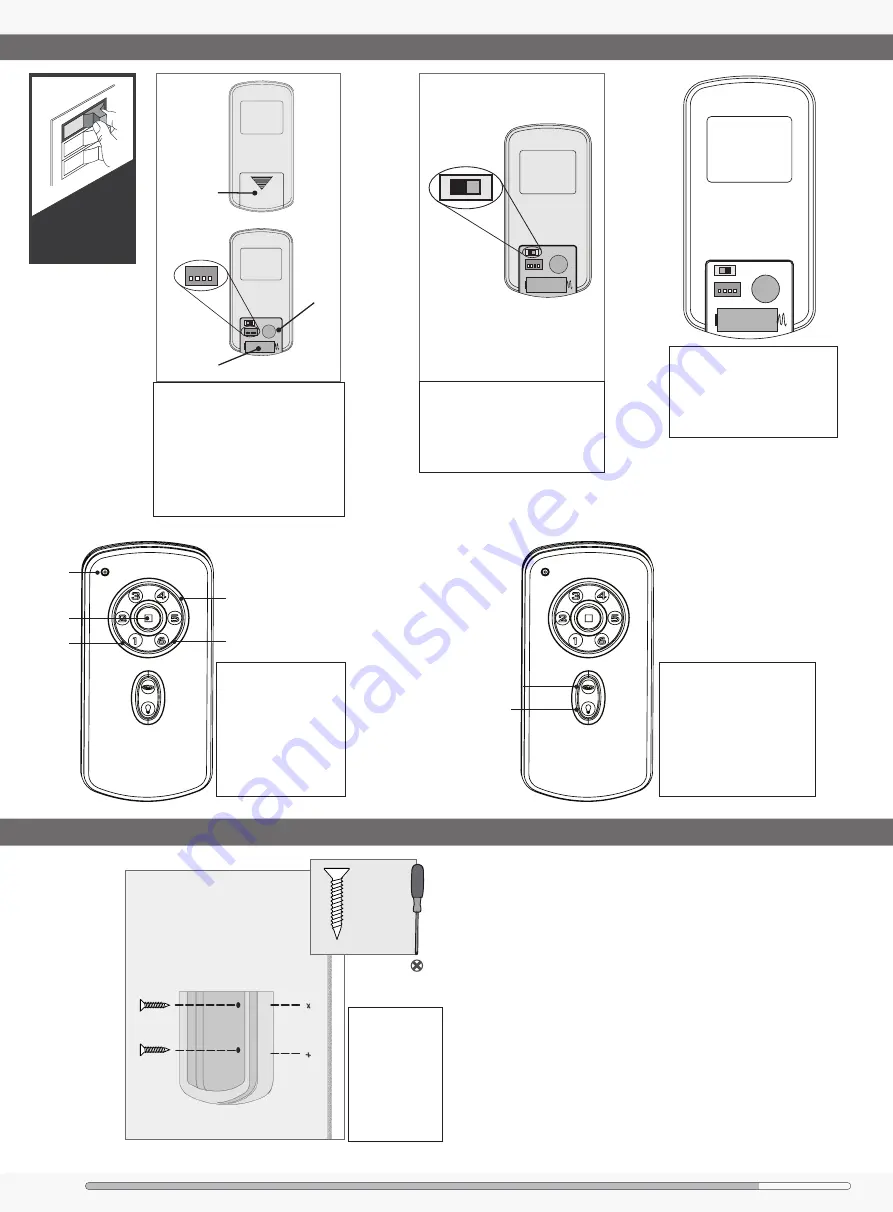
Remove battery door. Change the
dip switch settings if they match a
previously installed remote transmitter.
Install A23 or MN21 alkaline battery
in the proper polarity and replace the
battery door. To pair the remote, hold
down the Set button for 5 seconds.
Pairing is complete when LED button
flashes twice.
To select fan speed press
one of the numbers on
the Fan Speed Dial. To
calibrate the fan speed,
run the fan on “6” for 90
seconds after each AC
power reset. The LED light
flashes to indicate a signal
has been sent to the fan.
To install the
transmitter cradle,
hand-tighten the
provided screws to
mount the cradle
to the wall.
To reverse the air flow direction,
press the Reverse button while
fan is running. Press Light button
to turn lights off/on. To dim the
lights, press the light button for
more than one second. Light will
cycle from brightest to dimmest.
Release the light button when
desired brightness is achieved.
If a light kit is installed on your fan,
choose the light bulb mode by moving
the toggle switch. Move the switch
towards the “D” for CFL bulbs and
toward “ON” for standard bulbs.
Replace the battery door.
To change the battery, remove the
battery door. Remove battery and
replace with A23 or MN21 alkaline
battery. Please observe proper
polarity placement.
2 of 2
Cradle Screw


