INSTALLATION
14
Fascia Blockout — Inside Mount
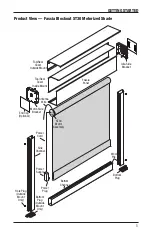
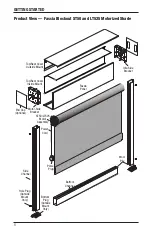
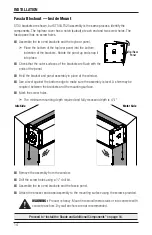
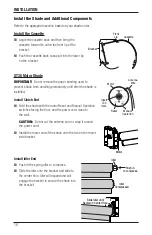
ST30 brackets are shown, but ST50/LT525 assembly is the same process. Identify the
components. The top/rear cover has a notch (cutout) at each end and two screw holes. The
fascia panel has no screw holes.
■
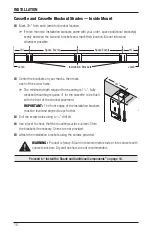
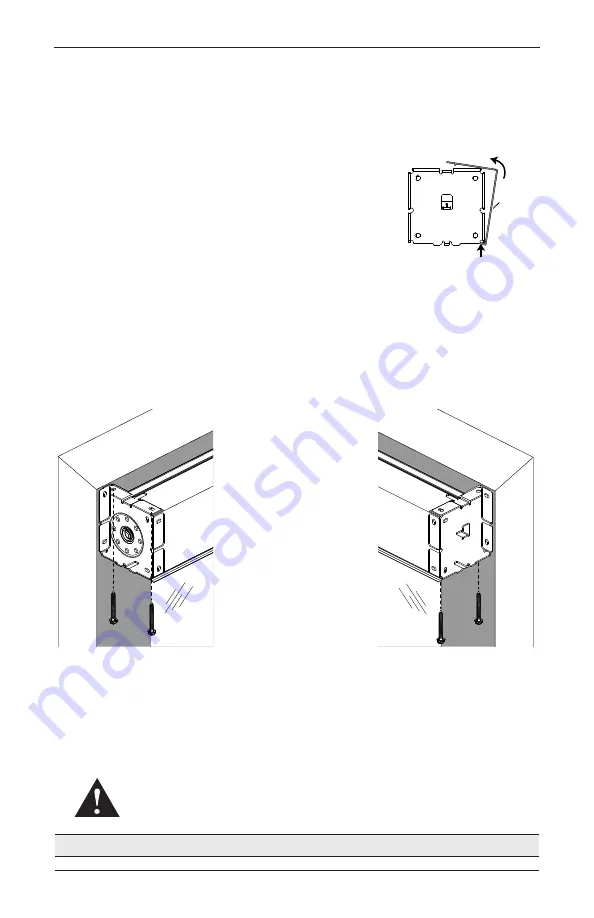
Assemble the two end brackets and the top/rear panel.
➤
Place the bottom of the top/rear panel into the bottom
indention of the brackets. Rotate the panel up and snap it
into place.
■
Check that the outer surfaces of the brackets are flush with the
ends of the panel.
■
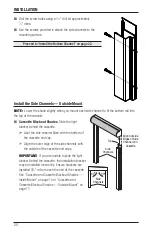
Hold the bracket and panel assembly in place at the window.
■
Use a level against the bottom edge to make sure the assembly is level. A shim may be
required between the brackets and the mounting surface.
■
Mark the screw holes.
➤
The minimum mounting depth required and fully recessed depth is 4
1
/
8
".
■
Remove the assembly from the window.
■
Drill the screw holes using a
1
∕
8
" drill bit.
■
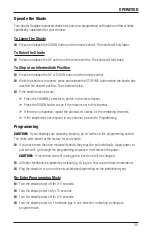
Assemble the two end brackets and the fascia panel.
■
Attach the bracket and panel assembly to the mounting surface using the screws provided.
WARNING:
Product is heavy. Mount into wood/metal studs or into concrete with
concrete anchors. Drywall anchors are not recommended.
Proceed to “Install the Shade and Additional Components” on page 16.
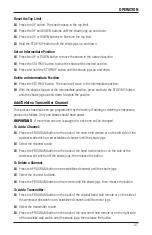
Top/Rear
Panel
Idle Side
Motor Side

