INSTALLATION
4
■
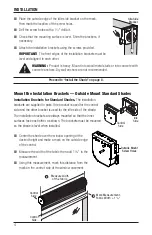
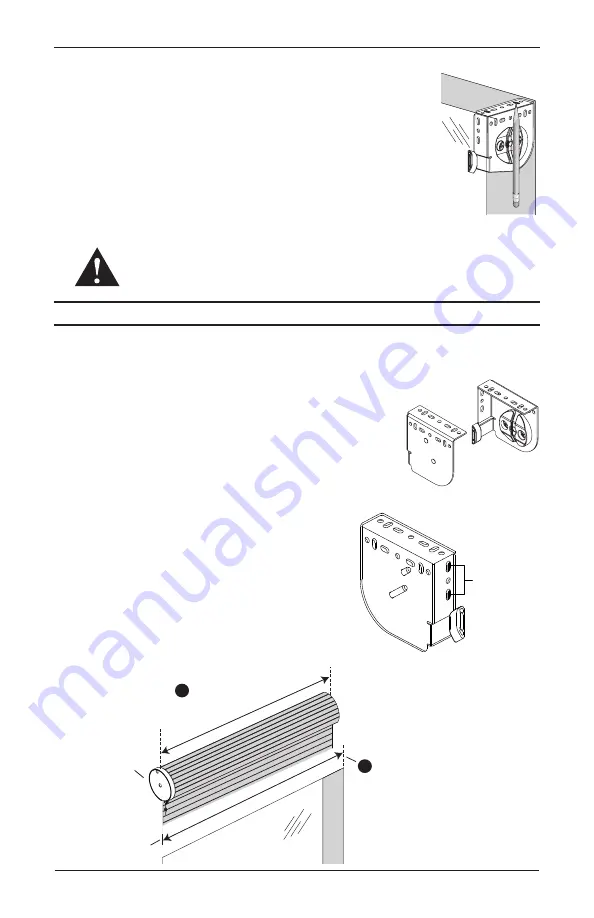
Place the outside edge of the idle-side bracket on the mark,
then mark the location of the screw holes.
■
Drill the screw holes with a
3
∕
32
" drill bit.
■
Check that the mounting surface is level. Shim the brackets, if
necessary.
■
Attach the installation brackets using the screws provided.
IMPORTANT:
The front edges of the installation brackets must be
level and aligned to each other.
WARNING:
Product is heavy. Mount into wood/metal studs or into concrete with
concrete anchors. Drywall anchors are not recommended.
Proceed to “Install the Shade” on page 8.
Mount the Installation Brackets — Outside Mount Standard Shades
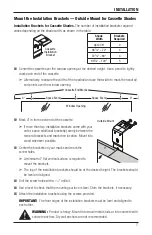
Installation Brackets for Standard Shades.
The installation
brackets are supplied in pairs. One bracket is used for the control
side and the other bracket is used for the idle side of the shade.
The installation brackets are always mounted so that the inner
surfaces face each other, as shown. The brackets must be mounted
so the shade is level when installed.
■
Center the shade over the window opening at the
desired height and make a mark on the outside edge
of the control.
■
Measure the width of the fabric then add 1
3
∕
16
" to the
measurement.
■
Using this measurement, mark this distance from the
mark on the control-side of the window casement.
Idle-Side
Bracket
Outside Mount
Screw Holes
Control
Side
Idle
Side
Measure width
of the fabric.
Mark Measurement:
Fabric Width + 1
3
/
16
"
Control
Side
Control
Side
1
2
1
Summary of Contents for Alustra Woven Textures
Page 19: ......

