INSTALLATION
21
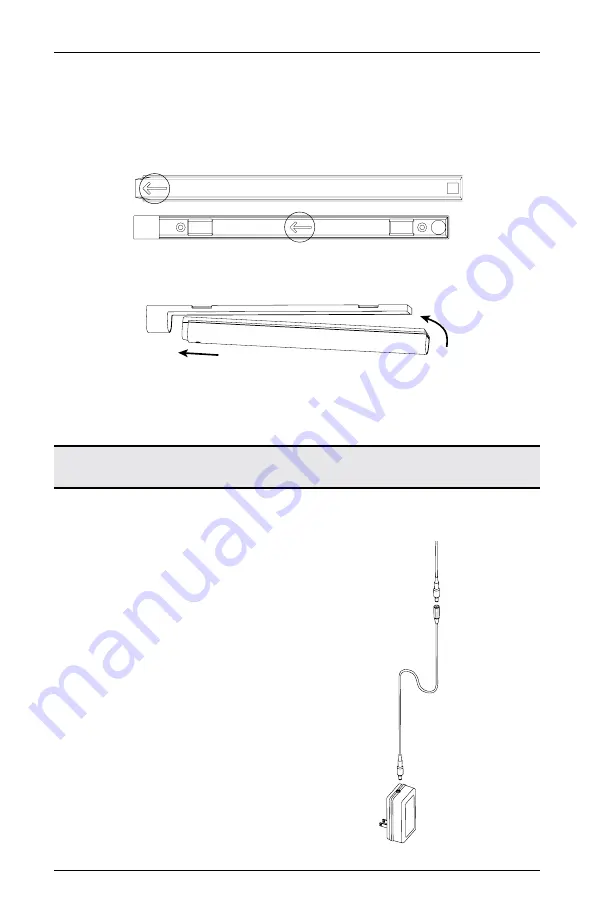
Insert the Battery Wand into the Battery Mount
NOTE:
The rechargeable battery wand ships fully charged, so it is ready to install out of
the package.
■
Match the direction of the arrow on the underside of the battery wand with the arrow on
the battery mount.
■
Insert the nose of the battery wand into the cavity of the mount (the side plugged into the
shade). Push the battery wand flush into the mount until the battery snaps into place.
CAUTION:
Failing to insert wand properly may cause it to fall out of the mount, posing
an injury risk and potentially damaging the wand. Additionally, when mounting on a door,
closing the door with excess force may cause battery wand to dislodge from the mount,
also posing an injury risk and possibly damaging the wand.
Proceed to
"Operating the PowerView® App and Gen 3 Remote" on page 22.
18V DC Power Supply
NOTE:
When power is connected to the motor,
a blue LED inside the control button housing
will flash to indicate the shade is ready for
operation.
■
Plug the power cable from the shade motor
into the extension cable.
■
Plug the other end of the extension cable
into the 18V DC power supply.
■
Plug the 18V DC power supply into a power
source.
Power cable
from shade motor
Extension
cable
18V DC
Power
Supply
Summary of Contents for Applause
Page 33: ...CHILD SAFETY 31 ...


