CARE
14
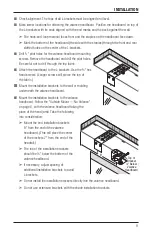
Shade Removal (If Necessary)
Raise the shade completely before removing it.
■
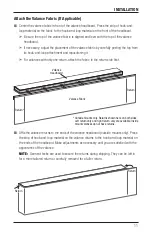
Remove the valance fabric. If the shade has an optional valance,
carefully peel the hook-and-loop material at the top of the valance
fabric from the valance headboard.
■
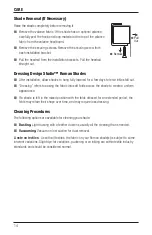
Remove the securing screws. Remove the securing screw from
each installation bracket.
■
Pull the headrail from the installation brackets. Pull the headrail
straight out.
Dressing Design Studio™ Roman Shades
■
After installation, allow shades to hang fully lowered for a few days to let wrinkles fall out.
■
“Dressing” refers to easing the fabric into soft folds across the shade to create a uniform
appearance.
■
If a shade is left in the raised position with the folds dressed for an extended period, the
folds may retain their shape over time, and may require less dressing.
Cleaning Procedures
The following options are available for cleaning your shade:
■
Dusting.
Light dusting with a feather duster is usually all the cleaning that is needed.
■
Vacuuming.
Vacuum on low suction for dust removal.
A note on textiles:
As with all textiles, the fabric on your Roman shade(s) is subject to some
inherent variations. Slight dye-lot variations, puckering or wrinkling are within textile industry
standards and should be considered normal.
Headrail
Headrail
Loosen Set Screw
Pull Headrail from Brackets
Remove
Pull
Out

