GETTING STARTED
2
Thank you for purchasing Hunter Douglas Design Studio
™
Roman shades. With proper
installation, operation and care, your new shades will provide years of beauty and performance.
Please thoroughly review this instruction booklet before beginning the installation.
Installation Components Provided
Check the packaging to be sure you have all the components needed to install your shades.
Keep the packaging until the shades perform to your satisfaction.
■
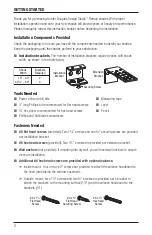
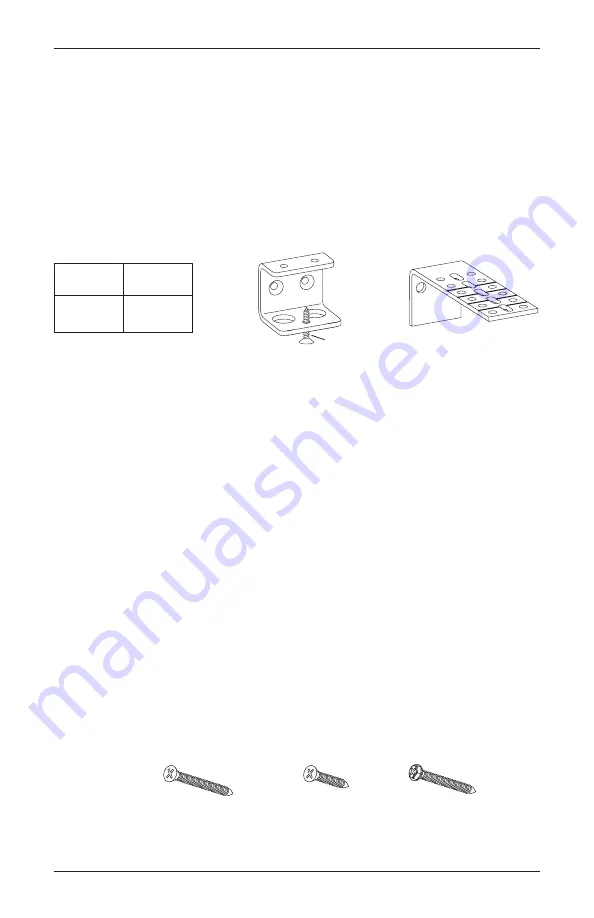
Installation brackets.
The number of installation brackets required varies with shade
width, as shown in the table below.
Tools Needed
■
Power drill and drill bits
■
Measuring tape
■
3" long Phillips bit recommended for flat head screws
■
Level
■
¼" hex driver recommended for hex head screws
■
Pencil
■
Phillips and flat blade screwdrivers
Fasteners Needed
■
#6 flat head screws
(provided)
.
Two 1
5
/
8
" screws and one ¾" securing screw are provided
per installation bracket.
■
#6 hex head screws
(provided)
.
Two 1½" screws are provided per extension bracket.
■
Wall anchors
(not provided)
.
If mounting into drywall, you will need wall anchors to ensure
a secure installation.
■
Additional #6 hex head screws are provided with optional valance.
➤
Inside mount: four or more 2" screws are provided to attach the valance headboard to
the head jamb inside the window casement.
➤
Outside mount: two 1½" screws and two ¾" screws are provided per L-bracket to
attach the brackets to the mounting surface (1½") and the valance headboard to the
brackets (¾").
Shade
Width
15" – 30"
30
1
/
8
" – 60"
Brackets
Required
2
3
Installation
Bracket
Securing Screw
Extension
Bracket
#6 x 1½"
Hex Head
Screw
#6 x ¾"
Flat Head
Securing Screw
#6 x 1
5
/
8
"
Flat Head
Screw

