background image

Installation 

 Operation 

 Care

Silhouette

®

 and Nantucket


Window Shadings

PowerView

 Motorization

Summary of Contents for Nantucket

Page 1: ...Installation Operation Care Silhouette and Nantucket Window Shadings PowerView Motorization ...

Page 2: ...ach Magnetic Hold Down Brackets Optional 16 Operation Testing the Shading 17 Using the PowerView Remote 17 Resetting the Shading If Necessary 19 Troubleshooting 20 Care Removing the Shading 25 Cleaning Procedures 25 Declarations 27 Warranty Back Cover Questions Call the Hunter Douglas Customer Information Center at 1 888 501 8364 2016 Hunter Douglas All rights reserved All trademarks used herein a...

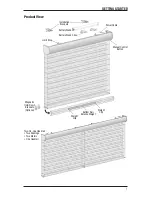
Page 3: ...ry Wand Battery Wand Clips Manual Control Button Installation Brackets Limit Stop Two On One Headrail Two Shadings Two Motors One Headrail Magnetic Hold Down Brackets Optional Weight Clip Weight Clip Bottom Rail Balance Weight Power Cable ...

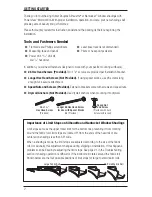
Page 4: ...ension brackets come with screws and speed nuts Drywall Anchors Not Provided Use drywall anchors when mounting into drywall Speed Nut and Screw Provided with Each Extension Bracket 6 x 11 2 Hex Head Screw Provided Longer 6 Hex Head Screw for Use with Spacer Blocks Not Provided Importance of Limit Stops on Silhouette and Nantucket Window Shadings Limit stops serve as the upper travel limit for the ...

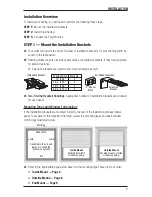
Page 5: ...tallation brackets are provided for each panel Mounting Types and Window Terminology If the installation brackets are mounted correctly the rest of the installation process follows easily To prepare for this important first step review the mounting types and basic window terminology illustrated below Refer to the appropriate page below based on the mounting type chosen for your order Inside Mount ...

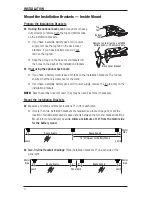
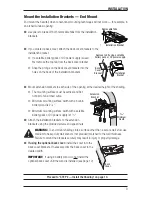
Page 6: ...lite battery pack or DC power supply remove the top tab only on the installation brackets NOTE Save these tabs once removed They may be used as shims if necessary Mount the Installation Brackets Measure and mark end bracket locations 2 in from each jamb If more than two installation brackets are required see table on page 3 mark the location of additional bracket s spaced evenly between the two en...

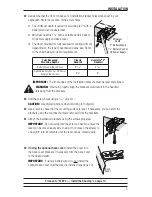
Page 7: ...o drywall Use a level to check that the mounting surface is level If necessary you can shim the brackets using the top tabs that were removed from the brackets Attach the installation brackets using the screws provided IMPORTANT Do not overtighten the screws Check to ensure the lever can be moved easily side to side If not loosen the screws in one eighth turn increments until the lever can be move...

Page 8: ...over the window opening Mark 2 in from each of the headrail end marks If more than two installation brackets are required see table on page 3 mark the location of additional bracket s spaced evenly between the two end bracket locations Mount into wood whenever possible Allow a minimum of 18 from the motor side for the battery wand Two On One Headrail Shadings Place installation brackets 3 on each ...

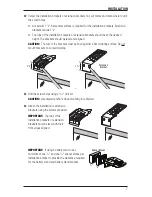
Page 9: ...be flush against a flat mounting surface Do not mount brackets on curved molding Drill the screw holes using a 3 32 drill bit CAUTION Use drywall anchors when mounting into drywall Attach the installation or extension brackets using the screws provided IMPORTANT The tops of the installation brackets or extension brackets must be level with their front edges aligned IMPORTANT If using a battery wan...

Page 10: ...t add more than 11 2 of clearance using spacer blocks IMPORTANT The tops of the installation brackets must be level with the front edges aligned If using extension brackets attach an installation bracket to the underside of each extension bracket using the speed nuts and screws provided Proceed to STEP 2 Install the Shading on page 10 11 2 Maximum Spacer Blocks Longer Screw Speed Nuts Screws ...

Page 11: ...battery wand is 21 8 Minimum mounting surface width with a satellite battery pack or DC power supply is 11 2 Attach the installation brackets to the extension brackets using the provided screws and speed nuts WARNING To end mount shadings into a surface other than a secure wall stud use medium to heavy duty wall anchors not provided matched to the wall thickness Failure to mount the brackets secur...

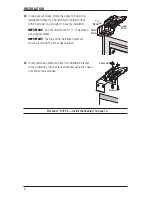
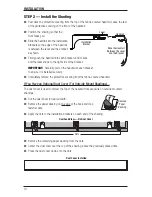
Page 12: ... the protective covering from the fabric covered headrail If You Have an Optional Dust Cover For Outside Mount Shadings The dust cover is used to protect the top of the headrail from exposure on outside mounted shadings Cut the dust cover to desired width Remove the paper backing on one side of the hook and loop fastener dots Apply the dots to the installation brackets on each end of the shading R...

Page 13: ...ttery wand Install the batteries according to the instructions on the battery wand label Hunter Douglas recommends AA alkaline batteries for use with our battery powered shadings These will provide more than one year of operation depending on usage Lithium and rechargeable batteries are not recommended Replace the cap Align the tab with the end of the wand Press the cap on until it latches Mount t...

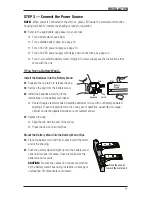
Page 14: ...on page 16 or Testing the Shading on page 17 If You Have a Satellite Battery Pack Install the Batteries into the Battery Wand See the instructions on the previous page Mount the Satellite Battery Pack Decide where you want to mount the satellite battery pack A satellite battery pack may be mounted in any orientation Mark the screw holes for the wall mount bracket Drill the screw holes using a 3 32...

Page 15: ...g into the extension cable Plug the other end of the extension cable into the socket in the battery wand Two On One Headrail Shadings Plug in both power cables into the extension cables and then plug both extension cables into the sockets in the battery wands Proceed to Attach Magnetic Hold Down Brackets Optional on page 16 or Testing the Shading on page 17 Socket Battery Wand Cover Extension Cabl...

Page 16: ...oes not impede the operation of the shading Space the wire retainers approximately 15 apart along the power supply cable as shown WARNING Keep cords and small parts out of the reach of children They can wrap cords around their necks and STRANGLE They can also put small parts in their mouths and CHOKE WARNING Electric shock and or a fire hazard may occur if not properly installed Proceed to Attach ...

Page 17: ... cable into the connector and plug the cable into the DC power supply Two extension cables and two connectors are used for three shadings Plug the DC power supply into a standard outlet Two On One Headrail Shadings Route the power cables from each side of the shading to the connector Use extension cables if necessary Plug the extension cables or power cables into the connector and plug the cable i...

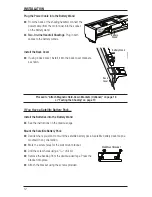
Page 18: ... Mark the screw locations using one of the mounting options shown below The screw should be placed in the middle of the channel This will allow for adjustment Drill the screw holes using a 3 32 drill bit Attach the hold down brackets to the mounting surface using the screws provided If necessary adjust the bracket height by loosening the screw and sliding the bracket up or down Hold Down Bracket B...

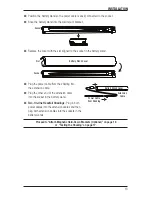
Page 19: ...starts to rub against either window jamb immediately press the manual control button to stop the shading See Adjust the Bottom Rail Weight on page 23 Two On One Headrail Shadings have two motors and two battery packs The right motor operates the right shading and the left motor operates the left shading Use the manual control buttons on each side to test the two shadings individually Using the Pow...

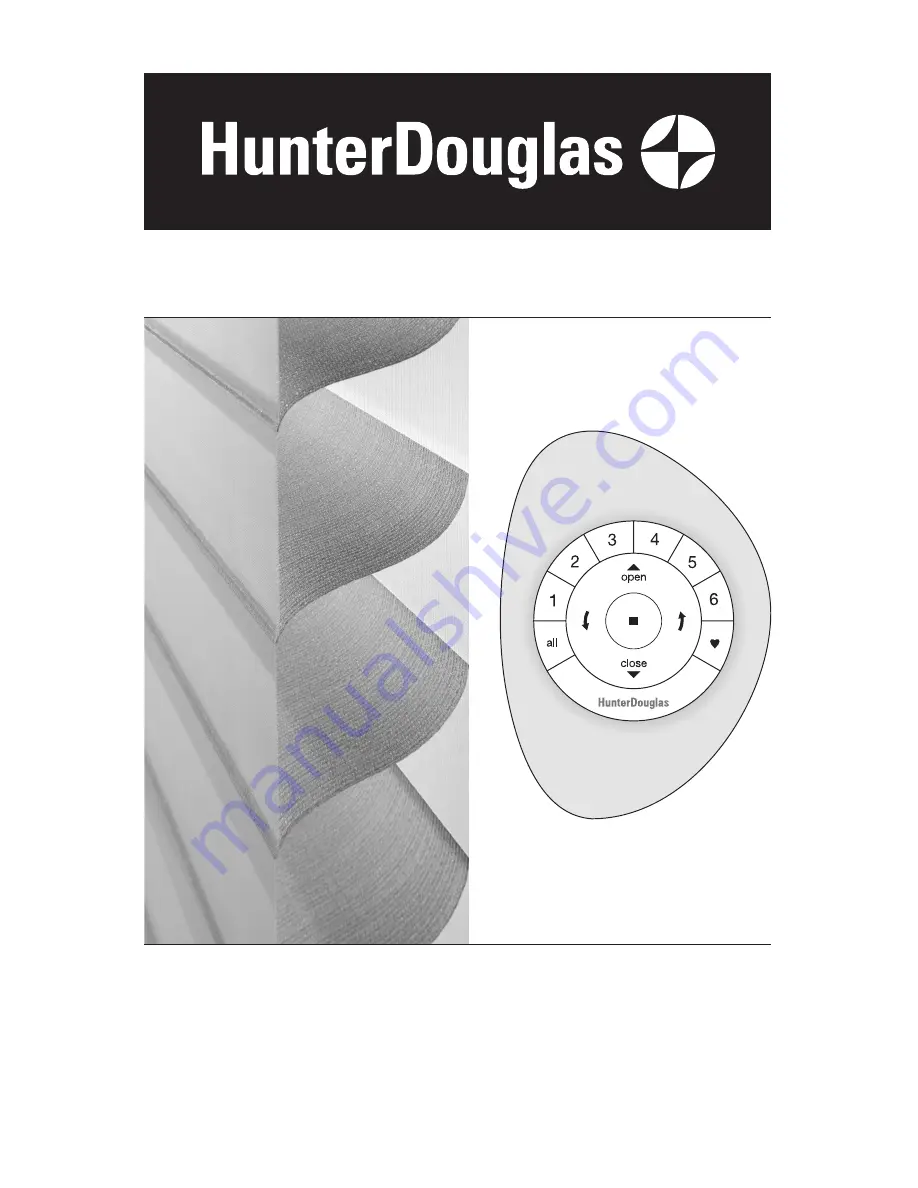
Page 20: ... Press all or groups 1 6 to select specific shading s to move Selected group button s will light to show they are selected a Multiple group buttons may be selected at a time b To deselect a group press the group button again The backlight for that group button will go out 3 Press CLOSE to lower the selected shading s 4 Press the right arrow to open the vanes 5 Press the left arrow to close the van...

Page 21: ...o reset the shading s travel limits 1 Press and hold the manual control button for 6 seconds The shading will move slightly 2 Release the manual control button The shading will raise to its fully open position to set the upper travel limit then lower to the fully closed position with vanes open to set the lower travel limit The shading will move slightly one more time to indicate that the travel l...

Page 22: ...e Shading on page 10 Problem The shading does not operate using the manual control button Solution Unplug the power cable from the motor then plug it back in A green LED inside the manual control button housing should flash to indicate the motor has power Check that the batteries in the battery wand satellite battery pack or C size satellite battery wand are correctly inserted and fresh Check that...

Page 23: ...ly touching the fabric roll In the second illustration the limit stop adjustment is too tight The fabric may not drop freely and could even be damaged when the shading is raised To correct this the limit stop should be adjusted one step up Simply pull back on the rear of the limit stop to adjust its position In the bottom illustration the adjustment is too loose The bottom rail can slip under the ...

Page 24: ...ming troubleshooting solutions Problem Adjacent shadings do not roll up evenly Solution It is considered normal if the roll up on both shadings is within 5 16 of each other If one shading rolls up tighter than another lower and raise both shadings several times Reset the shading See Resetting the Shading on page 19 Check that the shading fabric is not catching on any brackets or components Check t...

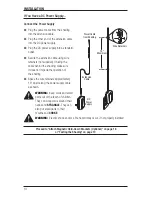
Page 25: ...e level Shim to level if necessary Adjust the Bottom Rail Weight Release the weight clips by inserting a flat blade screwdriver into the weight clip and turning clockwise Move the weight in 1 increments toward the side where the fabric is gathering Secure the weight clips in position by turning them counterclockwise after making the adjustment Test and if necessary adjust again Weight Bottom Rail ...

Page 26: ... sill when the vanes are closed Solution A small gap between the sill and the bottom of the shading is normal in the fully lowered vane closed position The gap is necessary to allow for the unimpeded movement of the bottom rail If this distance is excessive or moves over time open the shading to its full vane open position and try again If this does not correct the problem reset the bottom limit S...

Page 27: ...the headrail to completely remove the shading from the brackets Cleaning Procedures Silhouette and Nantucket window shadings are made of 100 polyester which means they are inherently durable and resilient However care must be taken to avoid wrinkling the fabric particularly where the vanes meet the facings The Palette Fabric Covered Headrail Spot clean the headrail using a sponge or delicate cloth...

Page 28: ...isty Harbor and Traditions Light Dimming Never immerse the headrail in the solution Electrostatic Cleaning Do not use electrostatic cleaning wipes on any Silhouette or Nantucket window shadings A Note About Hardware for The Alustra Collection Gold Radiance Silver Reflection Bronze Shimmer and Champagne Shine hardware finishes can be spot cleaned with luke warm water and a gentle soap Do not use al...

Page 29: ...ifferent from that to which the receiver is connected Consult the dealer or an experienced radio TV technician for help Any changes or modifications not expressly approved by the party responsible for compliance could void the user s authority to operate the equipment Industry Canada Under Industry Canada regulations this radio transmitter may only operate using an antenna of a type and maximum or...

Page 30: ...Notes ...

Page 31: ......

Page 32: ...Y Hunter Douglas window fashion products are covered for defects in materials workmanship or failure to operate for as long as the original retail purchaser owns the product unless shorter periods are provided below All internal mechanisms Components and brackets Fabric delamination Operational cords for a full 7 years from the date of purchase Repairs and or replacements will be made with like or...

Reviews: