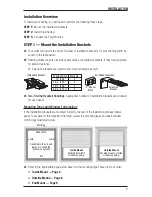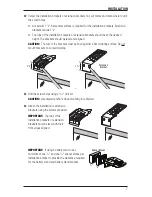
INSTALLATION
4
Mount the Installation Brackets — Inside Mount
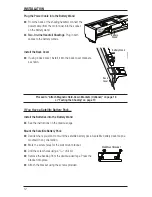
Prepare the Installation Brackets
■
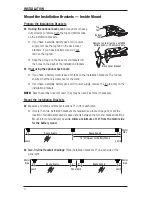
If using the optional back cover:
Use pliers or heavy-
duty scissors to remove both the top and bottom tabs
on the installation brackets.
➤
If you have a satellite battery pack or DC power
supply, remove the top tab on the back cover
brackets. If you have a battery wand, do not
remove the top tab.
➤
Snap the prongs on the back cover brackets into
the holes on the back of the installation brackets.
■
If not using the optional back cover:
➤
If you have a battery wand, leave both tabs on the installation brackets. The top tab
ensures that there is clearance for the wand.
➤
If you have a satellite battery pack or DC power supply, remove the top tab only on the
installation brackets.
NOTE:
Save these tabs once removed. They may be used as shims, if necessary.
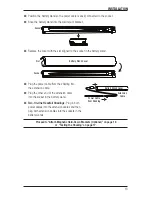
Mount the Installation Brackets
■
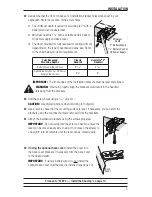
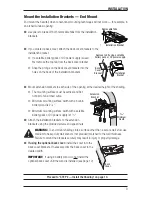
Measure and mark end bracket locations 2" in from each jamb.
➤
If more than two installation brackets are required (see table on page 3), mark the
location of additional bracket(s) spaced evenly between the two end bracket locations.
Mount into wood whenever possible.
Allow a minimum of 18" from the motor side
for the battery wand.
■
Two-On-One Headrail shadings:
Place installation brackets 3" on each side of the
panel split.
Top
Tab
Bottom
Tab
Remove top tab if using a satellite
battery pack or DC power supply.
Back Cover Bracket
Motor
Side
Panel Split
2"
Motor
Side
2"
3"
3"
Space Evenly
Jamb
Jamb
Space Evenly
2"
Motor
Side
2"
Space Evenly
Jamb
Jamb
Space Evenly
18" Minimum for Battery Wand

