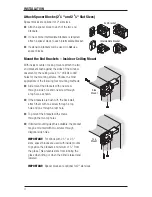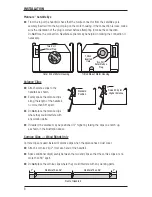
INSTALLATION
5
Intermediate Brackets (If Required)
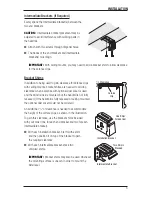
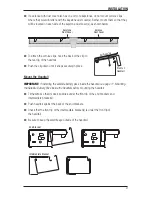
Evenly space the intermediate bracket(s) between the
two end brackets.
CautIon:
Intermediate bracket placement may be
adjusted to avoid interference with working parts in
the headrail.
Attach with two screws through diagonal holes.
■
The backs of the end brackets and intermediate
■
bracket(s) must align.
Important:
With ceiling mounts, you may need to add a bracket shim to allow clearance
for the valance clips.
Bracket Shims
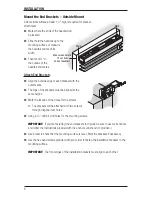
In addition to being used to gain clearance for valance clips
with ceiling mounts, bracket shims are needed to add top
clearance when a valance with optional dust cover is used
and the blind is inside mounted, but the headrail is not fully
recessed. (If the headrail is fully recessed or ceiling mounted,
the optional dust cover would not be ordered.)
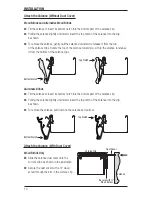
An additional
3
/
8
" of clearance is needed to accommodate
the height of the cornice clips, as shown in the illustration.
To gain this clearance, use the bracket shims included
with your order (one for each end bracket and two for each
intermediate bracket).
With each installation bracket, first fold the shim
■
and then position it on top of the bracket to gain
the required clearance.
With each intermediate bracket, stack two
■
unfolded shims.
Important:
Bracket shims may also be used whenever
the mounting surface is uneven in order to mount the
blind level.
3
⁄
8
" Clearance
Cornice
Clip
One Shim
Folded Over
Two Shims
Stacked
Installation Bracket
Intermediate Bracket

