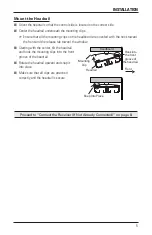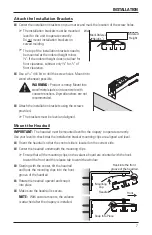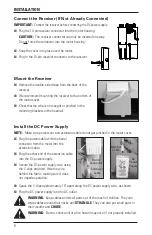
INSTALLATION
6
Outside Mount
The number of installation brackets required varies based on
the headrail width, as shown in the table on Page 2.
IMPORTANT:
The top of the installation brackets must be
mounted at the ordered height minus
7
⁄
8
". If the ordered height
does not allow for floor clearance, subtract only
3
⁄
8
" for
1
⁄
2
" of
floor clearance.
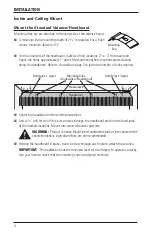
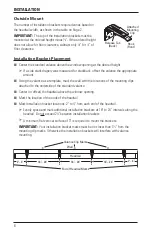
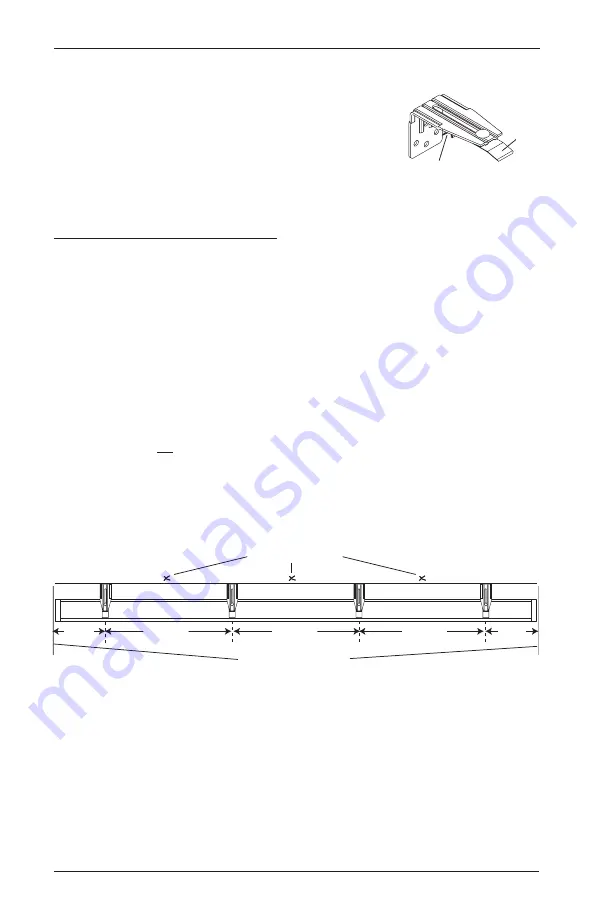
Installation Bracket Placement
■
Center the standard valance above the window opening at the desired height.
➤
If a side stack drapery was measured for stackback, offset the valance the appropriate
amount.
■
Using the valance as a template, mark the wall with the locations of the mounting clips
attached to the underside of the standard valance.
■
Center (or offset) the headrail above the window opening.
■
Mark the location of the ends of the headrail.
■
Mark installation bracket locations 2" to 4" from each end of the headrail.
➤
Evenly space and mark additional installation brackets at 18" to 24" intervals along the
headrail. Do not exceed 24" between installation brackets.
➤
A minimum flat vertical surface of 3" is required to mount the brackets.
IMPORTANT:
Your installation bracket marks must be no closer than 1
1
⁄
2
" from the
mounting clip marks. Otherwise the installation brackets will interfere with valance
mounting.
Attached
Mounting
Clip
Hook
(Front)
Release Tab
(Back)
2"− 4"
18"– 24"
18"– 24"
18"– 24"
Wall
Headrail
End of Headrail Marks
Valance Clip Marks
2"– 4"

