background image

OPERATION

39

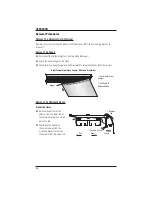
Adjust/Shorten Fabric Panel Length

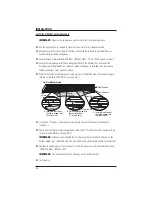
CAUTION:  

Shades made with the fabrics Point South, Del Sol, and Diamond Head may not be 

able to reuse the plastic adhesive strip mentioned in this process. Contact your Hunter Douglas 
dealer for a replacement strip if the strip will not stick in the new location.

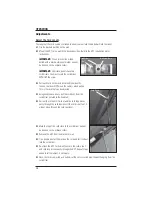
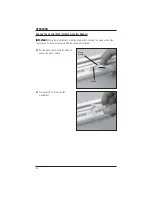
Measure and record the amount you want to shorten on a panel. Refer to this information for 


any remaining panels you want to shorten.

If the bottom weights were connected together, disconnect them now.


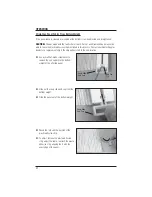
Carefully remove the panel by releasing the fabric hanger from the carriers (see 


Remove The 

Panels

 on page 46). 

Place the panel on a clean, fl at working surface. If it is not possible to spread the panel out 


fl at, then carefully roll the panel up around the hanger (or preferably the shipping core), so 
that the bottom weight is accessible. 

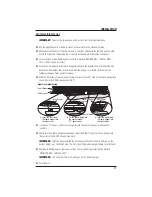
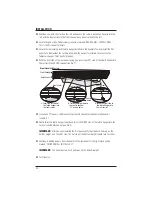
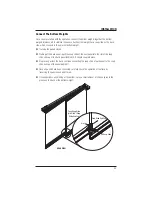
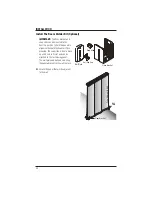
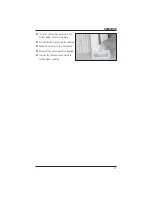
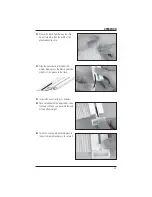
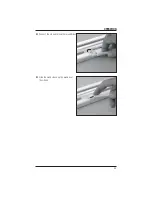
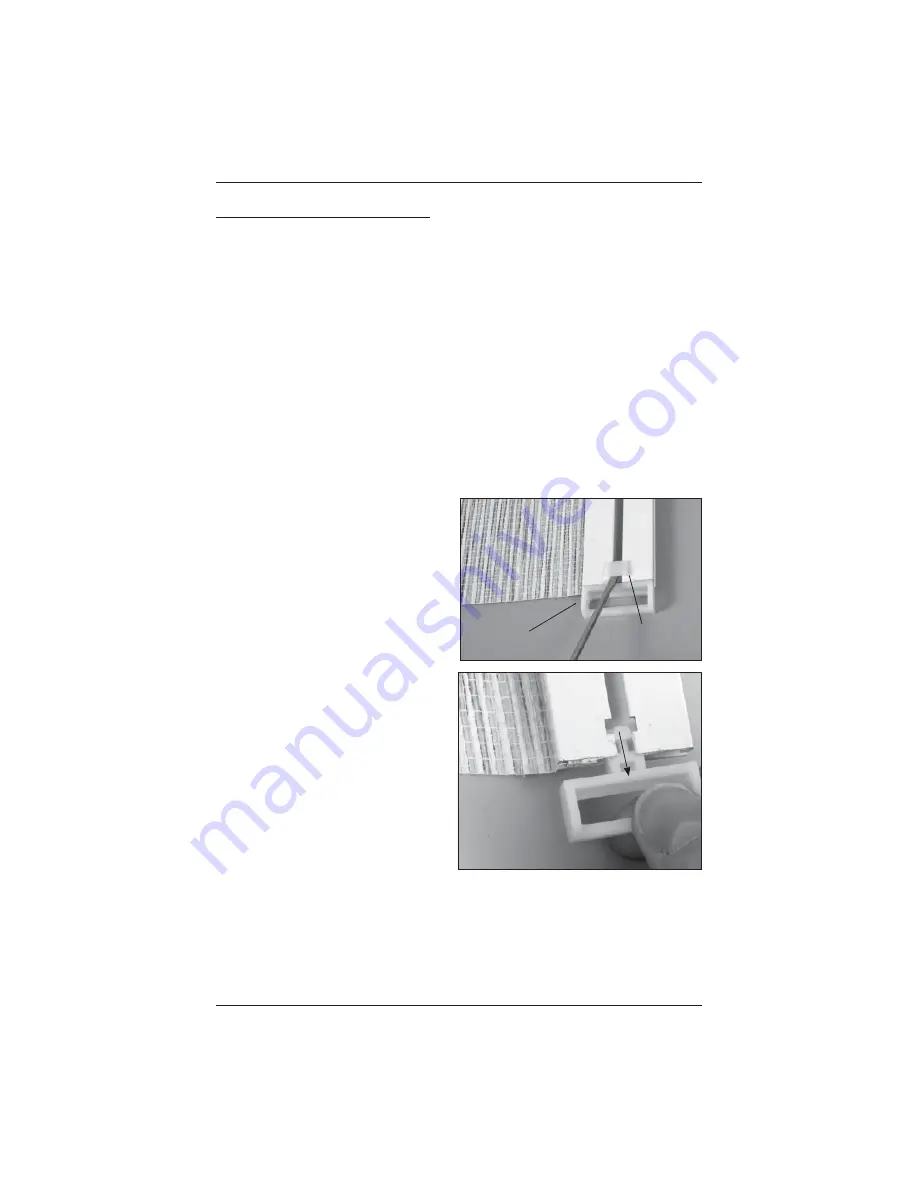
Use a small fl at-blade screwdriver 


to remove the end cap pin in the 
bottom weight.

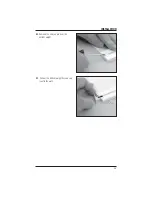
Slide out the snap slide end cap from the 


bottom weight.

Slide the panel out of the bottom weight.


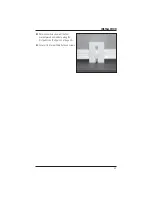
IMPORTANT:  

Note the folded fl ap at the 

bottom of the panel and how it is folded. 

Snap Slide End Cap

End Cap Pin

Summary of Contents for Skyline Gliding Window Panels

Page 1: ...Installation Operation Care Skyline Gliding Window Panels...

Page 2: ...e Gliding Window Panels 5 Product View Valance Options 6 Installation Inside and Ceiling Mount Applications 7 Outside Mount Applications 15 Box Valance Installation 16 Mount The Headrail 19 Secure The...

Page 3: ...up fabric panels and set aside Locate the panels marked FRONT INSTALL LAST and REAR INSTALL FIRST Do not unroll the panels until installation Carefully remove the headrail and optional valance from th...

Page 4: ...the table above Splice Clip A splice clip allows a long headrail to be split in half during shipping and reconnected during installation Once installed a spliced headrail functions seamlessly as if it...

Page 5: ...kets Outside Mount The number of valance brackets will be the same as the number of installation brackets shown in the table on page 2 Box Valance Brackets A box valance wraps around the entire headra...

Page 6: ...addition you will need fasteners designed to work with your speci c mounting surface s 6 Hex Head Screws Provided Two 11 2 screws are provided per outside mount installation bracket or one per mounti...

Page 7: ...ew Skyline Gliding Window Panels Fabric Panels Bottom Weights Installation Bracket Mounting Clip Operating Cord Headrail Universal Cord Tensioner UCT And Mounting Bracket Single Or Dual Wand Control O...

Page 8: ...Valance Bracket Box Valance Rear Box Valance Front Valance Bracket OB Skyline Standard Box Valance Optional Skyline Fabric Box Valance Optional Skyline Standard Valance Optional Skyline Fabric Valanc...

Page 9: ...e brackets if necessary Shims not provided Ensure the mounting clip is positioned so the release tab is toward to the window Begin by securing the center mounting clip and work outward Use the hex hea...

Page 10: ...o the valance spacing them 2 to 4 from each end with 18 to 24 between intermediate valance brackets Center the valance inside the window opening Mark the drilling locations using the valance clip hole...

Page 11: ...ing locations using the valance clip holes as guides Set the valance aside then drill the pilot holes at the mounting clip locations previously marked Holding the valance in place over the drilled hol...

Page 12: ...These are marked on the inside corners for the left and right sides Do not fully seat the corners Hook the top edge of the fabric valance over the top of the plastic dust cover and then gently pull t...

Page 13: ...r upside down on a working surface Place the mounting clips on the dust cover The release tabs must be facing away from the valance The end mounting clips must be 2 to 4 from the end of the dust cover...

Page 14: ...the valance aside then use a 3 32 drill bit to drill the mounting screw holes IMPORTANT If you are fastening the installation brackets to drywall be sure to use wall anchors and follow the instruction...

Page 15: ...ottom edge of the dust cover Lay the dust cover upside down on a working surface Place the mounting clips on the dust cover The release tabs must be facing away from the valance The end mounting clips...

Page 16: ...holes in the dust cover Hold the dust cover in place on the mounting surface and mark through the holes Set the valance aside then use a 3 32 drill bit to drill the mounting screw holes Insert a scre...

Page 17: ...n brackets need to be mounted to the outside mount ordered height plus an additional for the desired oor clearance Mark 2 to 4 in for the installation bracket locations Drill holes at the marked locat...

Page 18: ...he back and at the top Go to the Mount The Headrail section on page 19 Box Valance Installation Skyline Standard Box Valance Installation Assemble the valance using all four corners both return pieces...

Page 19: ...anchors now Hold the valance back in place and replace the center mounting clip and screw Install the rest of the mounting clips and screws Skyline Fabric Box Valance Installation Slide one corner ont...

Page 20: ...apping 3 16 screws to hold the dust covers together during installation Set the mounting clips in place They are 2 to 4 from each end and 18 to 24 between intermediate mounting clips as shown in the g...

Page 21: ...must face in the same direction Install the rest of the mounting clips and screws Mount The Headrail One Piece Headrail Mounting Instructions IMPORTANT The headrail must be mounted level for the pane...

Page 22: ...tate the headrail upward to snap into place Secure The Universal Cord Tensioner UCT It is imperative that the UCT be properly secured to the wall or window frame to reduce children s access to the cor...

Page 23: ...of the center piece and two return pieces plus two plastic corner clips CAUTION DO NOT put valance returns on the valance before installing the valance Hold the valance up to the headrail Hook the upp...

Page 24: ...the valance dust cover These are marked on the inside corners for the left and right sides Do not fully seat the corners in this step Hook the top edge of the fabric valance over the top of the plasti...

Page 25: ...ce brackets provided and place them next to the mounting brackets as shown in the gure Ensure that the release tabs on the mount clips attached to the fabric valance mounting brackets are facing the w...

Page 26: ...of panel installation differs depending on the con guration selected Refer to the label on the top of the headrail see gure below or your original order to determine which con guration you ordered In...

Page 27: ...carrier in the REAR channel see No 1 If you have 17 panels slide the center guide into the center channel in the headrail see No 2 Gently twist the fabric hanger inward and insert the RIGHT side of th...

Page 28: ...arrier in the FRONT channel see No 1 If you have 17 panels slide the center guide into the center channel in the headrail see No 2 Gently twist the fabric hanger inward and insert the RIGHT side of th...

Page 29: ...rier in the REAR channel see No 1 If you have 17 panels slide the center guide into the center channel in the headrail see No 2 Gently twist the fabric hanger outward and insert the LEFT side of the f...

Page 30: ...rrier in the FRONT channel see No 1 If you have 17 panels slide the center guide into the center channel in the headrail see No 2 Gently twist the fabric hanger outward and insert the LEFT side of the...

Page 31: ...side of the fabric hanger into the carrier in the REAR channel see No 1 If you have 17 panels slide the center guide into the center channel in the headrail see No 2 Gently twist the fabric hanger ou...

Page 32: ...slide the center guide into the center channel in the headrail see No 2 Gently twist the fabric hanger inward and insert the RIGHT side of the fabric hanger into the carrier in the REAR channel see No...

Page 33: ...he fabric hanger into the carrier in the FRONT channel see No 1 If you have 17 panels slide the center guide into the center channel in the headrail see No 2 Gently twist the fabric hanger inward and...

Page 34: ...slide the center guide into the center channel in the headrail see No 2 Gently twist the fabric hanger inward and insert the LEFT side of the fabric hanger into the carrier in the FRONT channel see N...

Page 35: ...into the slot of the snap slide end cap of the back panel behind it It should snap into place Progressing across the track continue connecting the snap slide of each panel to the snap slide end cap o...

Page 36: ...ent beneath the headrail Once mounted the snap slide is free to move up and down in its slot and can be attached to the last moving panel The wall plate and ball end cap keep the panel adjacent to the...

Page 37: ...INSTALLATION 35 Remove the end cap pin from the bottom weight Pull out the bottom weight at end cap next to the wall...

Page 38: ...in the wall plate Insert the snap slide into the oor bracket by aligning the slot of the bracket with the grooves in the snap slide Be sure that the clip portion sits inside the slot of the oor brack...

Page 39: ...INSTALLATION 37 Determine where you want the oor bracket placed somewhere along the rst panel see the gure on of page 34 Secure it in place with 6 at head screws...

Page 40: ...lled This is the cord that can be adjusted Using needle nose pliers pull the cord knot from the cord driver located in the headrail Pull out the cord until it is taut and the cord loop moves easily th...

Page 41: ...ts were connected together disconnect them now Carefully remove the panel by releasing the fabric hanger from the carriers see Remove The Panels on page 46 Place the panel on a clean at working surfac...

Page 42: ...d length from each panel Place the previously removed plastic strip along the bottom of the panel back aligning the strip with the bottom edge of the panel Push on the plastic strip so it adheres to t...

Page 43: ...k into in the bottom weight and press into place Reinstall the fabric panel into the headrail Repeat this process for the other panels Reconnect the bottom weights if required Traverse the shade open...

Page 44: ...er for a replacement strip if the strip will not stick in the new location Use a small at blade screwdriver to remove the end cap pin in the bottom weight of the affected panel Slide out the snap slid...

Page 45: ...trip Slide the panel back into the bottom weight making sure the plastic adhesive strip ts in the groove in the track Inspect the panel for folds or wrinkles Once satis ed with the adjustment slide th...

Page 46: ...While these instructions show the headrail not installed the wand control side changed can be done just as easily with the shade fully installed Pull the wand sleeve down the wand to expose the metal...

Page 47: ...OPERATION 45 Connect the J hook to the other wand driver Slide the wand sleeve up the wand over the J hook...

Page 48: ...e panel hanger and pull downward to release the hooks from the carriers Remove The Optional Valance Standard Valance Release the bottom of the valance from the lower tab on the valance bracket by push...

Page 49: ...kets Remove The Headrail Locate the release tab on the mounting clip Firmly grasp the headrail assembly Push up on the release tab to release the headrail Repeat for each mounting bracket Lift the hea...

Page 50: ...back channels Panels will fall out of the headrail if installed improperly from the purchased con guration Check that the bottom snap slides are installed correctly and operating correctly The weight...

Page 51: ...cranks with T cranks Check that the Universal Cord Tensioner if not wand control is installed properly and that the cord does not interfere with the hanging panel Wrinkling and folds in the panel fab...

Page 52: ...th a damp cloth and a mild detergent solution Skyline Fabric Covered Valance Cleaning Follow the same directions above for the fabric panels Product Notes and Disclaimers Actual fabric color may vary...

Page 53: ...ord Loop Shades Attach the cord tensioner on the cord loop to the wall or window casement This can prevent children from pulling cord loops around their necks Hunter Douglas provides a cord tensioner...

Page 54: ...Notes...

Page 55: ......

Page 56: ...rds for a full 7 years from the date of purchase All internal mechanisms Components and brackets Fabric delamination Hunter Douglas PowerRise PowerTilt and PowerGlide all with Platinum Technology and...

Reviews: