INSTALLATION
10
STEP 3 — Connect the Power Source
NOTE:
When power is connected to the motor, a green LED inside the programming button
housing will flash to indicate the shade is ready for operation.
■
Refer to the appropriate page below based on your order.
➤
For a battery wand, see below.
➤
For a satellite battery pack, see page 11.
➤
For an optional 18V DC power supply, see page 12.
➤
For an optional 18V DC power supply with daisy-chain connections, see page 13.
➤
For an optional C-size satellite battery wand or large DC power supply, see the
instructions that came with the unit.
Mount the Battery Wand into the Battery Wand Clips
■
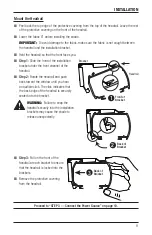
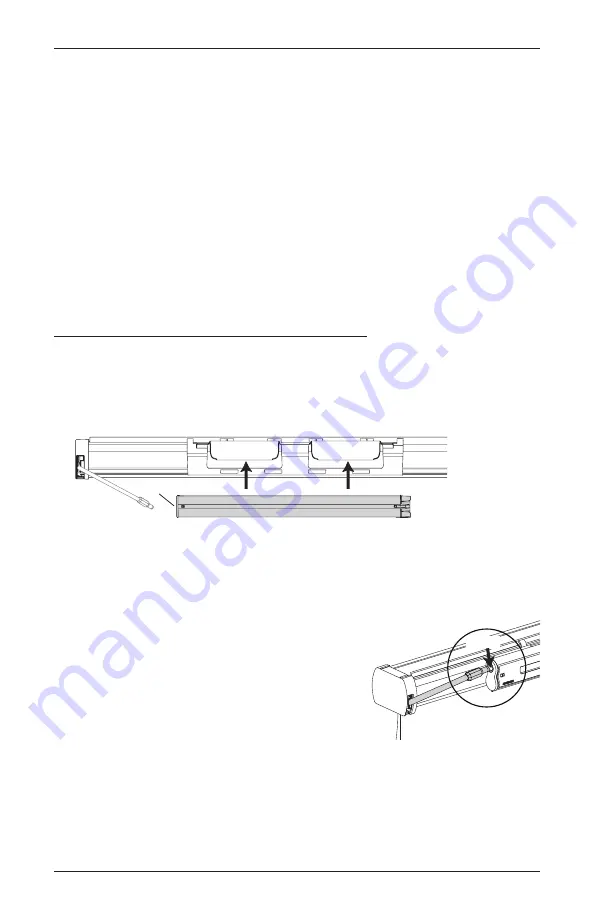
Align the battery wand with its socket toward the motor end on the shade.
■
Push the battery wand straight up into the battery wand clips until it snaps into place. Check
to make sure the battery wand is secure.
CAUTION:
Be sure the cable does not become pinched by the installation bracket or
battery wand clip. Damage or overheating of components could result.
Plug the Power Cable into the Battery Wand
■
From the back of the shade headrail, connect the
power cable (from the motor side) into the socket on
the battery wand.
■
Two-On-One Headrail shades:
Plug in both cables to
the battery wands.
Back of Shade
Socket
Socket

