INSTALLATION
3
STEP 1 — Mount the Installation Brackets
■
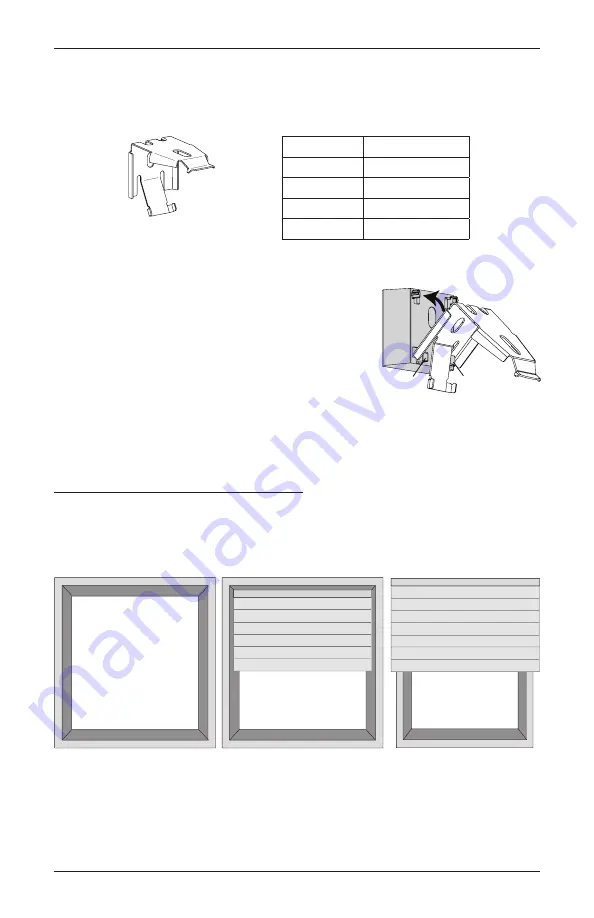
Your order includes the correct number of installation brackets for your shade width,
as shown in the table.
IMPORTANT:
A
1
/
2
" spacer block is required for shades
using the battery wand. It is pre-attached to the back of
the installation bracket.
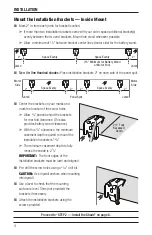
■
Should the spacer block become detached, reattach it.
➤
Insert the legs of the installation bracket into the tabs
on the spacer block.
➤
Rotate the installation bracket back, as shown.
■
Two-On-One Headrail Shades.
The appropriate number of installation brackets are
provided for each panel.
Mounting Types and Window Terminology
If the installation brackets are mounted correctly, the rest of the installation process follows
easily. To prepare for this important first step, review the mounting types and basic window
terminology illustrated below.
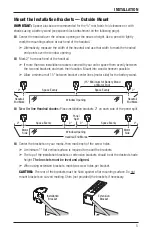
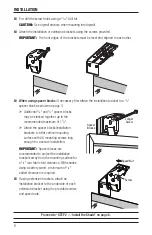
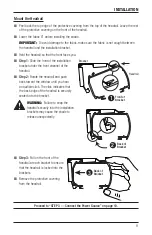
■
Refer to the appropriate page below based on the mounting type chosen for your order:
➤
Inside Mount —
Page 4
➤
Outside Mount — Page 5
➤
End Mount — Page 7
Outside Mount
Shade mounts outside
window opening.
Inside Mount
Shade fits within
window opening.
Collectively, the sill and
jambs are called the
“window casement.”
Molding
Head Jamb
Sill
Jamb
Jamb
Shade Width
Brackets Required
12" – 36"
2
36
1
/
8
"
–
72"
3
72
1
/
8
" – 108"
4
108
1
/
8
" – 140"
5 or 6*
*Two-On-One Headrails require six
installation brackets.
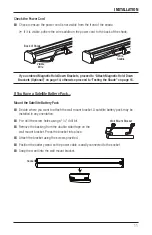
Tab
Tab

