INSTALLATION
8
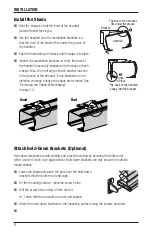
Install the Shade
■
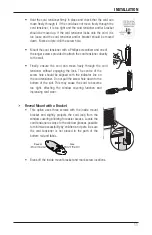
Hold the shade so that the front of the headrail
(colored fabric) faces you.
■
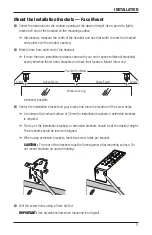
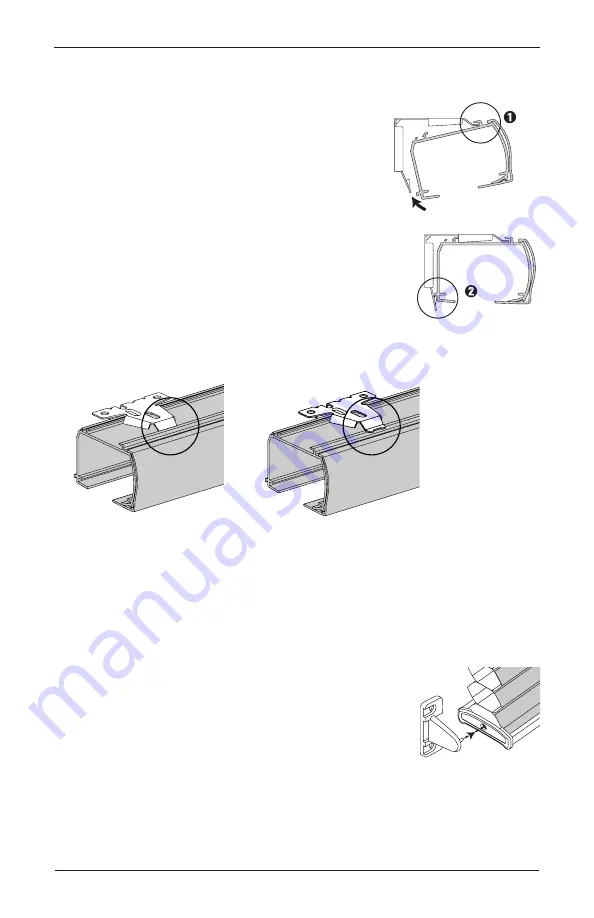
Slip the headrail onto the installation brackets, so
that the front of the bracket fits under the groove of
the headrail.
■
Push the headrail up and back until it snaps into place.
■
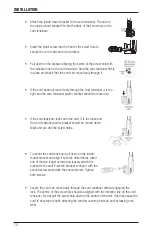
Inspect the installation brackets to verify the back of
the headrail is securely snapped into the base of each
bracket. Also, the front edge of each bracket must be
in the groove of the headrail. If any brackets are
not
installed correctly, release the shade and reinstall. See
“Removing the Shade (If Necessary)”
on page 13.
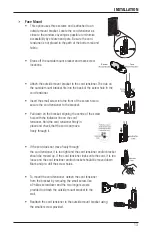
Attach Hold-Down Brackets (Optional)
Hold-down brackets provide stability and prevent swaying by securing the bottom rail
(often used in French door applications). Hold-down brackets can only be used on outside
mount shades.
■
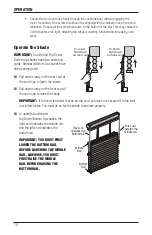
Lower the shade and place the pins from the hold-down
brackets into the bottom rail end caps.
■
On the mounting surface, mark the screw holes.
■
Drill the screw holes using a 3mm drill bit.
➤
Check that the brackets are level and aligned.
■
Attach the hold-down brackets to the mounting surface using the screws provided.
■
The back of the headrail
snaps into the bracket.
The front of the bracket
fits under the groove.
Headrail
Bracket
Snap
in Place
Good
Bad
Good
Bad

