INSTALLATION
9
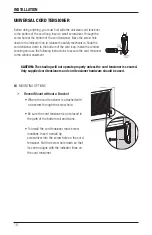
Attach the Universal Cord Tensioner(s)
Before you proceed, you
must
first slide the cord
tensioner(s) to the bottom of the cord loop.
■
Insert a small screwdriver, punch, or awl through the
screw hole at the bottom of the cord tensioner.
■
Move the screw hole down to the indicator line to
release the safety mechanism.
■
Slide the cord tensioner down to the bottom of the
cord loop.
ATTACH
the cord tensioner(s) according to the instructions provided
below.
WARNING:
It is imperative that the cord tensioner(s) be properly secured
to the wall or window frame to reduce children’s access to the cord loop.
Young children can strangle in cord loops. They can also wrap cords around
their necks and strangle.
Indicator
Line
Universal
Cord
Tensioner
Shade Height Adjustment
Shade height and adjustments to level the bottom rail can be made by
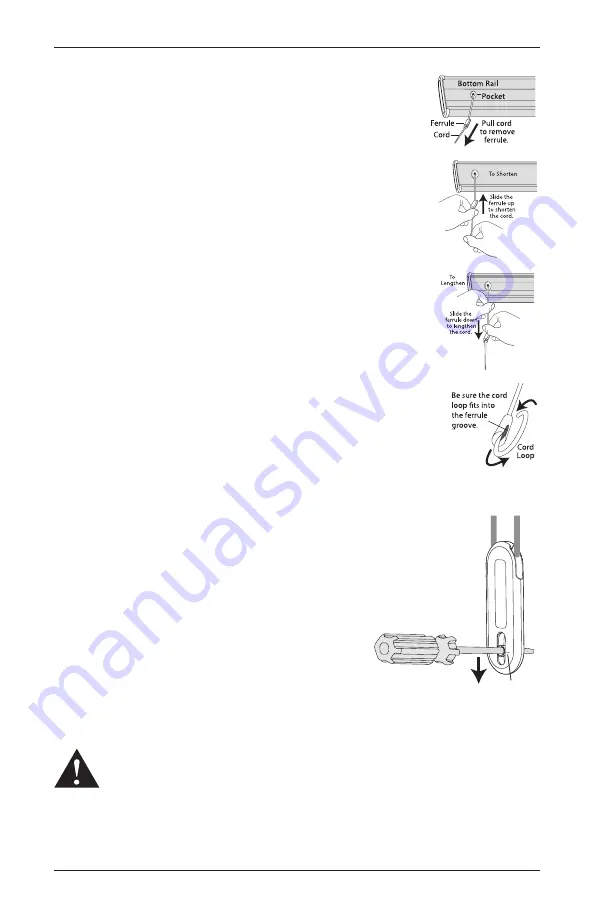
adjusting the cord on the underside of the bottom rail. Locate the ferrule,
seated in a pocket in the bottom rail. Remove the ferrule by pulling
on the excess cord. If the cord has been trimmed, you will need to use
needlenose pliers to access it.
■
To shorten the cord, hold the cord tight under the ferrule. Then slide
the ferrule up toward the pocket. Image
■
To lengthen the cord, hold the cord tight between the pocket and the
ferrule. Then slide the ferrule down.
■
After adjusting, place the ferrule fully back into the pocket. Once
you are certain of the final adjustments, tape the extra cord length
to the bottom rail, or into the groove on the bottom rail (for future
adjustments).
■
If the ferrule has come of the cord, thread the end of the cord into the
tapered end of the ferrule. Loop the end around the ferrule and back
through the tapered end. Make sure the loop fits into the groove on the
side of the ferrule.

