12
•
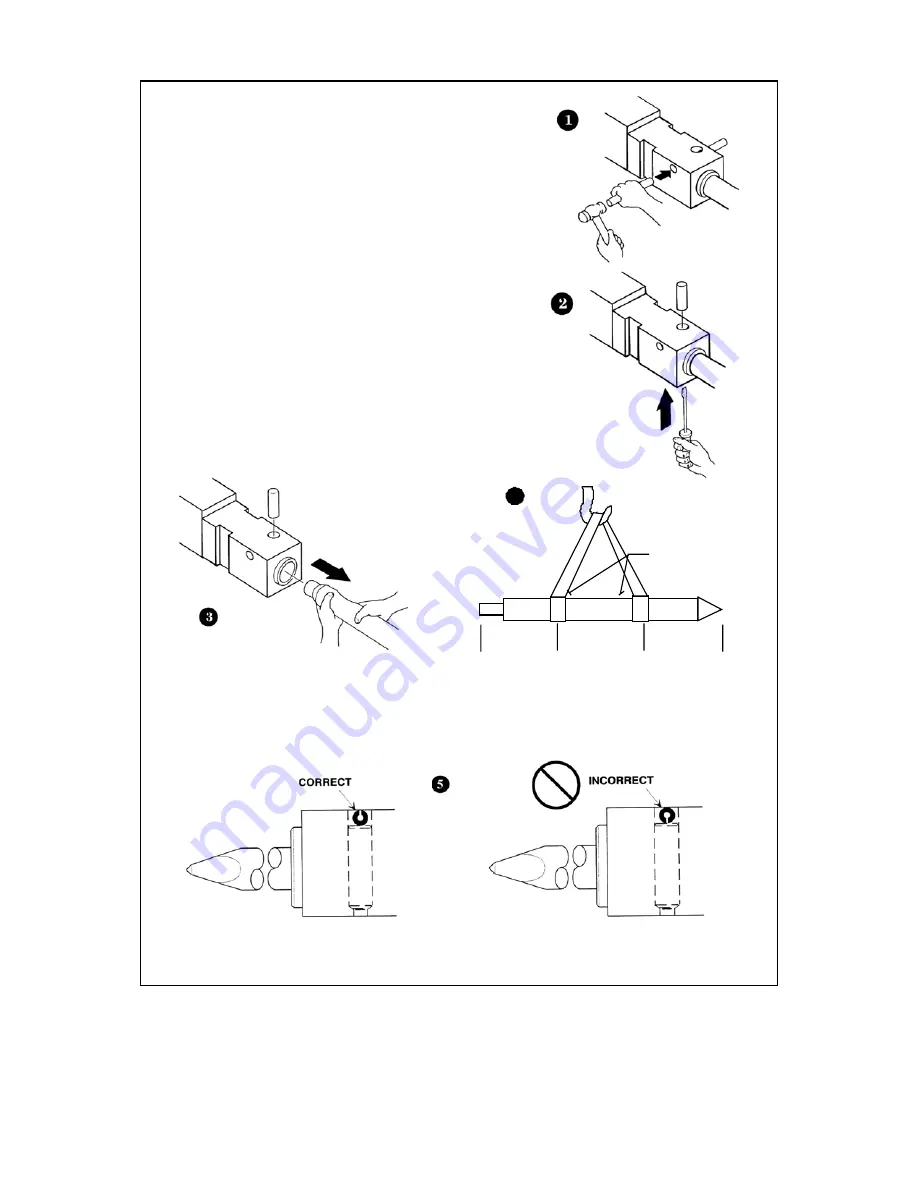
Carefully drive out the tool spring pin.
•
Push the tool set pin up and out of the front cap
using a screwdriver or round bar.
Note:
Check Table 1, Page 11, before handling tools.
•
For models HH100 through HH750-2, manual
removal is possible.
•
For the hammer models HH1000-2 and larger
use hoist and sling as shown. Check for sling
load rating and compare to
Table 1, Page 11.
•
When installing the tool in the hammer,
reverse steps 1 through 4 above. Note that
tool spring pin must be inserted with the slot
or open side away from the tool set pin.
Figure 4. Tool Replacement
4
60
o
1/3
1/3
1/3
SLING ANGLES
NOT SMALLER THAN:
Summary of Contents for HH100
Page 1: ...HUSKIE HYDRAULIC HAMMERS SERVICE MANUAL HH100 HH150 2 HH300 2 HH500 2 HH750 2 HH1000 2 ...
Page 2: ...2 ...
Page 33: ...33 9 PARTS LIST AND ILLUSTRATIONS HH100 HH150 2 HH300 2 HH500 2 HH750 2 HH1000 2 ...
Page 35: ...35 HH100 HAMMER Effective 07 09 ...
Page 37: ...37 ...
Page 39: ...39 HH150 2 HAMMER S N 001 099 2B2 1000 UP Effective 07 09 ...
Page 41: ...41 ...
Page 43: ...43 HH300 2 HAMMER S N 001 099 2E2 1000 UP Effective 07 09 ...
Page 47: ......
Page 49: ...49 HH500 2 HAMMER S N 001 099 2R2 1000 UP Effective 07 09 ...
Page 55: ...55 HH750 2 HAMMER S N 001 099 2F2 1000 UP Effective 07 09 ...
Page 59: ...59 ...
Page 61: ...61 Effective 07 09 HH1000 2 HAMMER S N 001 099 2H2 1000 UP ...


