15 HUSKYTOOLS.COM
Please contact 1-888-43-HUSKY for further assistance.
Maintenance (continued)
4
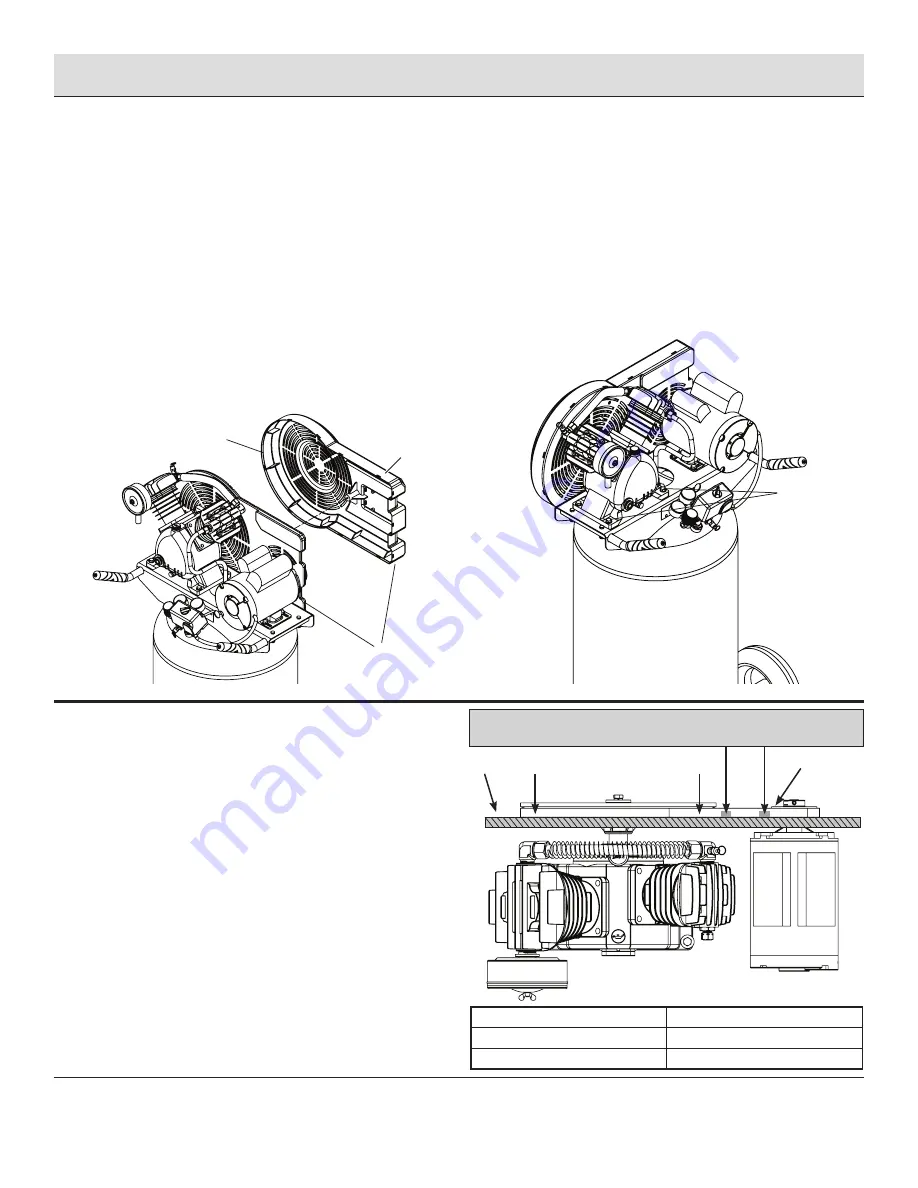
Checking the belt
□
Remove the beltguard screw (1).
□
Remove the front beltguard (2). The beltguards are held
together by pressure snap-latches (3). Wedge a flathead
screwdriver between the beltguards at the snap-latches.
□
Wedge a screwdriver at the other snap-latch junctions. Twist
and separate the snap-latches until the front beltguard comes
completely off.
□
If the belt appears to be in working order and has no signs of
damage, return the front beltguard to the original position and
snap it back in place. Tighten the beltguard screw.
□
If the belt needs to be replaced, move on to the next step.
□
If the belt does not need to be replaced, move to step 6
5
Removing the belt
□
Loosen (but do not remove) the four bolts (1) holding
the motor in place.
□
Shift the motor towards the pump. The belt should
be slack and easily removable.
□
Replace the belt.
□
Move the motor back to the original position
to create belt tension.
□
Tighten the motor bolts.
6
Aligning / tensioning the belt
□
Lay a straightedge (1) against the face of the flywheel touching
the rim at two places (2,3).
□
Adjust the flywheel or motor pulley so that the belt (4) runs
parallel to the straightedge. Use a gear puller to move the pulley
on the motor shaft. Tighten the setscrew after the pulley is
positioned.
□
Adjust the motor’s distance from the pump if needed.
□
Belt tension is determined by how much the belt moves when
weight is applied. The belt should move no more than 3/8 to 1/2
in. downward if normal thumb pressure
is placed on it.
□
Tighten the motor bolts once the proper belt tension is achieved.
□
Reattach the belt guard.
1
2
3
1
Bolt Torque
Flywheel
320-350 in . lbs .
Pulley
70-100 in . lbs .
1
2
Measure from straight edge to belt in two places.
Measurements should be within 1/16" of an inch in both places.
4
3


