21
HUSKYTOOLS.COM
Please contact 1-888-43-HUSKY for further assistance.
Maintenance (continued)
4
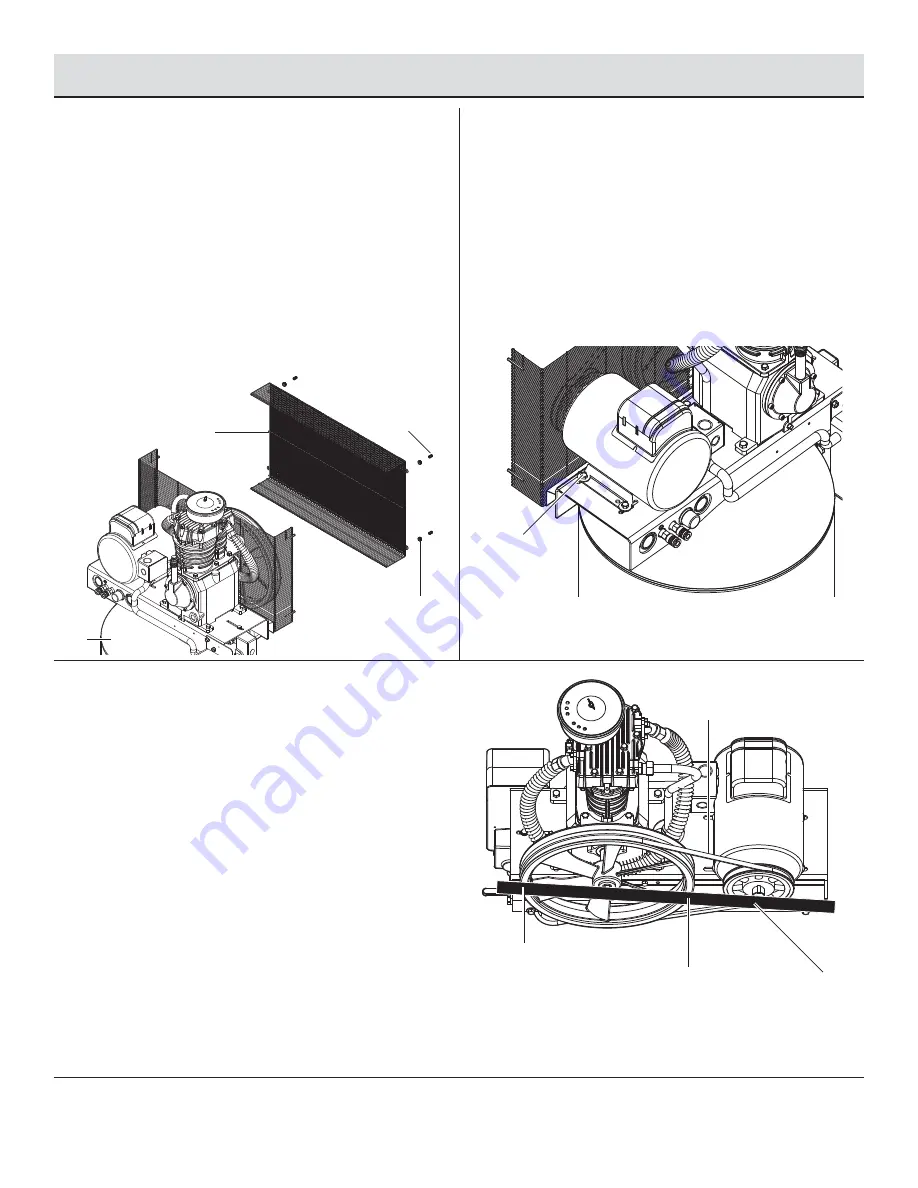
Checking the belt
□
Remove the four caps (1) and four fl ange nuts (2).
□
Remove the front beltguard (3).
□
Pull the front beltguard (3) away from the air compressor
unit (A).
□
If the belt appears to be in working order and has no signs
of damage, return the front beltguard (3) to the original
position.
□
Tighten the fl ange nuts (2) and reinstall the caps (1).
□
If the belt needs to be replaced, move on to the next step.
5
Removing the belt
□
Loosen (but do not remove) the four bolts (1) holding the
motor in place.
□
Shift the motor towards the pump. The belt should be slack
and easily removed.
□
Replace the belt.
□
Move the motor back to the original position to create belt
tension.
□
Tighten the motor bolts.
6
Aligning / tensioning the belt
□
Lay a straightedge (1) against the face of the fl ywheel
touching the rim at two places (2,3).
□
Adjust the flywheel or motor pulley so that the belt (4) runs
parallel to the straightedge. Use a gear puller to move the
pulley on the motor shaft. Tighten the setscrew after the
pulley is positioned.
□
Adjust the motor’s distance from the pump if needed.
□
Belt tension is determined by how much the belt moves
when weight is applied. The belt should move no more
than 3/8 to 1/2 in. downward if normal thumb pressure is
placed on it.
□
Tighten the motor bolts once the proper belt tension is
achieved.
□
Reattach the belt guard.
1
2
4
3
1
A
2
3
1


