S
ewing
4:19
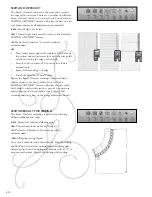
8-way sTiTChes – MenU T
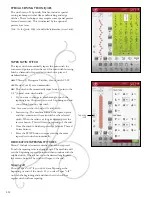
There are two different stitches, straight and reinforced
straight stitch, in the T menu. Touch the arrows to select
one of the pre-set sewing directions. To fine tune the
direction of the stitch, use the stitch width and stitch length
icons.
Note: The stitch length and width icons no longer adjust the length
and width of the stitch. In menu T, these icons change the sewing
direction of the stitch.
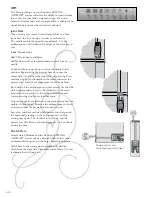
Program these stitches alone or with decorative stitches
from other menus to create unique stitches or borders.
FABriC
:
Woven medium and stabilizer.
seleCt
:
Woven medium on your Exclusive SEWINg
ADVISOR
™
feature, menu T - 8-way stitches.
use
:
Thread the top thread with embroidery thread, and use
bobbin thread for the bobbin: Use presser foot B and size
80 needle as recommended.
sew
:
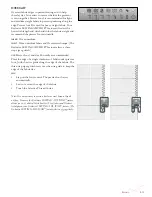
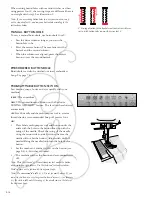
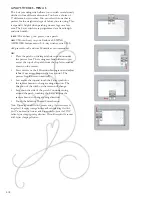
• Touch the Program icon.
• Select stitch g1:4.
• Select T1 and click three times on the straight stitch to
the right.
• Select stitch g1:4.
• Select T1 and click three times on the straight stitch to
the right.
• Select stitch g1:4.
• Select T1 and click three times on the straight stitch to
the left.
• Select stitch g1:4.
• Select T1 and click three times on the straight stitch to
the left.
• Touch OK.
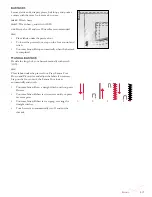
• Place the fabric and stabilizer in position under the
presser foot. Press the foot control to lower the
presser foot and start sewing your programmed stitch.
Straight stitch left
Straight stitch
right
Summary of Contents for Designer Ruby Deluxe
Page 1: ...User s Guide KEEPING THE WORLD SEWING ...
Page 5: ...Getting to knowyour machine 1 ...
Page 18: ...1 18 Script Alphabet Cyrillic Alphabet Hiragana Alphabet Brush Line Alphabet ...
Page 19: ...2SET UP ...
Page 31: ...3SeTTINGS FUNCTIONS ...
Page 45: ...4Sewing ...
Page 67: ...5PROGRAM ...
Page 73: ...6EMBROIDERY SET UP ...
Page 79: ...7EMBROIDERY EDIT ...
Page 91: ...8EMBROIDERY STITCH OUT ...
Page 103: ...9FILE MANAGER ...
Page 109: ...10MAINTENANCE ...


