1-8
Set it Up
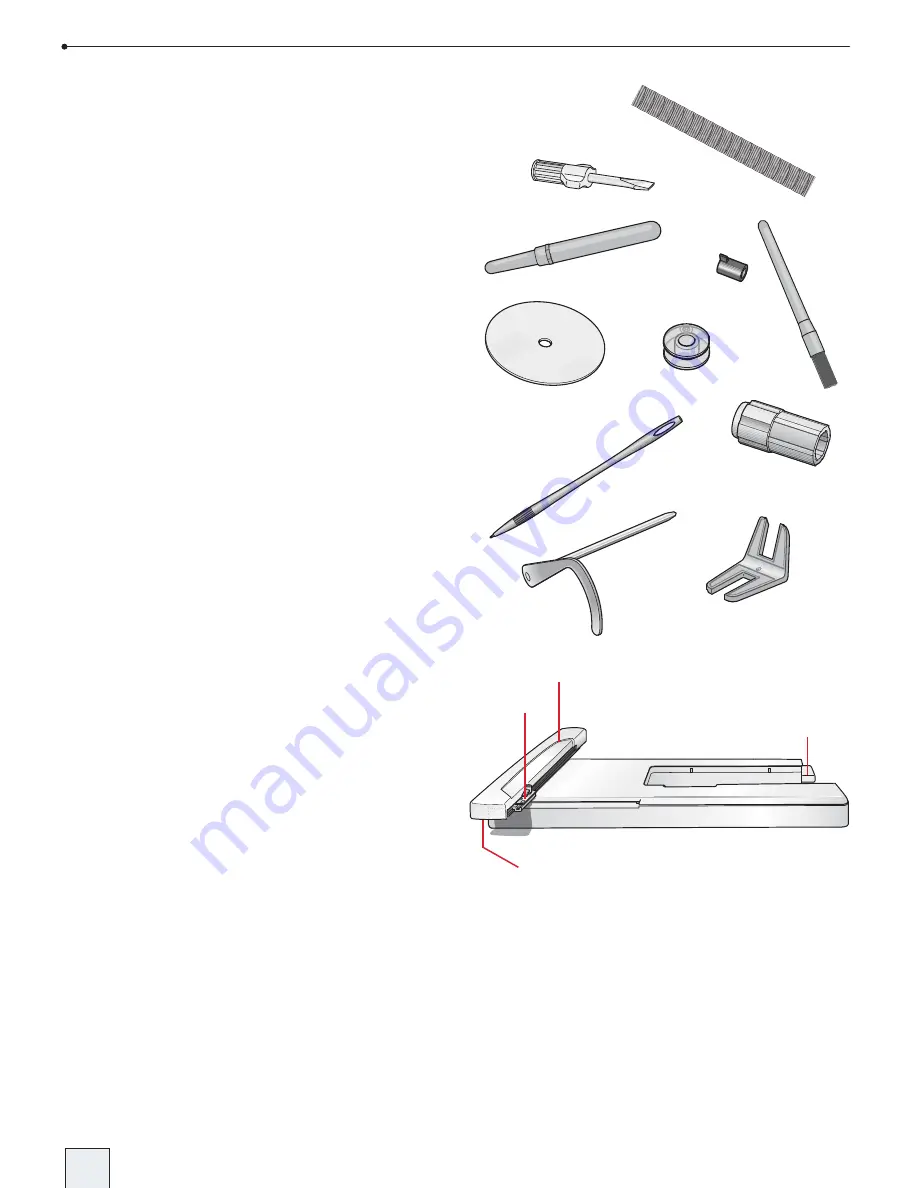
Accessories
Pictogram pen – a special pen with which
you can mark directly on the fabric. The color
disappears after some hours. You can also use
cold water to completely remove the markings
before ironing.
Needles
Thread spool
Presser feet (see page 1-18 - 1-19 for presser feet
overview)
Extra spool holders, one large, one small
70. Thread nets
71. Screwdriver
72. Seam ripper
73. Stitch plate opener
(attach to end of brush)
74. Brush
75. Felt pad
76. Bobbins
77. Stylus
78. Screw grip
79. Edge/quilting guide
80. Clearance plate/Button Reed
Unpacking
1. Place the machine on a steady, fl at surface. Re move the packaging and lift off the cov er.
2. Remove the packing material, the foot control and fi nally the protection cover. The machine is
delivered with an ac ces so ry bag, a main cord and a USB cable.
3. Wipe the machine, particularly around the nee dle and needle plate, to remove any soil be fore
sewing.
Embroidery Unit Overview
90. Embroidery unit socket
91. Embroidery arm
92. Embroidery hoop attatchment
93. Embroidery unit release button
90.
92.
91.
93.
75.
70.
71.
72.
76.
77.
73.
74.
79.
78.
80.
DSE 05 Kap 1.indd 1-8
05-03-14 10.56.45
Summary of Contents for Designer SE
Page 1: ...User s Guide KEEPING THE WORLD SEWING ...
Page 29: ...2 1 Sewing Mode ...
Page 46: ...2 18 Sewing Mode ...
Page 47: ...Set to Embroider ...
Page 55: ...4 1 Interactive 3D Embroidery Embroidery Mode ...
Page 77: ...5 1 File Manager ...
Page 87: ...Care of your Designer SE ...


