background image

Husqvarna Motorcycles GmbH

Stallhofnerstraße 3
5230 Mattighofen, Austria

T:

  + 43 / 7742 / 60 00-0

W: 

www.husqvarna-motorcycles.com

HUSQVARNA MOTORCYCLES ACCESSORIES


INFORMATION


3.402.225

27035936044

RADIATOR PROTECTION

11.2017

*3402225*

Summary of Contents for 27035936044

Page 1: ...otorcycles GmbH Stallhofnerstraße 3 5230 Mattighofen Austria T 43 7742 6000 0 W www husqvarna motorcycles com HUSQVARNA MOTORCYCLES ACCESSORIES INFORMATION 3 402 225 27035936044 RADIATOR PROTECTION 11 2017 3402225 ...

Page 2: ...tivities Correct installation of the product is essential to ensure that a maximum degree of safety and functionality is achieved Therefore please follow the installation instructions or contact your authorized dealer The quasi manufacturer or supplier cannot be held responsible for products that are incorrectly mounted or inappropriately used Thank you Grazie per aver scelto questo prodotto Quest...

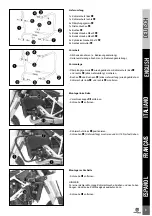
Page 3: ...Vormontage Dämpfungsgummis wie abgebildet am Kühlerschutz links und rechts alles Lieferumfang montieren Buchse und Buchsen alles Lieferumfang wie abgebildet am Kühlerschutz links und rechts montieren Montage linke Seite Verschlusskappe entfernen Schraube entfernen Kühlerschutz links positionieren Schrauben Lieferumfang montieren und mit 12 Nm festziehen Montage rechte Seite Schraube entfernen HINW...

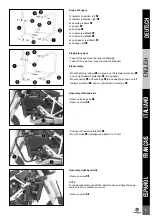
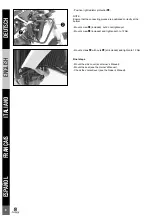
Page 4: ...hraube Lieferumfang montieren aber noch nicht festziehen Schraube Lieferumfang montieren und beide mit 12 Nm fest ziehen Schrauben mit Muttern alles Lieferumfang montieren und mit 12 Nm festziehen Nacharbeit Seitenverkleidung montieren s Bedienungsanleitung Sitzbank montieren s Bedienungsanleitung Kühlflüssigkeitsstand kontrollieren s Bedienungsanleitung ...

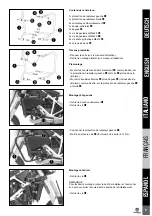
Page 5: ...Owner s Manual Preassembly Mount damping rubbers as shown on left radiator protection and on right radiator protection all included Mount bushing and bushings all included as shown on left radiator protection and on right radiator protection Assembly left hand side Remove locking cap Remove screw Position left radiator protection Mount screws included and tighten to 12 Nm Assembly right hand side ...

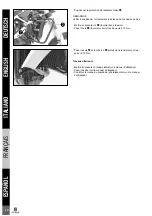
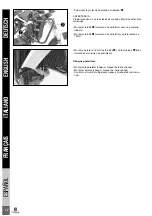
Page 6: ...e positioned correctly at the bottom Mount screw included but do not tighten yet Mount screw included and tighten both to 12 Nm Mount screws with nuts all included and tighten to 12 Nm Final steps Mount the side cover see Owner s Manual Mount the seat see the Owner s Manual Check the coolant level see the Owner s Manual ...

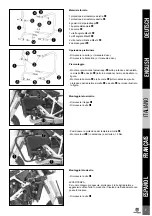
Page 7: ...el parastrappi sulla protezione del radiato re sinistra e destra tutto in dotazione nel modo illustrato in figura Montare la boccola e le boccole tutto in dotazione sulla protezione del radiatore sinistra e destra nel modo illustrato in figura Montaggio lato sinistro Rimuovere il tappo Rimuovere la vite Posizionare la protezione del radiatore sinistra Montare le viti in dotazione e serrarle a 12 N...

Page 8: ...i giunzione inferiori Montare la vite in dotazione ma non serrarla ancora Montare la vite in dotazione e serrare entrambe a 12 Nm Montare le viti con i dadi tutto in dotazione e serrare a 12 Nm Operazione conclusiva Montare la fiancatina v manuale d uso Montare la sella v il manuale d uso Controllare il livello del liquido di raffreddamento vedere il manua le d uso ...

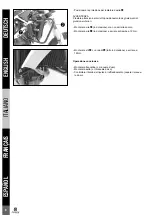
Page 9: ...émontage Monter les caoutchoucs d amortissement comme illustré sur la protection de radiateur gauche et droite inclus dans la livraison Monter la douille entretoise et les bagues inclues dans la livraison comme illustré sur la protection de radiateur gauche et droite Montage côté gauche Retirer le bouchon obturateur Retirer la vis Positionner la protection de radiateur gauche Mettre en place les v...

Page 10: ...re en place la vis fournie sans la serrer Poser la vis fournie et serrer les deux vis à 12 Nm Poser les vis et leur écrou inclus dans la livraison et les serrer à 12 Nm Travaux ultérieurs Mettre en place le carénage latéral voir manuel d utilisation Poser la selle voir le manuel d utilisation Contrôler le niveau du liquide de refroidissement voir le manuel d utilisation ...

Page 11: ...ción en las protecciones izquier da y derecha del radiador todo incluido en el volumen de suministro tal como se muestra en la figura Montar el casquillo y los casquillos todo incluido en el volu men de suministro en las protecciones izquierda y derecha del radiador tal como se muestra en la figura Montaje en el lado izquierdo Retirar la tapa de cierre Retirar el tornillo Posicionar la protección ...

Page 12: ...lumen de suministro pero no apretarlo todavía Montar el tornillo volumen de suministro y apretar ambos a 12 Nm Montar y apretar a 12 Nm los tornillos con las tuercas todo incluido en el volumen de suministro Trabajos posteriores Montar la tapa lateral véase el manual de instrucciones Montar el asiento véase el manual de instrucciones Controlar el nivel de refrigerante véase el manual de instruccio...

Reviews: