21
4
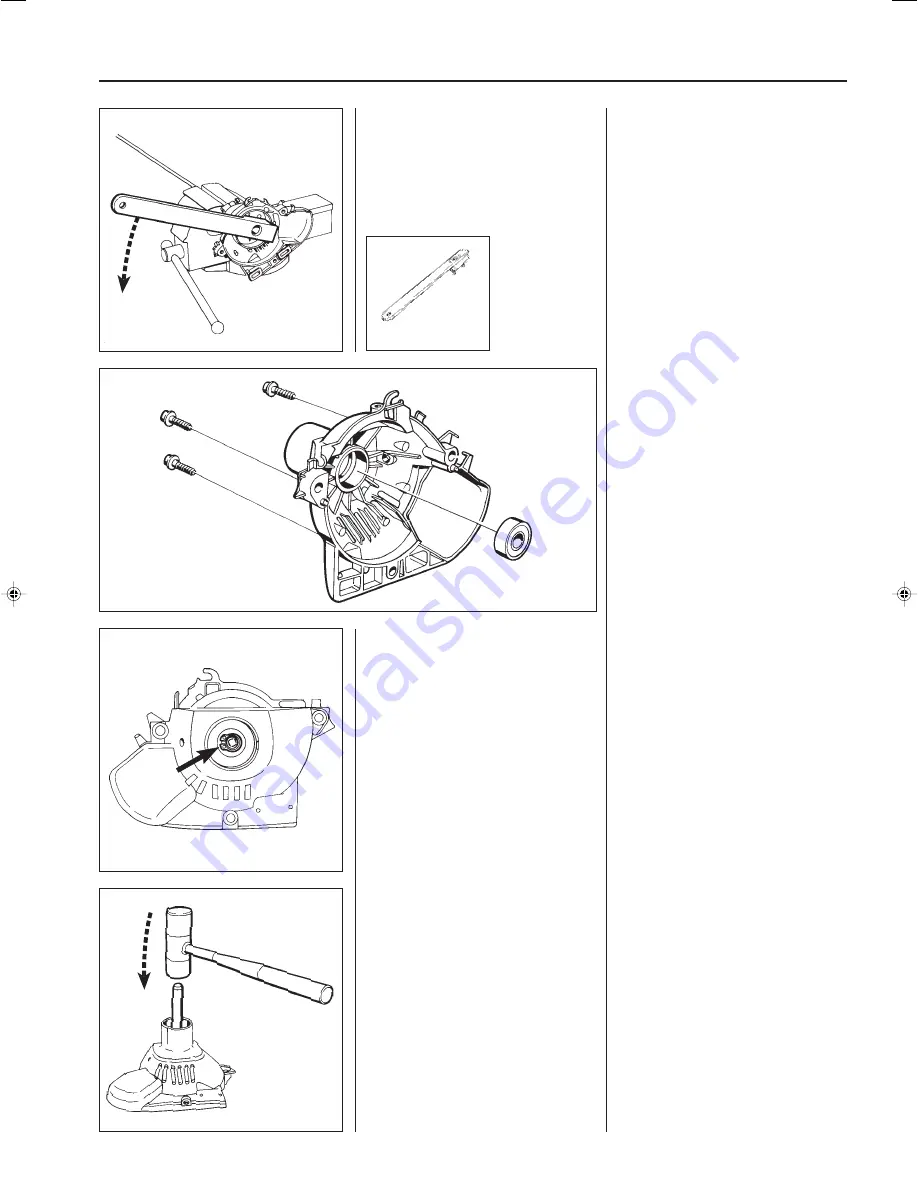
502 52 16-01
Centrifugal clutch
Now knock off the clutch drum using a
suitable punch and hammer.
The bearing is replaced in the same
way as described above.
Assembly takes place in the reverse
order as stated for dismantling.
Knock off the clutch drum.
Replace the bearing and fit the other
components in the reverse order as
stated for dismantling.
Model 322C
Dismantle the clutch cover from the
shaft.
Remove the shaft's securing compo-
nents from the clutch cover.
Remove the circlip holding the clutch
drum's axle spindle with the bearing.
Model 322C
Dismantle the clutch cover and remove
the shaft's securing components from
the cover.
Remove the circlip.
The bearing journalling the clutch drum
in the clutch cover is glued in position
using Loctite. To replace the bearing
the cover can be heated to approx.
70
°
C by using a hot air gun so that the
glue releases.
Dismantle the bearing using a suitable
punch and hammer.
NOTE!
Dismantle the shaft's securing clamp
and rubber insert in the clutch cover so
that these are not damaged when
heating the cover.
Assembly is carried out in the reverse
order as stated for dismantling.
Use Loctite intended for mounting
bearings when fitting the bearings in
the clutch cover.
Replacing the clutch
drum and drive axle
Separate the shaft from the clutch
cover.
Pull off the clutch cover complete with
the drive axle and clutch drum.
The drum is screwed on the drive axle
and can be dismantled using the tool
502 52 16-01.
If the diameter exceeds Ø 64.1 mm, the
clutch drum should be replaced.
Replacing the clutch
drum and drive axle
Separate the shaft from the clutch
cover.
Dismantle the clutch drum using the
tool 502 52 16-01.
4 Eng, 19-22
98-12-14, 17.08
21
Summary of Contents for 322
Page 1: ...English Workshop manual 322 322L 325 325L 522L ...
Page 3: ...2 ...
Page 7: ...6 ...
Page 8: ...7 2 Ignitionsystem Contents Dismantling 8 Assembly 9 ...
Page 11: ...10 ...
Page 23: ...22 ...
Page 27: ...26 ...
Page 31: ...30 ...
Page 34: ...101 90 19 26 2018W43 ...


